How to Extend SAP Cloud Platform Fiori Applications with Pre-Built Code from SAP: A Step-by-Step Guide

How to Extend SAP Cloud Platform Fiori Applications with Pre-Built Code from SAP: A Step-by-Step Guide
Authored by: Annie Liu, TruQua Enterprises
JS Irick, TruQua Enterprises
Since its launch in the spring of 2016, the SAP API Business Hub (https://api.sap.com) has steadily grown its offering of APIs, providing developers with easy access to a variety of SAP data sources. These APIs equip developers with the resources to extend their business applications with the latest technologies available from SAP such as text analysis, image identification and SAP Leonardo Machine Learning services. A full list of the available API Services can be found at: https://api.sap.com/shell/api. These APIs are an integral part of Developer Enablement, and were recently featured at Björn Goerke’s keynote address at SAP TechEd 2017.
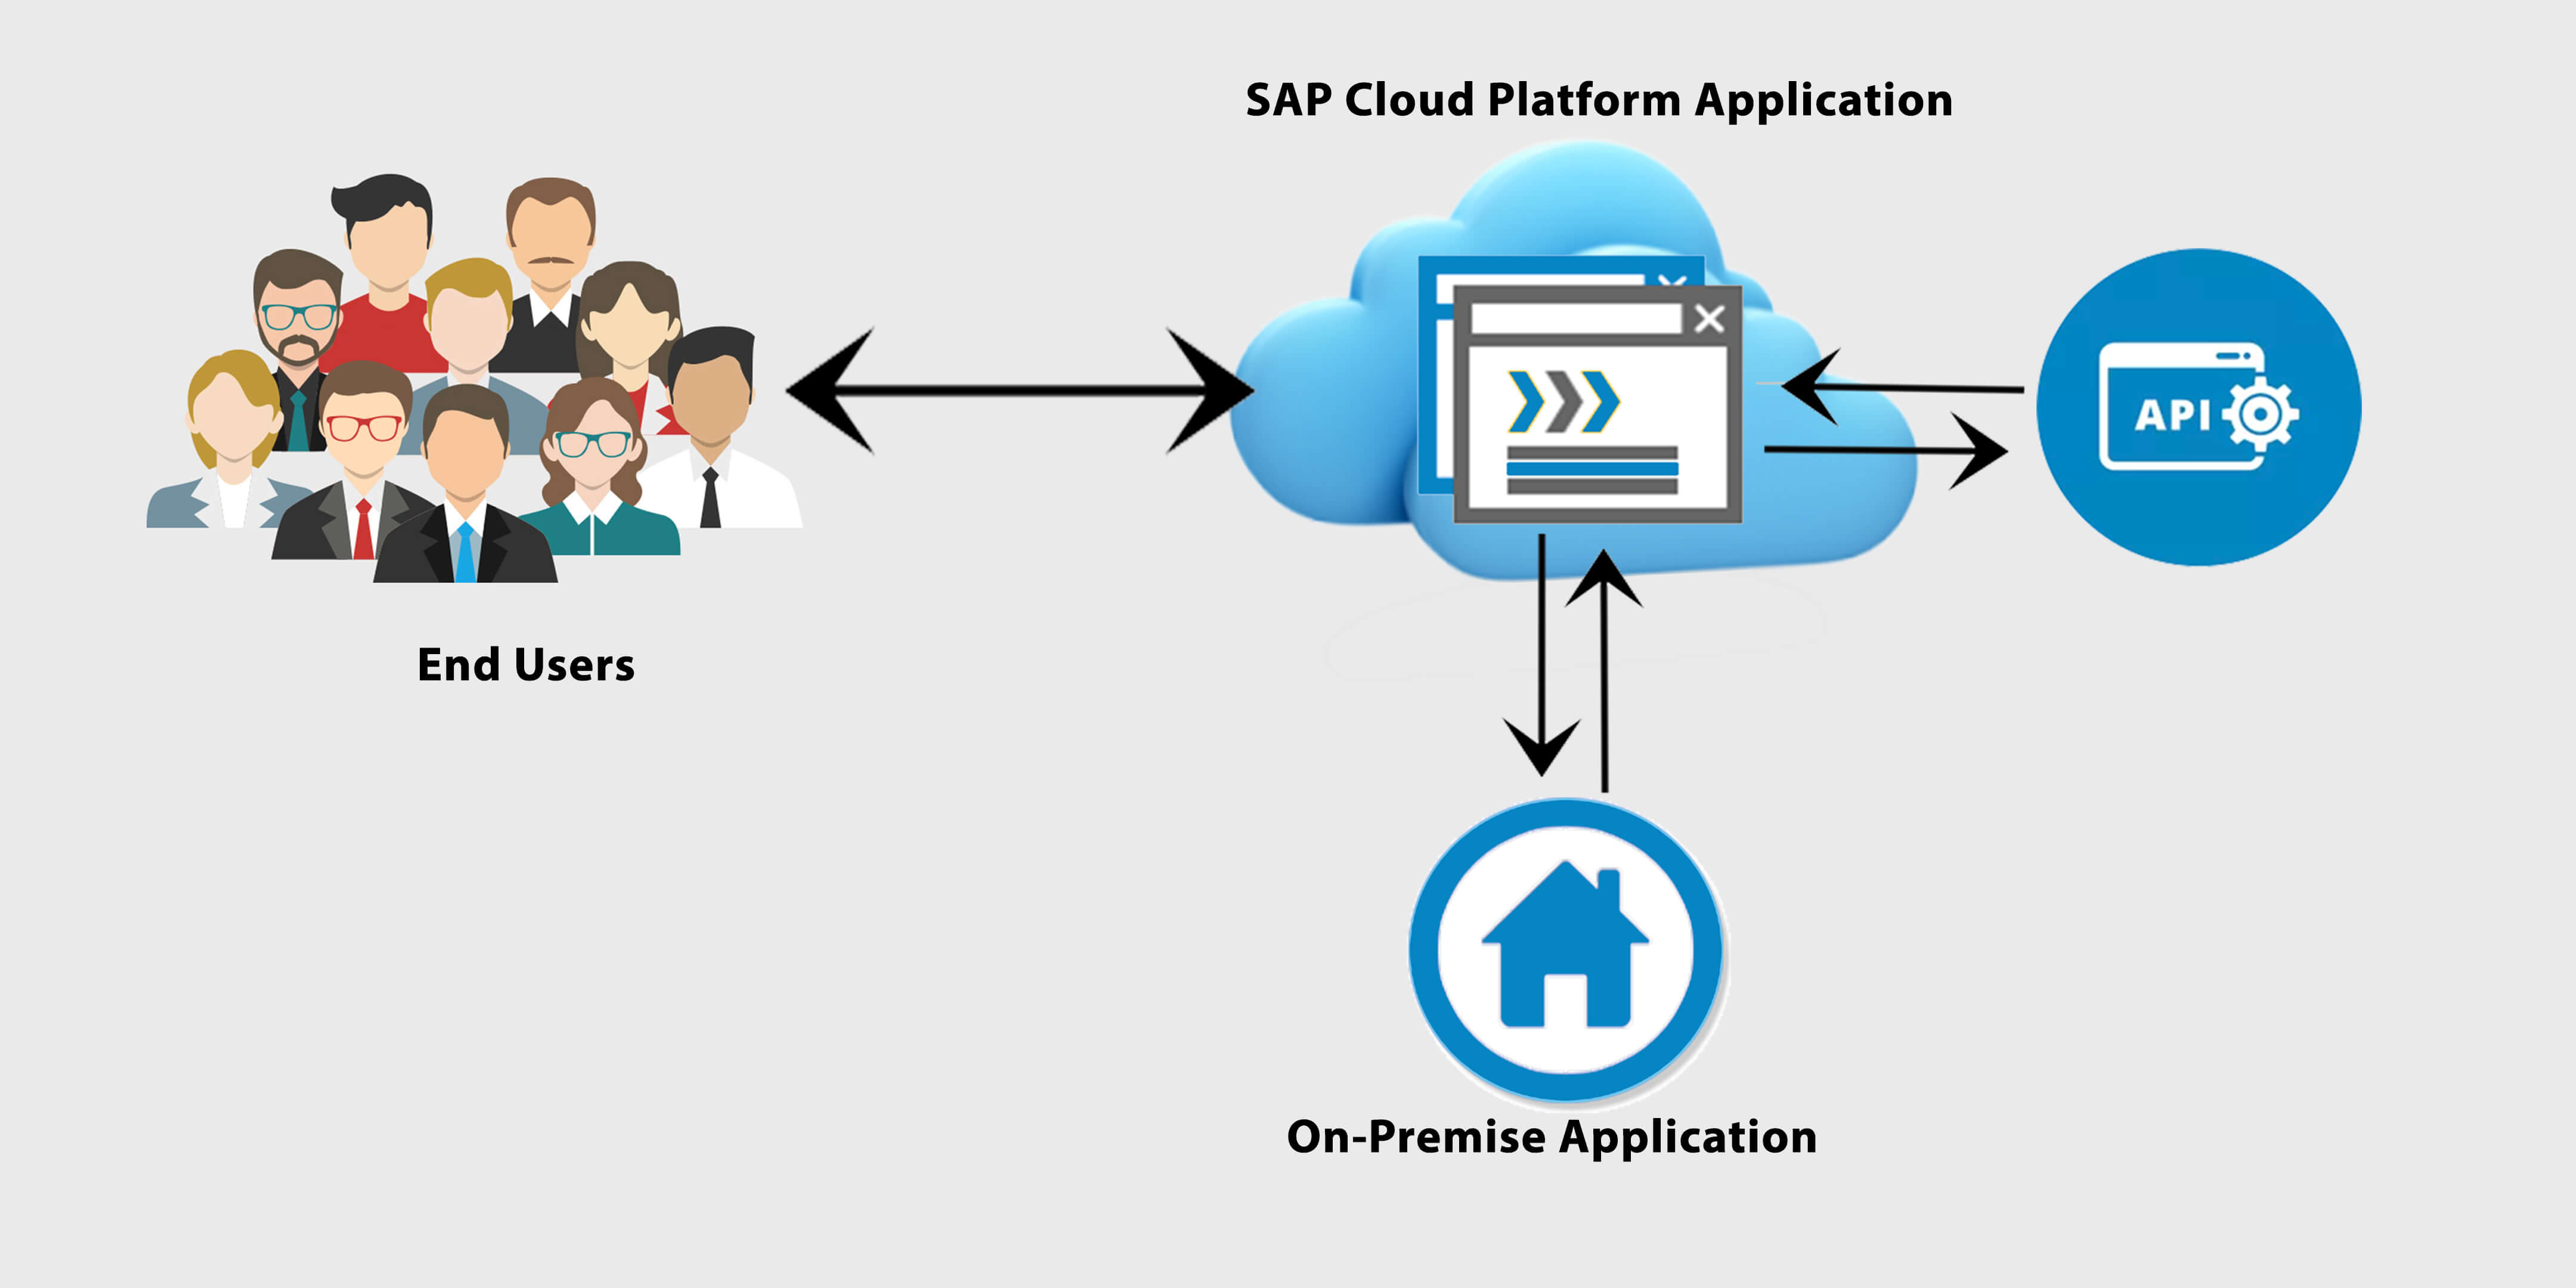
So what exactly is an API and why is it important to the business user? API stands for Application Programming Interface and is a connector that enables two separate applications to seamlessly interact and exchange information. This means that utilizing APIs, the people within an organization now have the ability to connect content, resources and data across different systems, helping to improve productivity and reduce costs by streamlining critical business processes.
Through step-by-step instruction, this exercise will detail how to extend a simple SAP Cloud Platform Fiori Application utilizing SAP API services and how doing so provides the convenience of using ready-made SAP APIs and SAPUI5 sample code. (Developers can set up a trial SAP Cloud Platform application by going to https://accounts.sap.com/saml2/idp/sso/accounts.sap.com)
By copying code from a selected API in conjunction with the code from SAP’s UI5 sample display documentation, it’s now possible to create an SAP Cloud Platform Fiori Application that is both flexible and customized for your business.
Part 1: Getting started with the SAP API
In the first part of this tutorial, we will examine how to use an SAP API on the SAP Cloud Platform.
Step 1: Login into SAP Cloud Platform. If you don’t yet have an account, you may register by going to https://accounts.sap.com/saml2/idp/sso/accounts.sap.com and selecting “Register”.
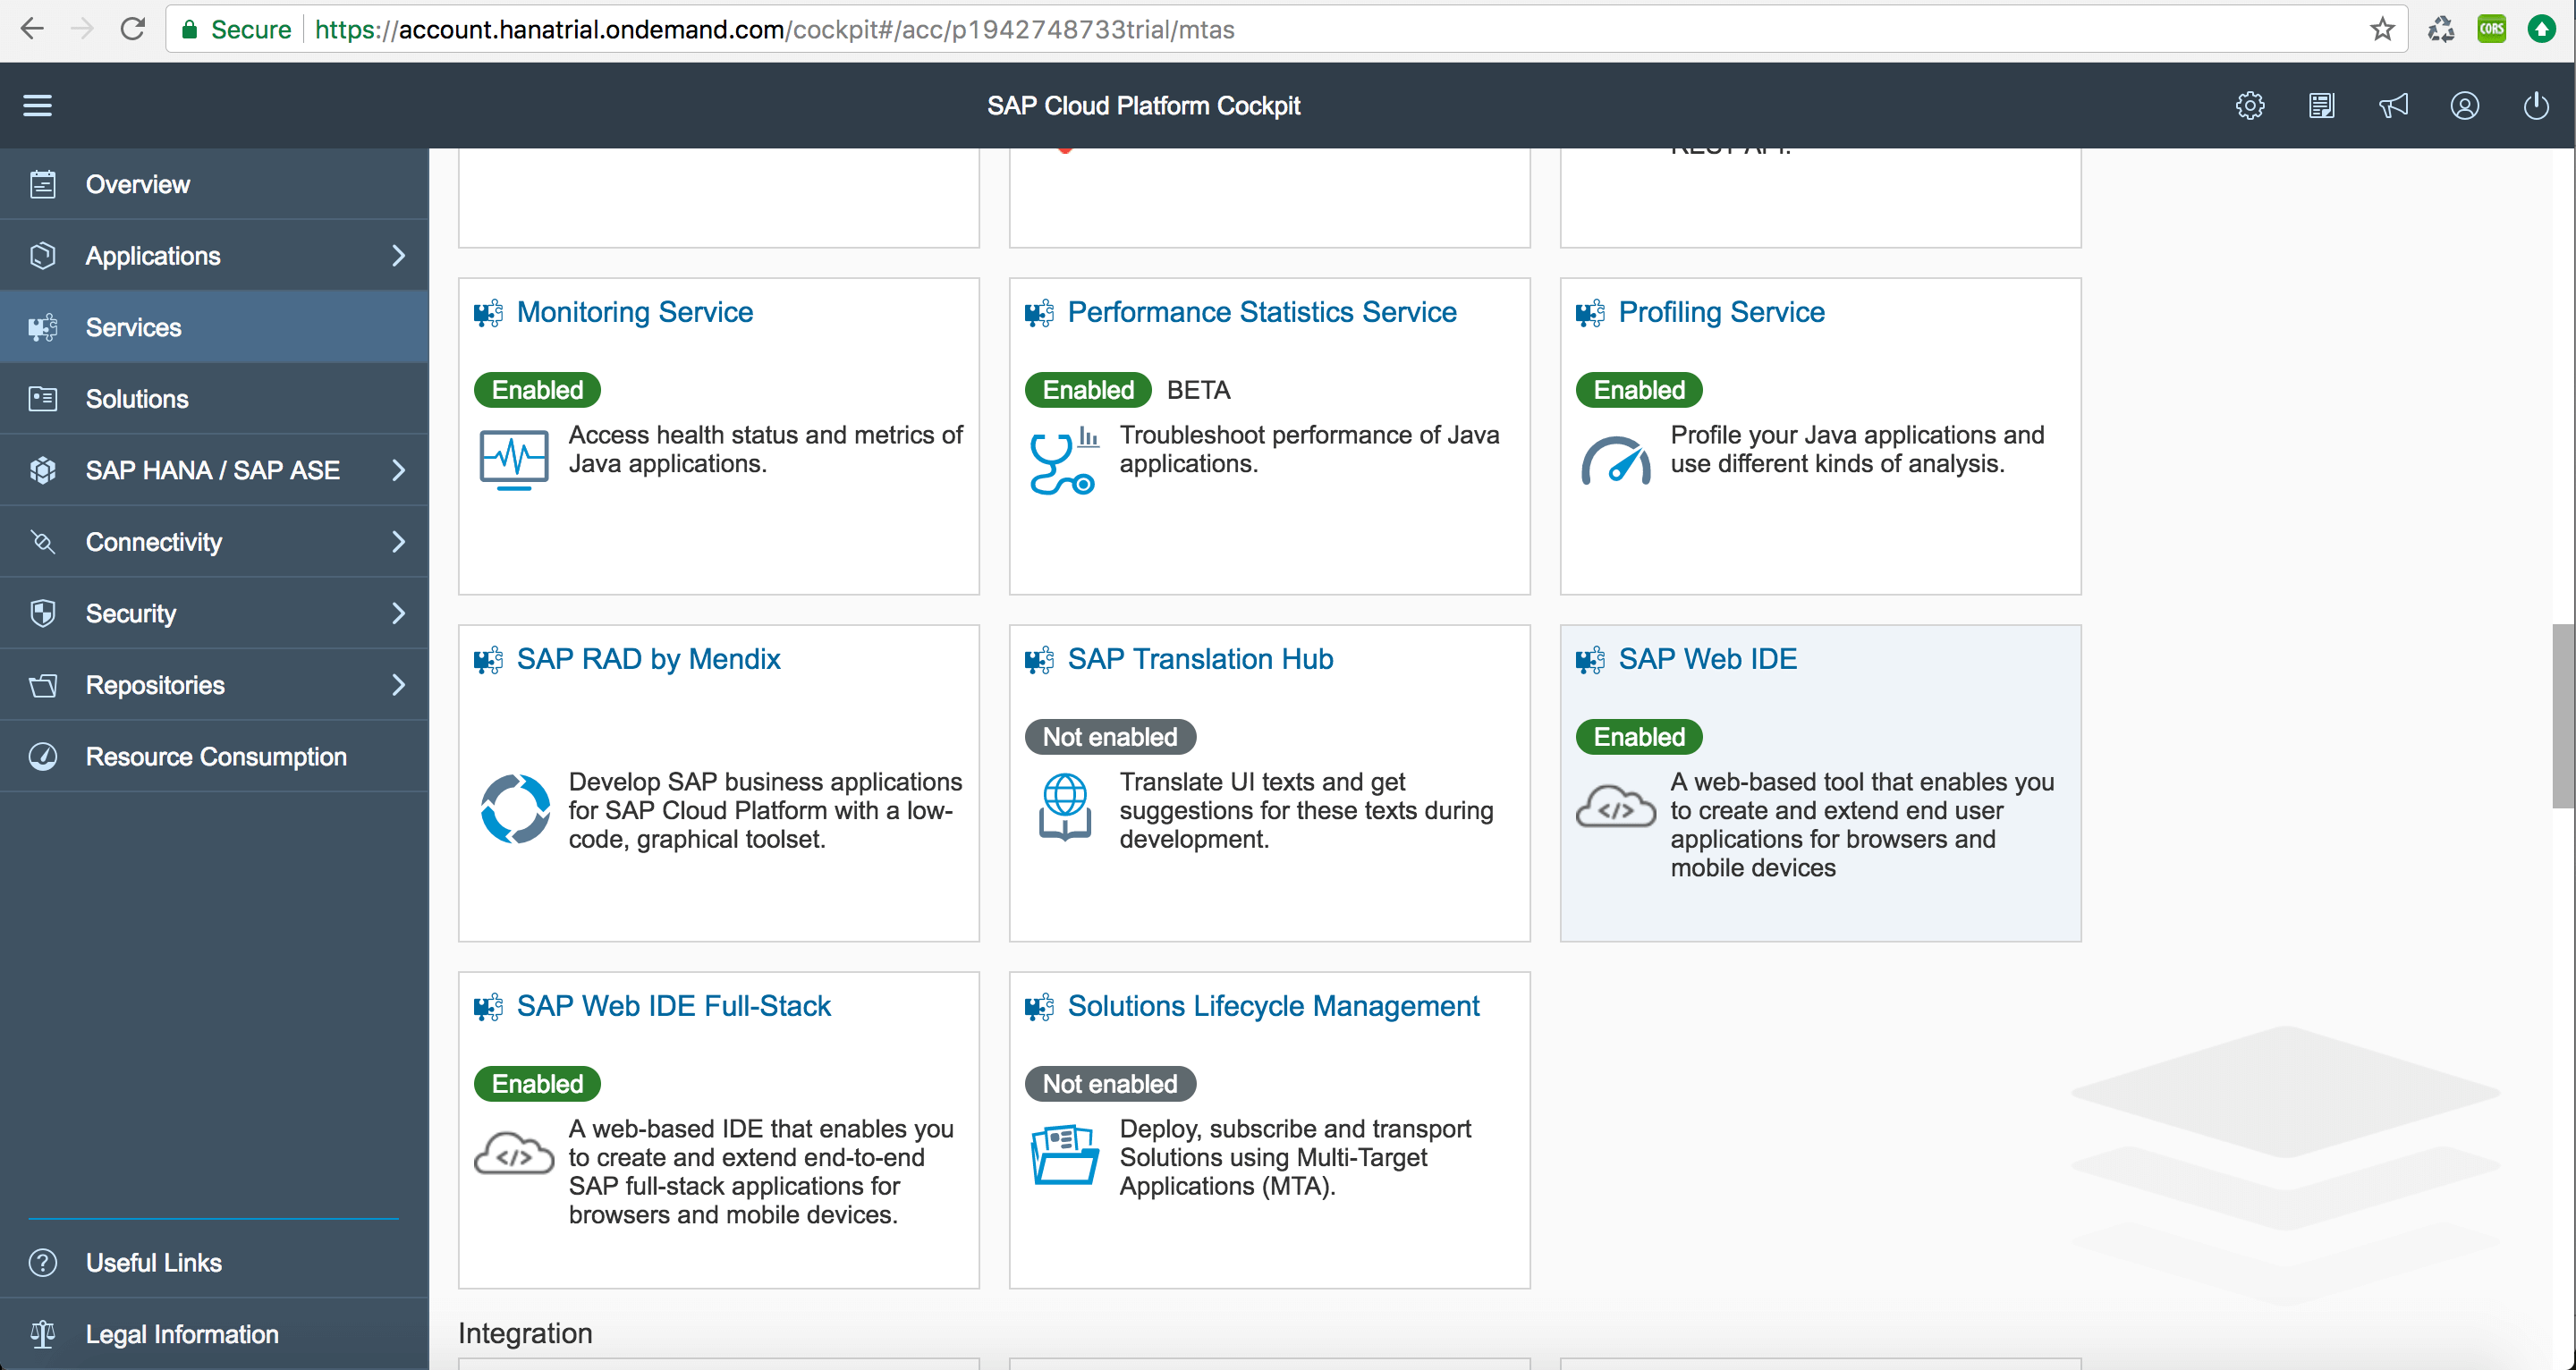
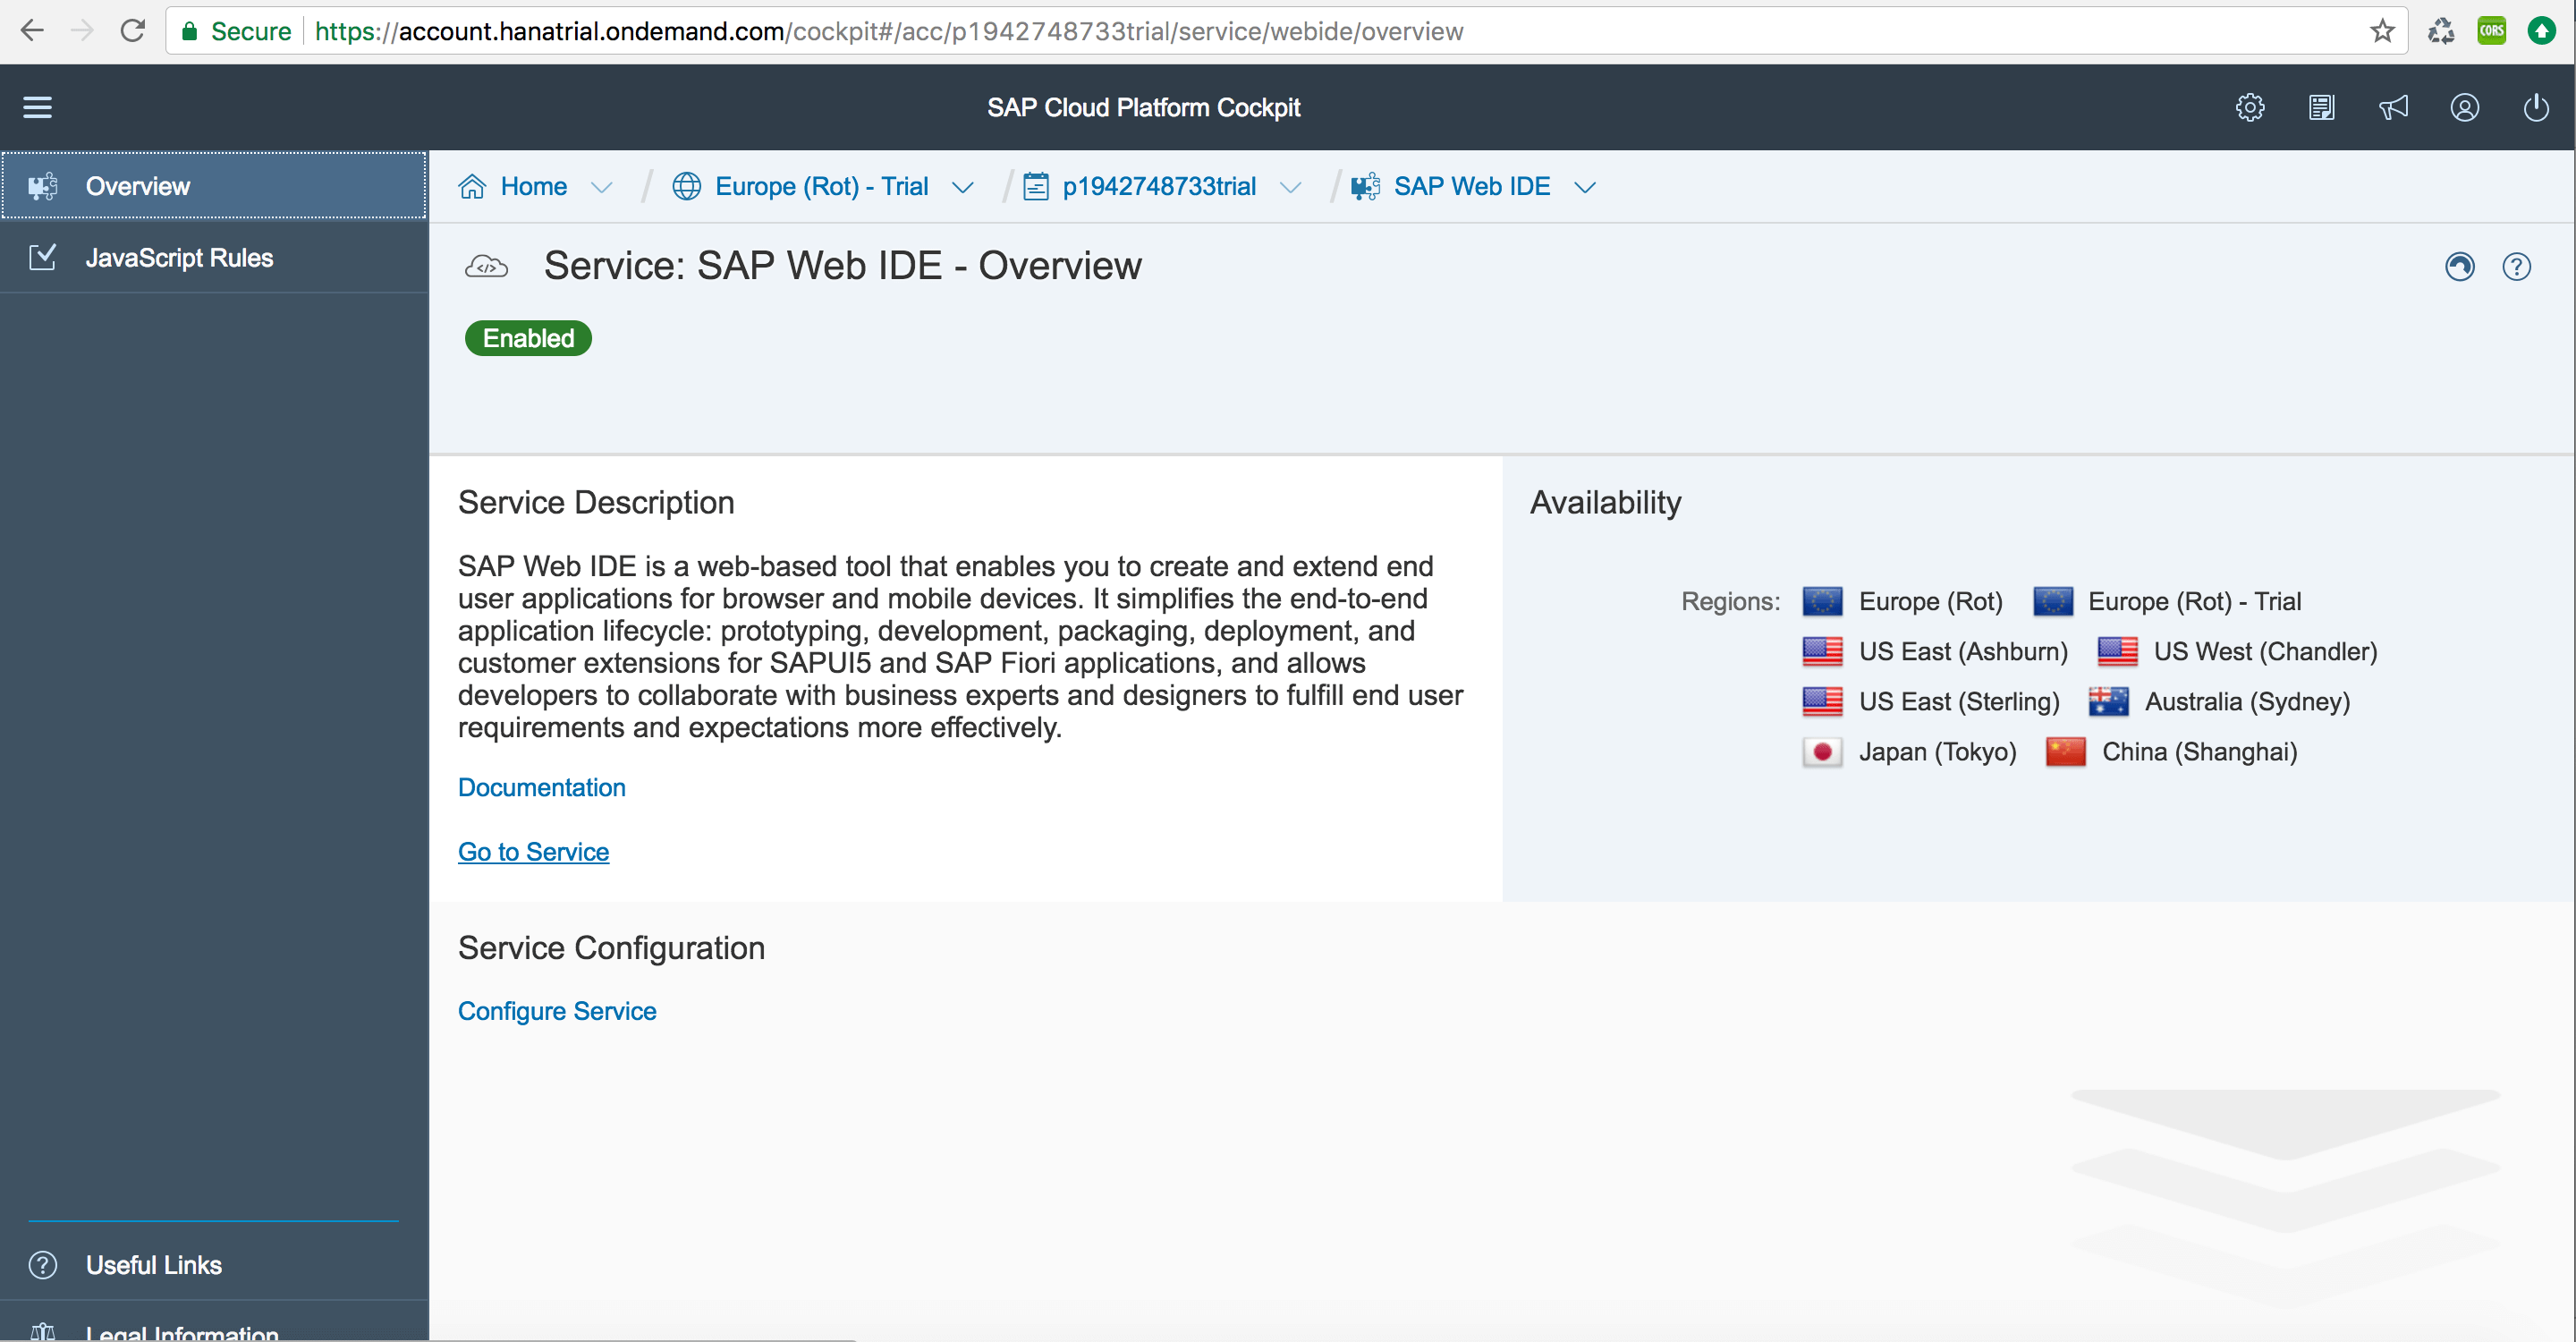
Step 2: Once logged into the SAP Cloud Platform, click on “Services” on the left menu bar and choose “SAP Web IDE” to enter the Web IDE Overview page. Next, click on “Go to Service”.
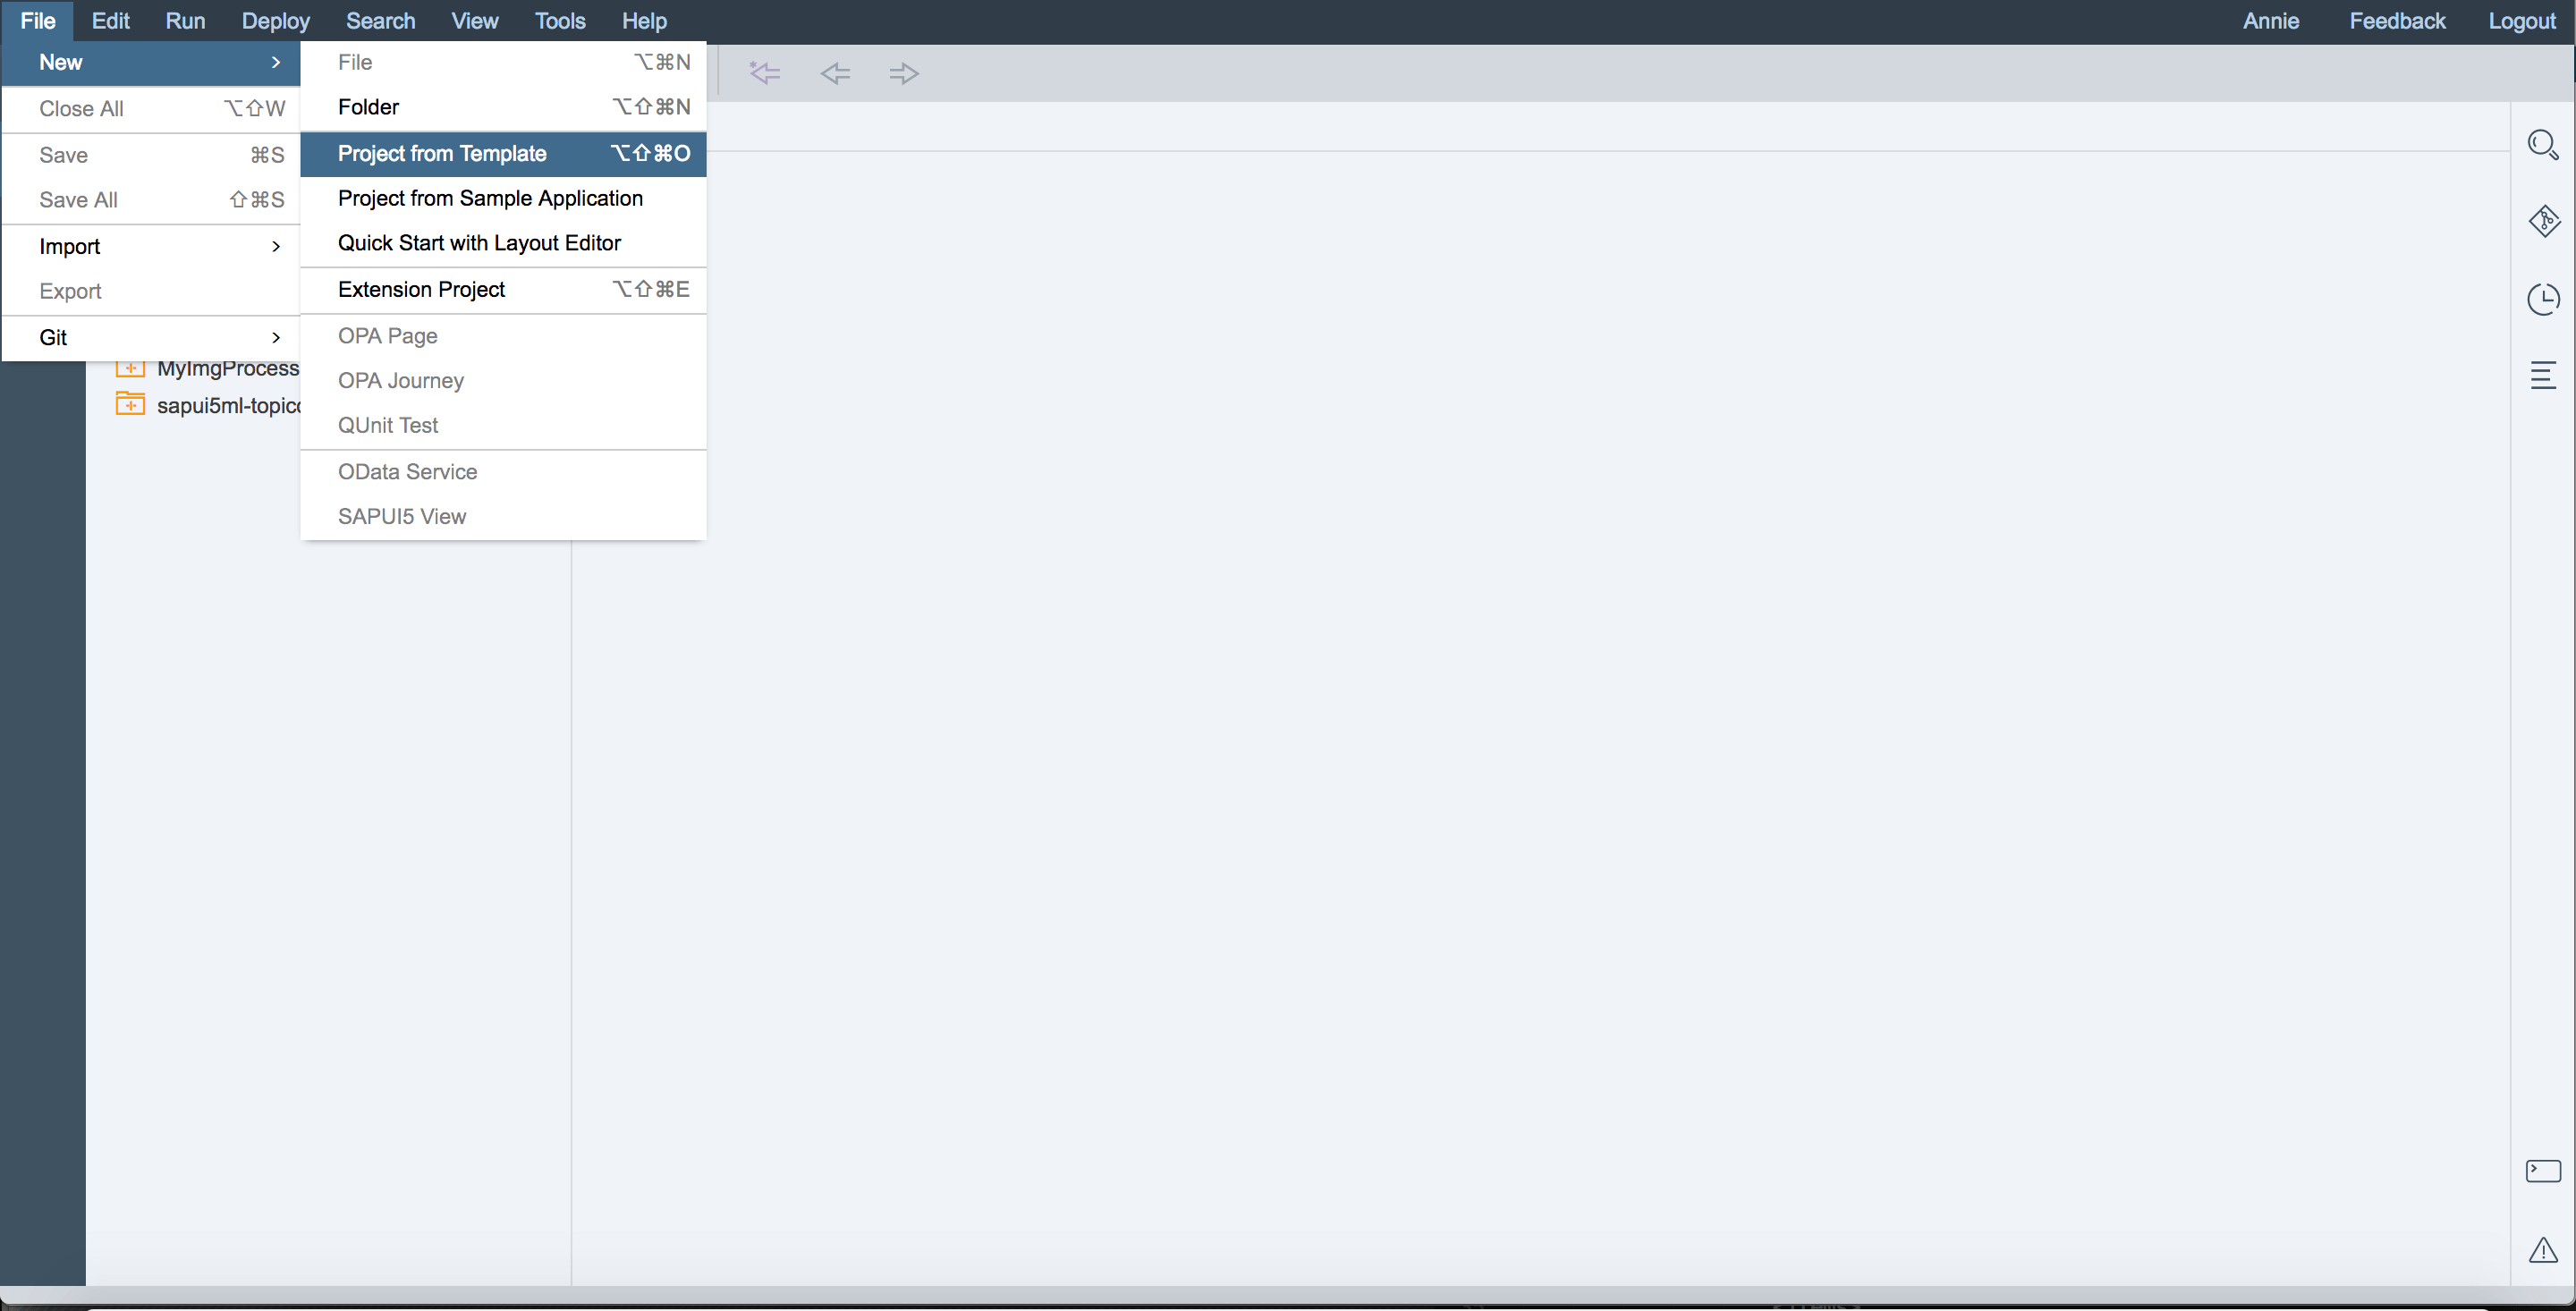
Step 3: Create a new project in the Web IDE by clicking on “File”->”New”->”Project from Template” on the top left corner.
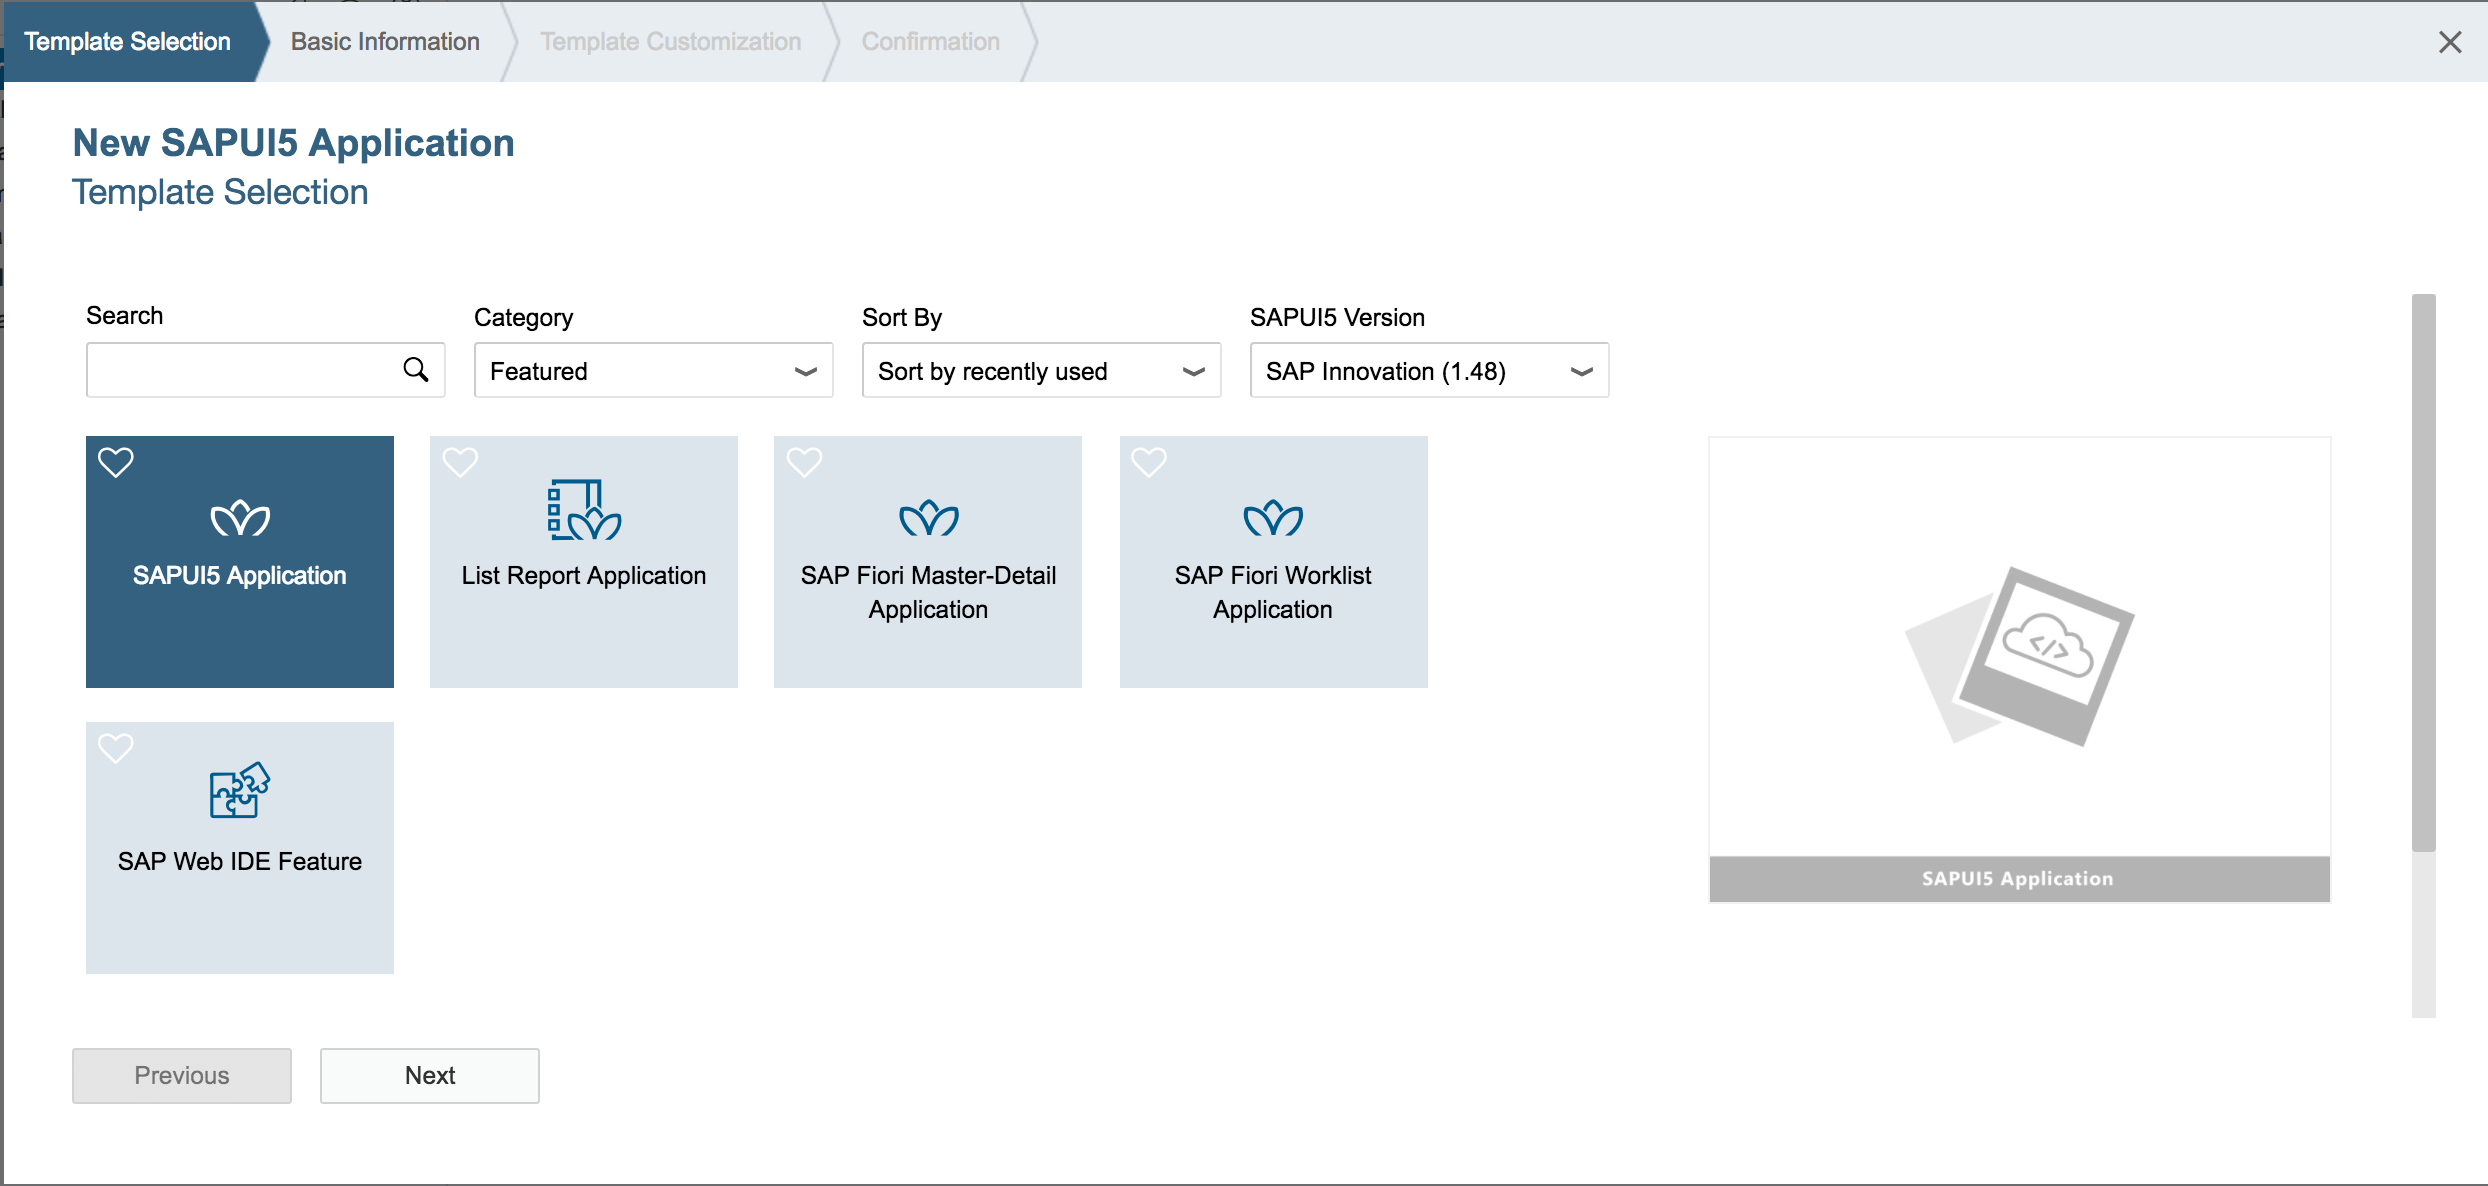
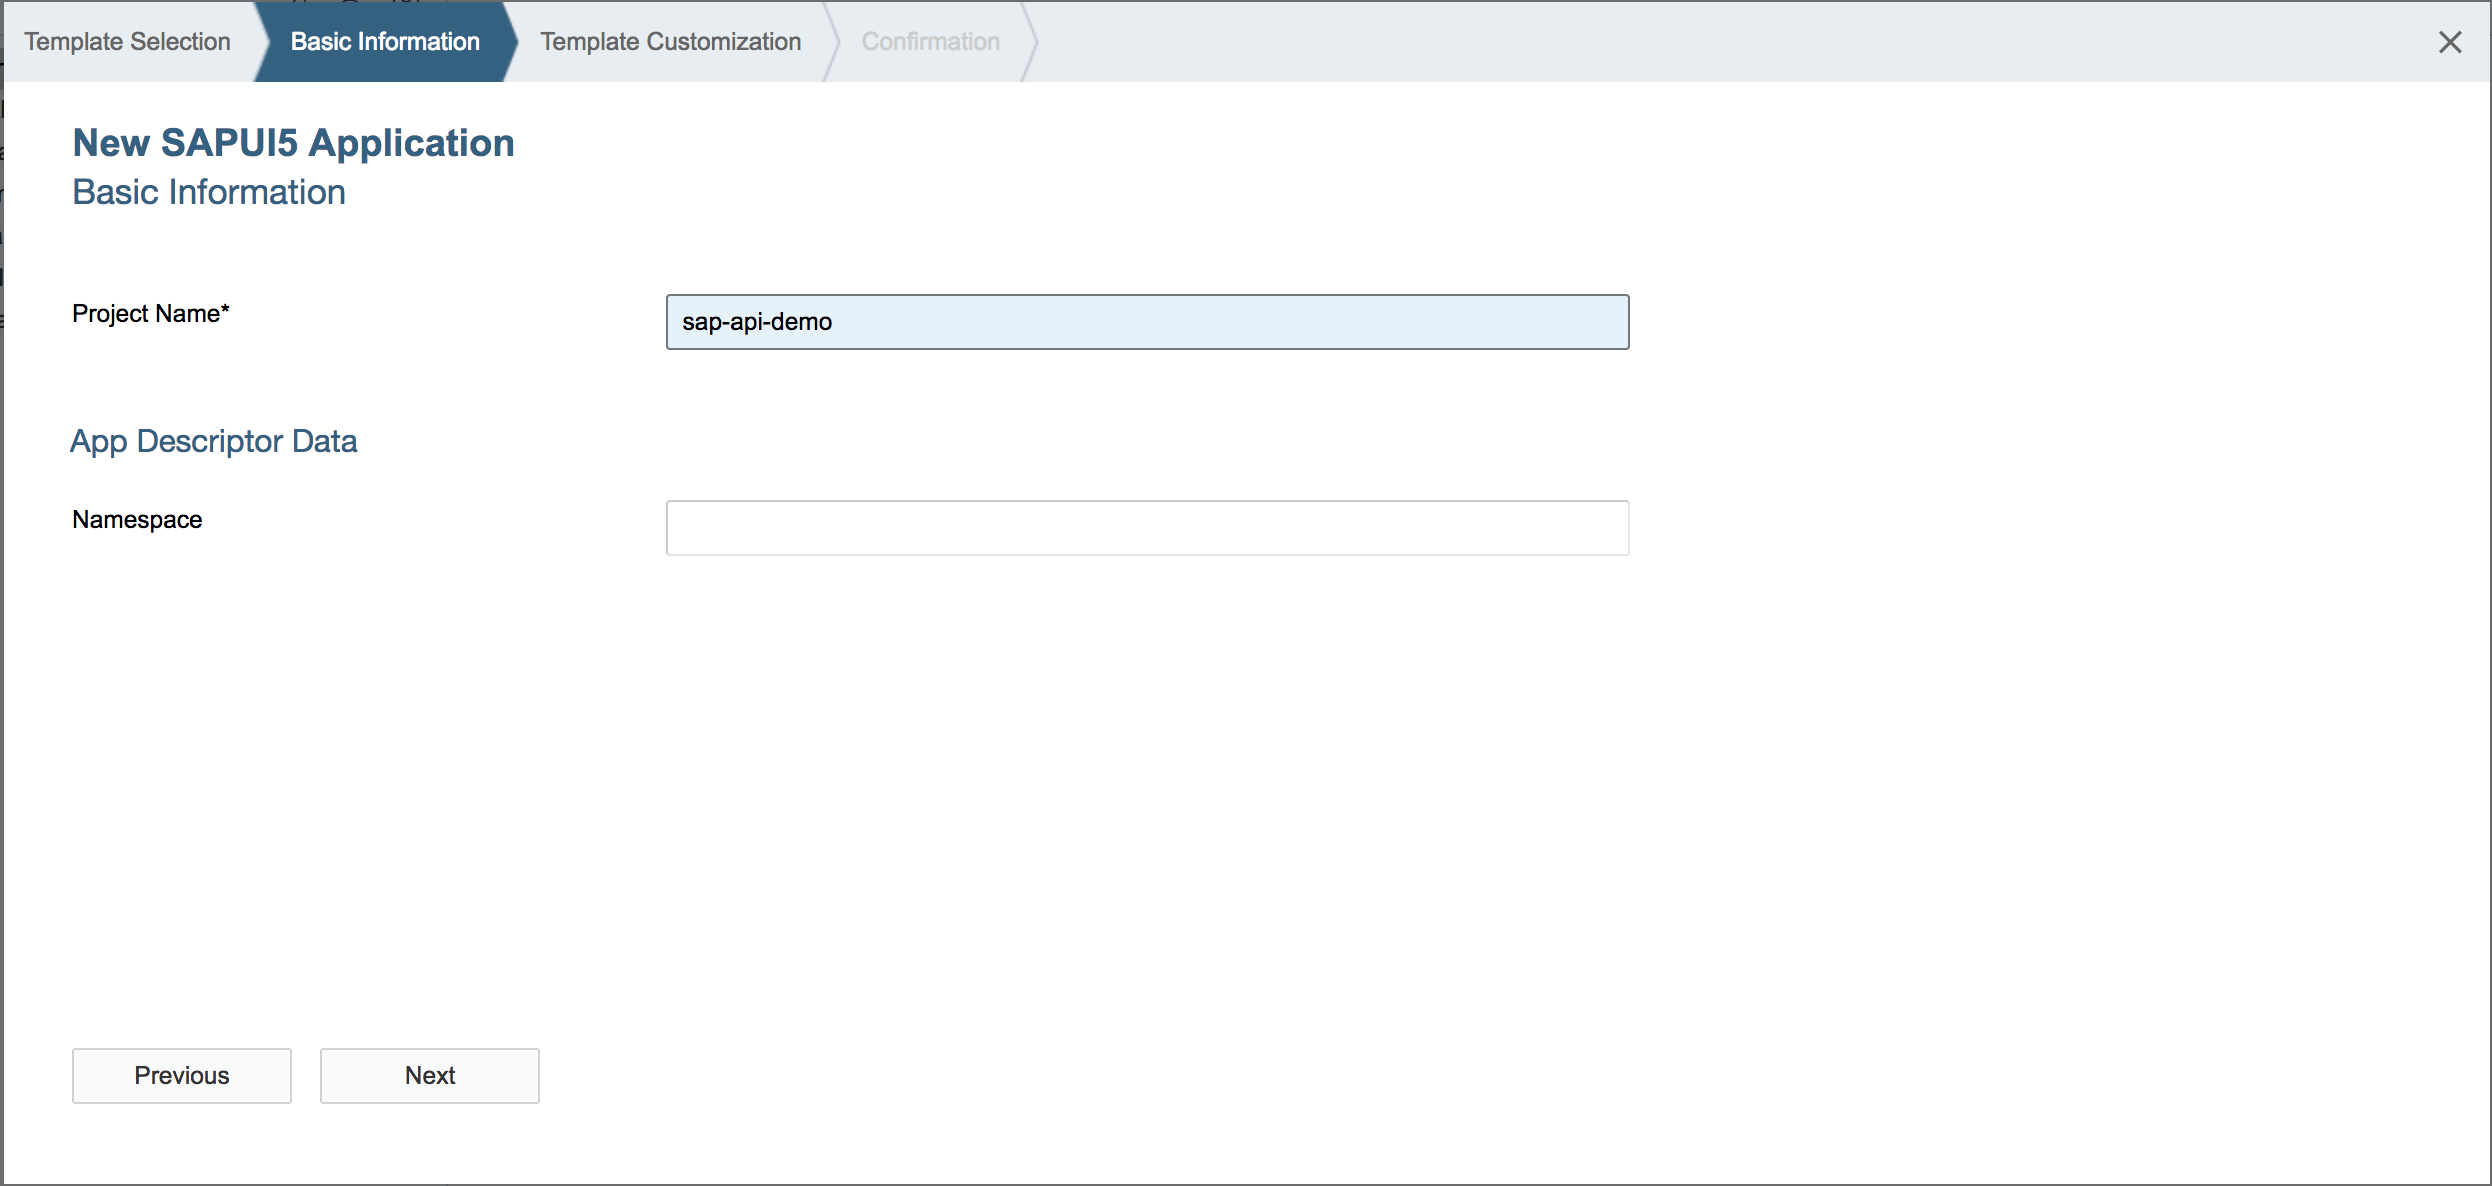
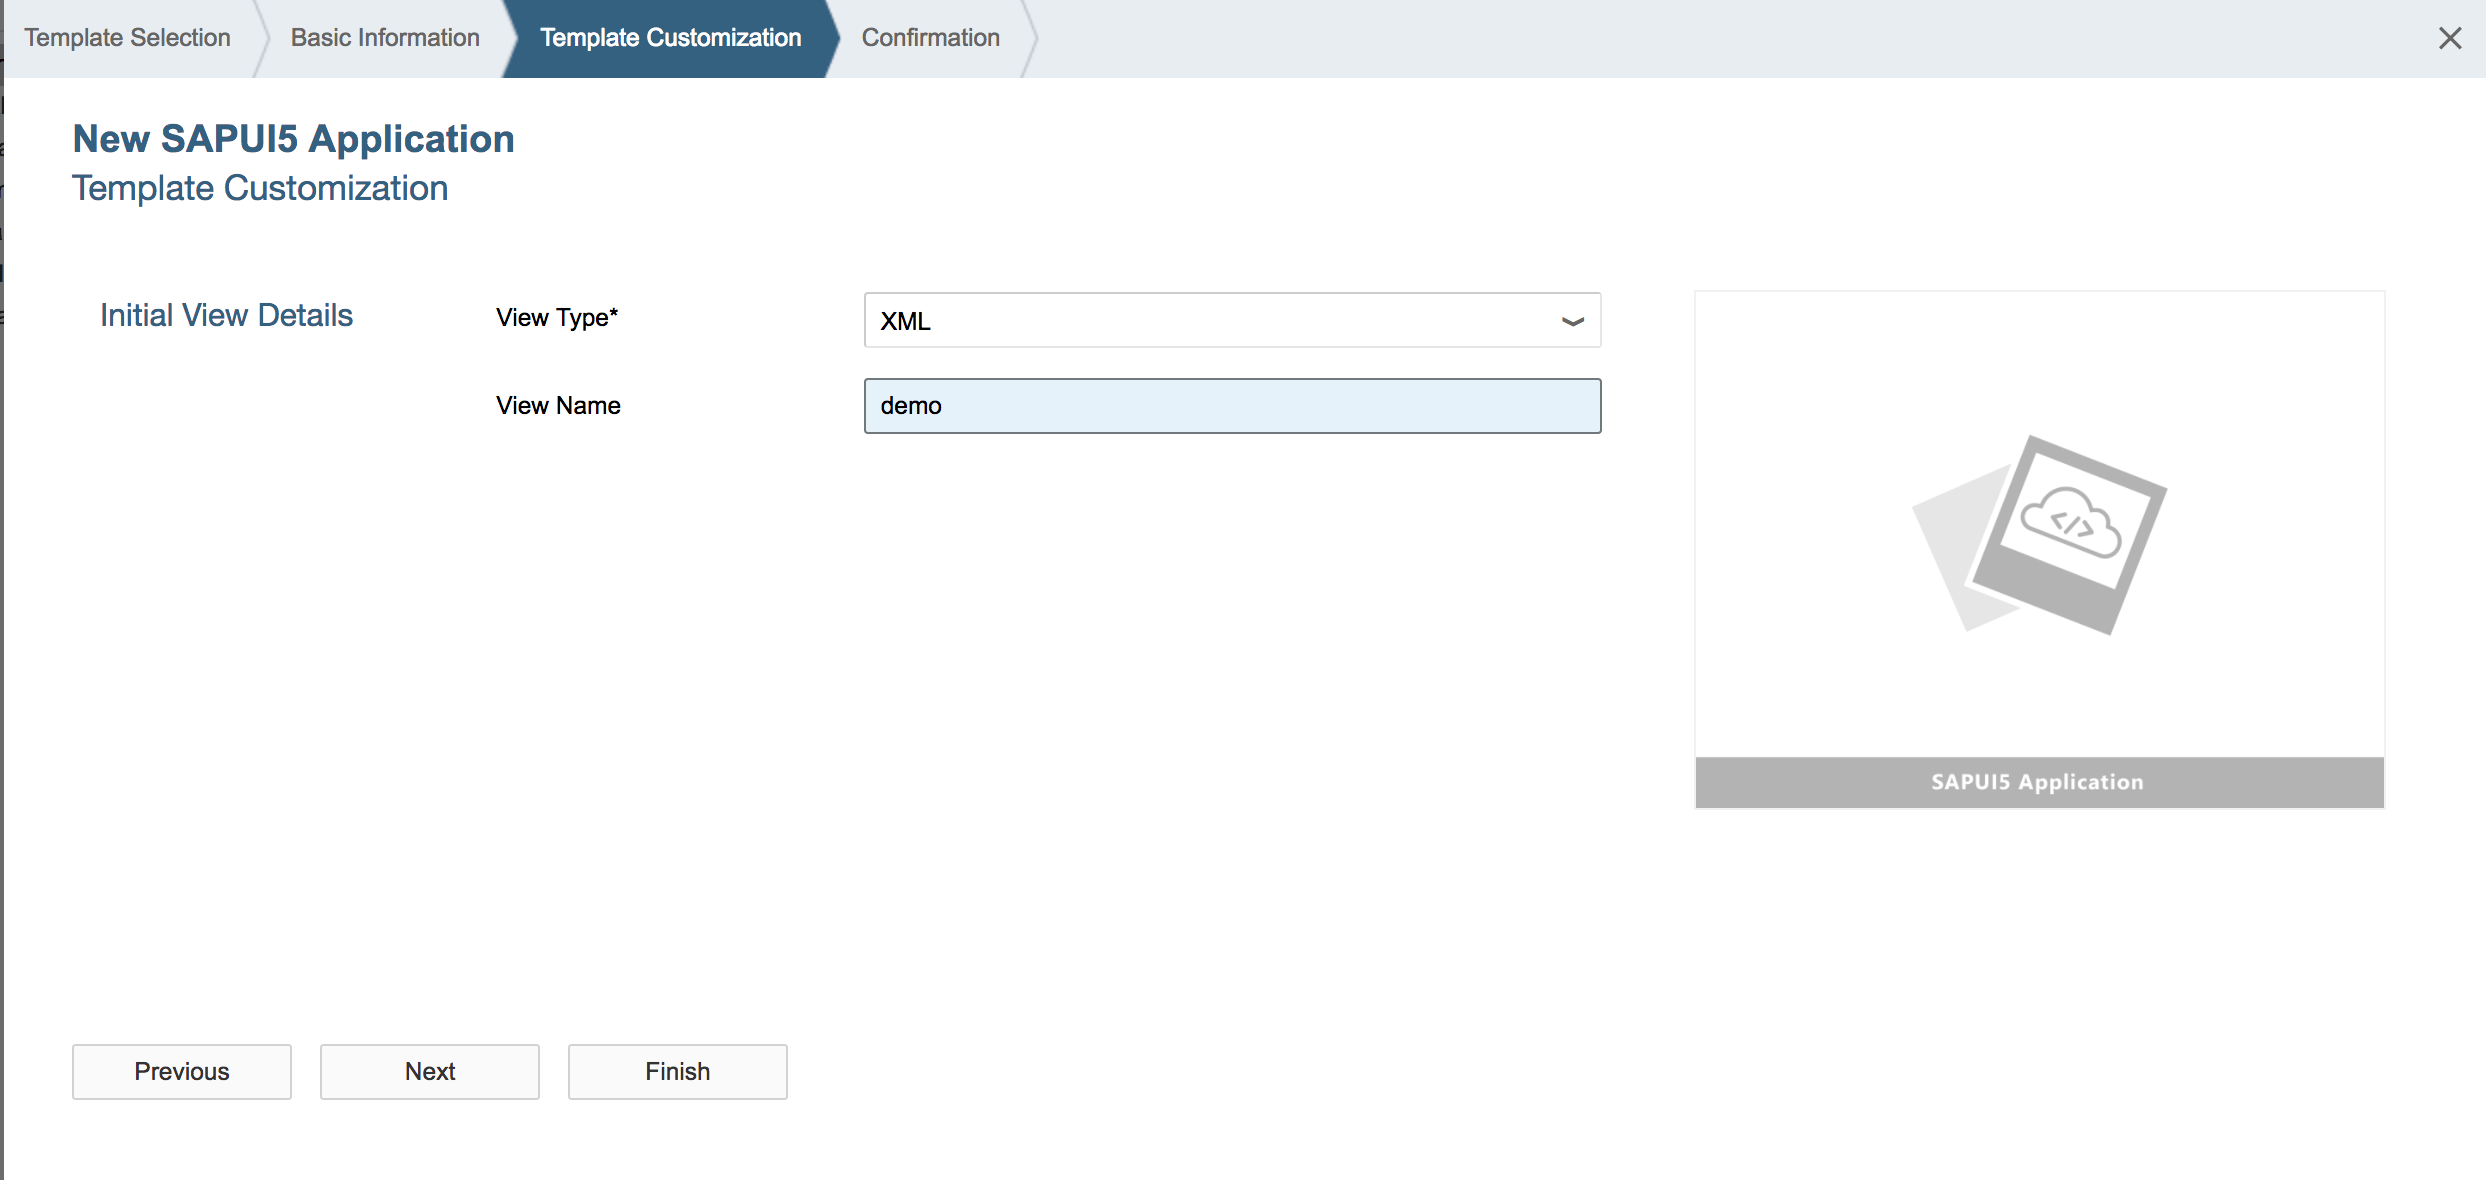
Step 4: Choose SAPUI5 Application and click next. Name the project “sap-api-demo”, and make sure to leave the namespace blank. Next keep the view type “XML” and set View Name “demo”. Click on “Finish”. Now you have a simple SAPUI5 application to contain your SAP API.
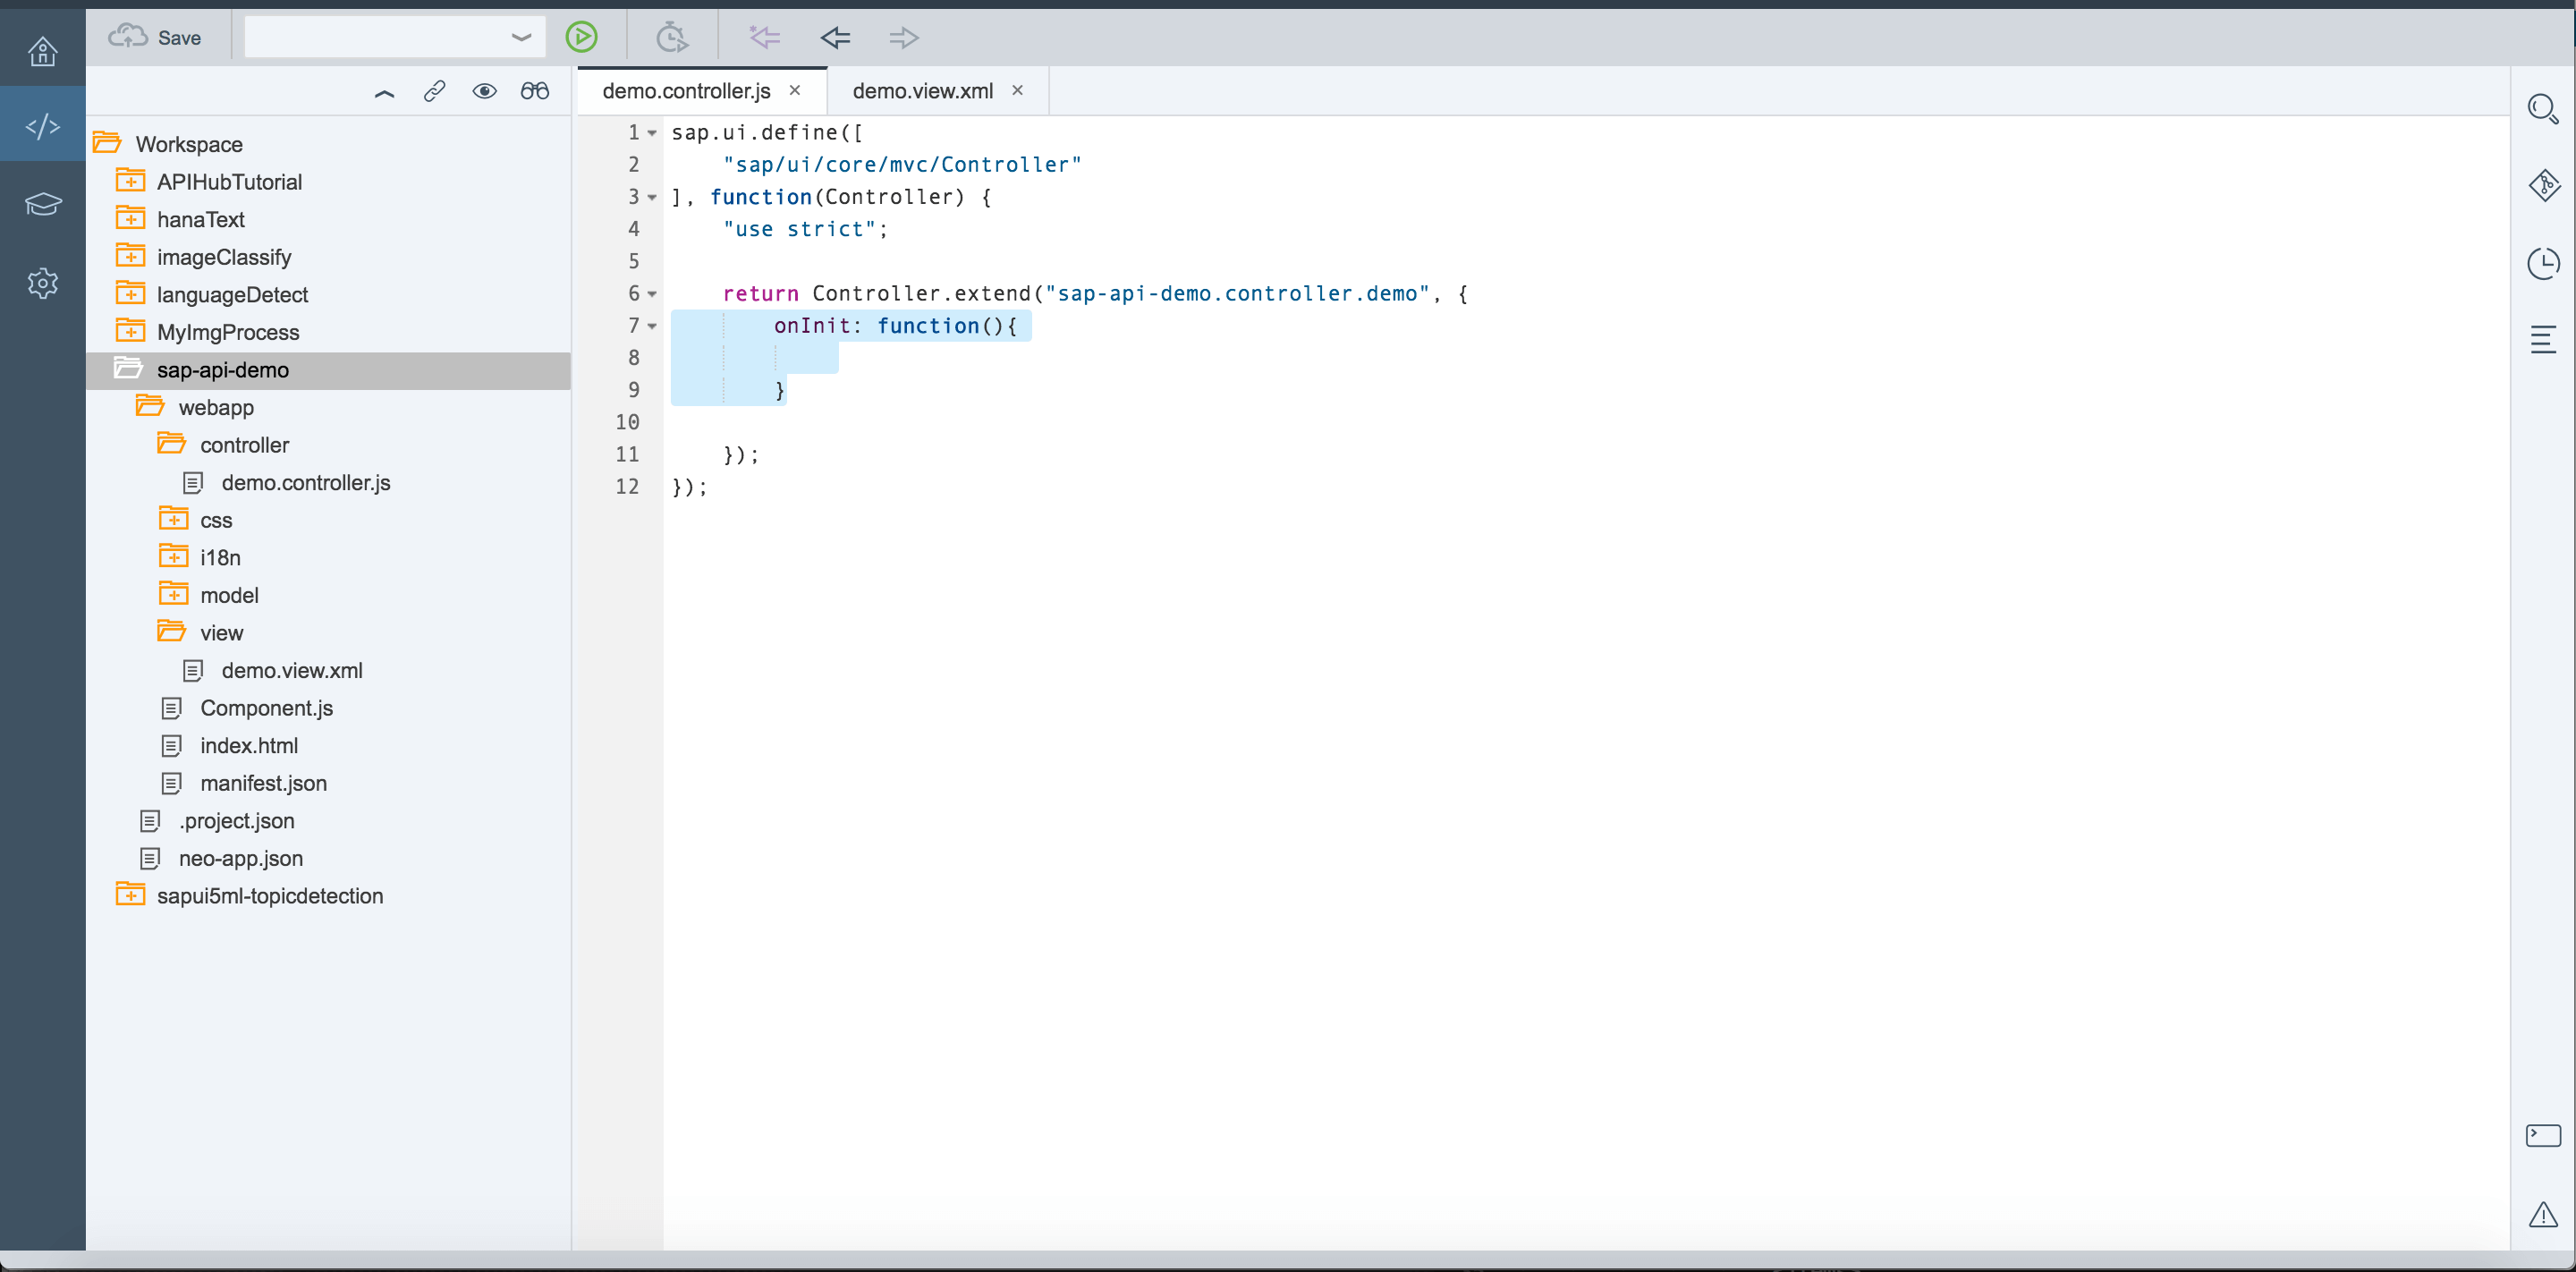
Step 5: You should now see a project named “sap-api-demo” under your “Workspace” folder on the left of your SAP Cloud IDE. Open the project folder and open “controller” and “view” subfolders. Double click to open demo.controller.js and demo.view.xml. Inside demo.view.xml, add an onInit function in return statement for API use later.
Step 6: Choose the SAP API for use. Go to api.sap.com/shell/api to see the complete list of SAP API currently available.
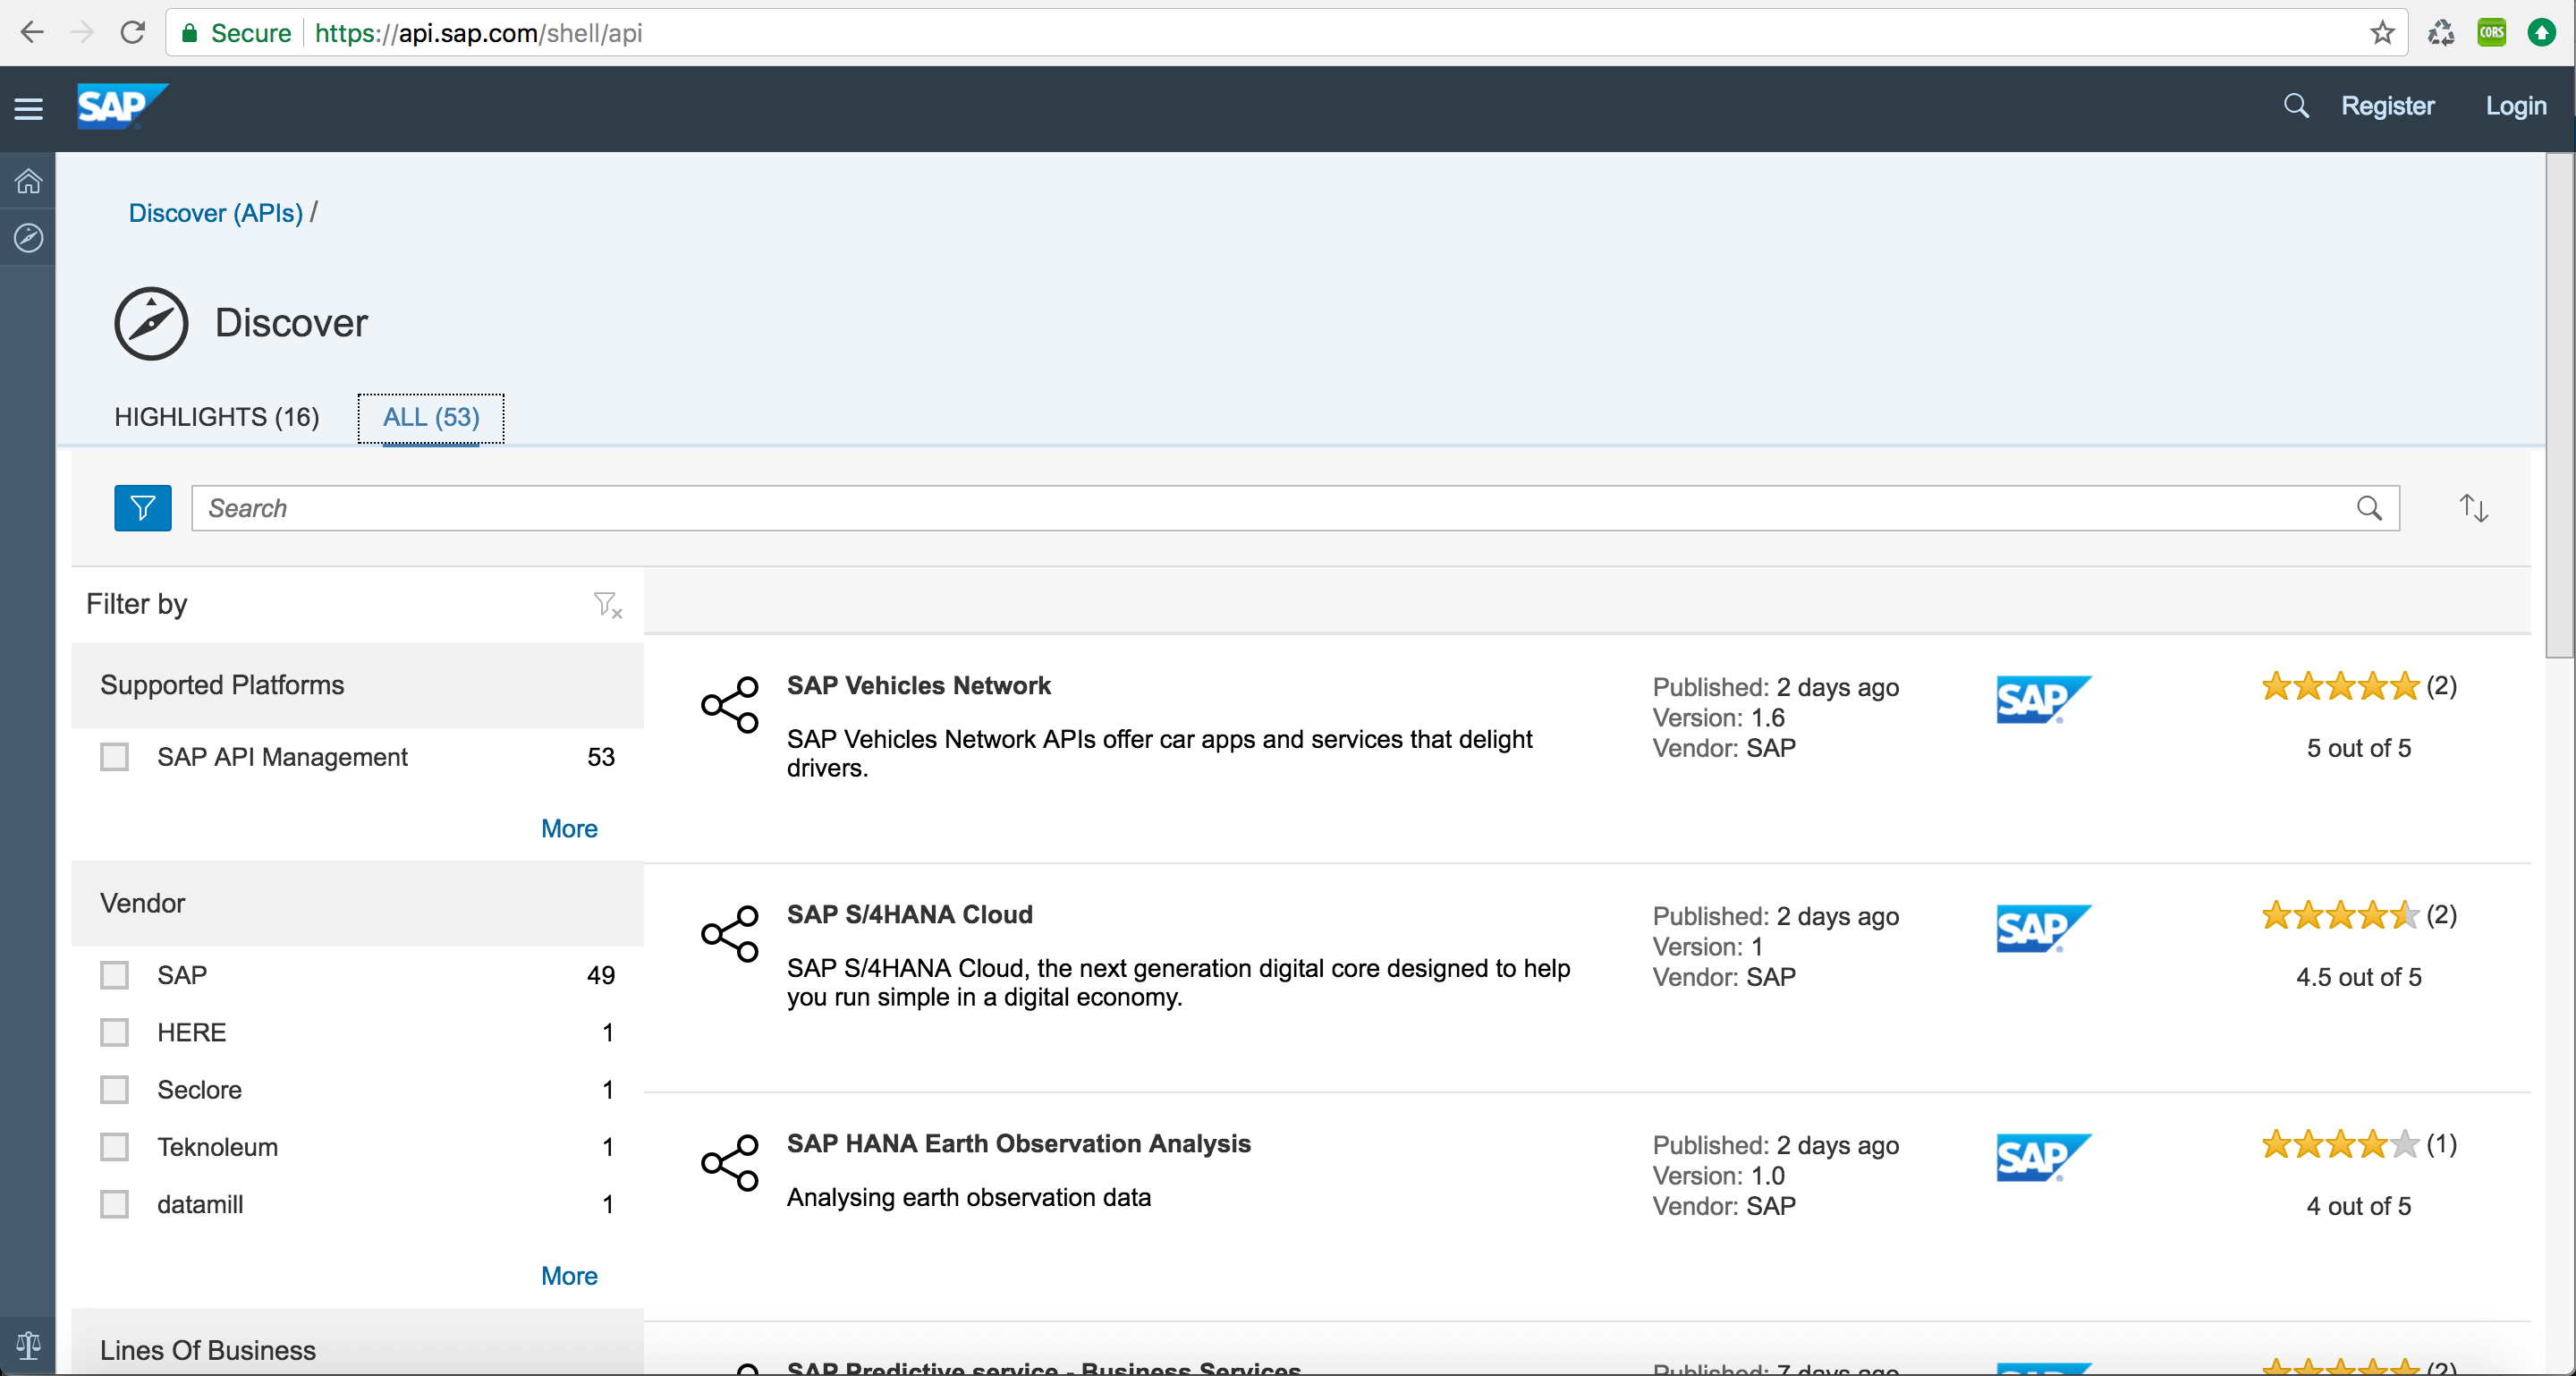
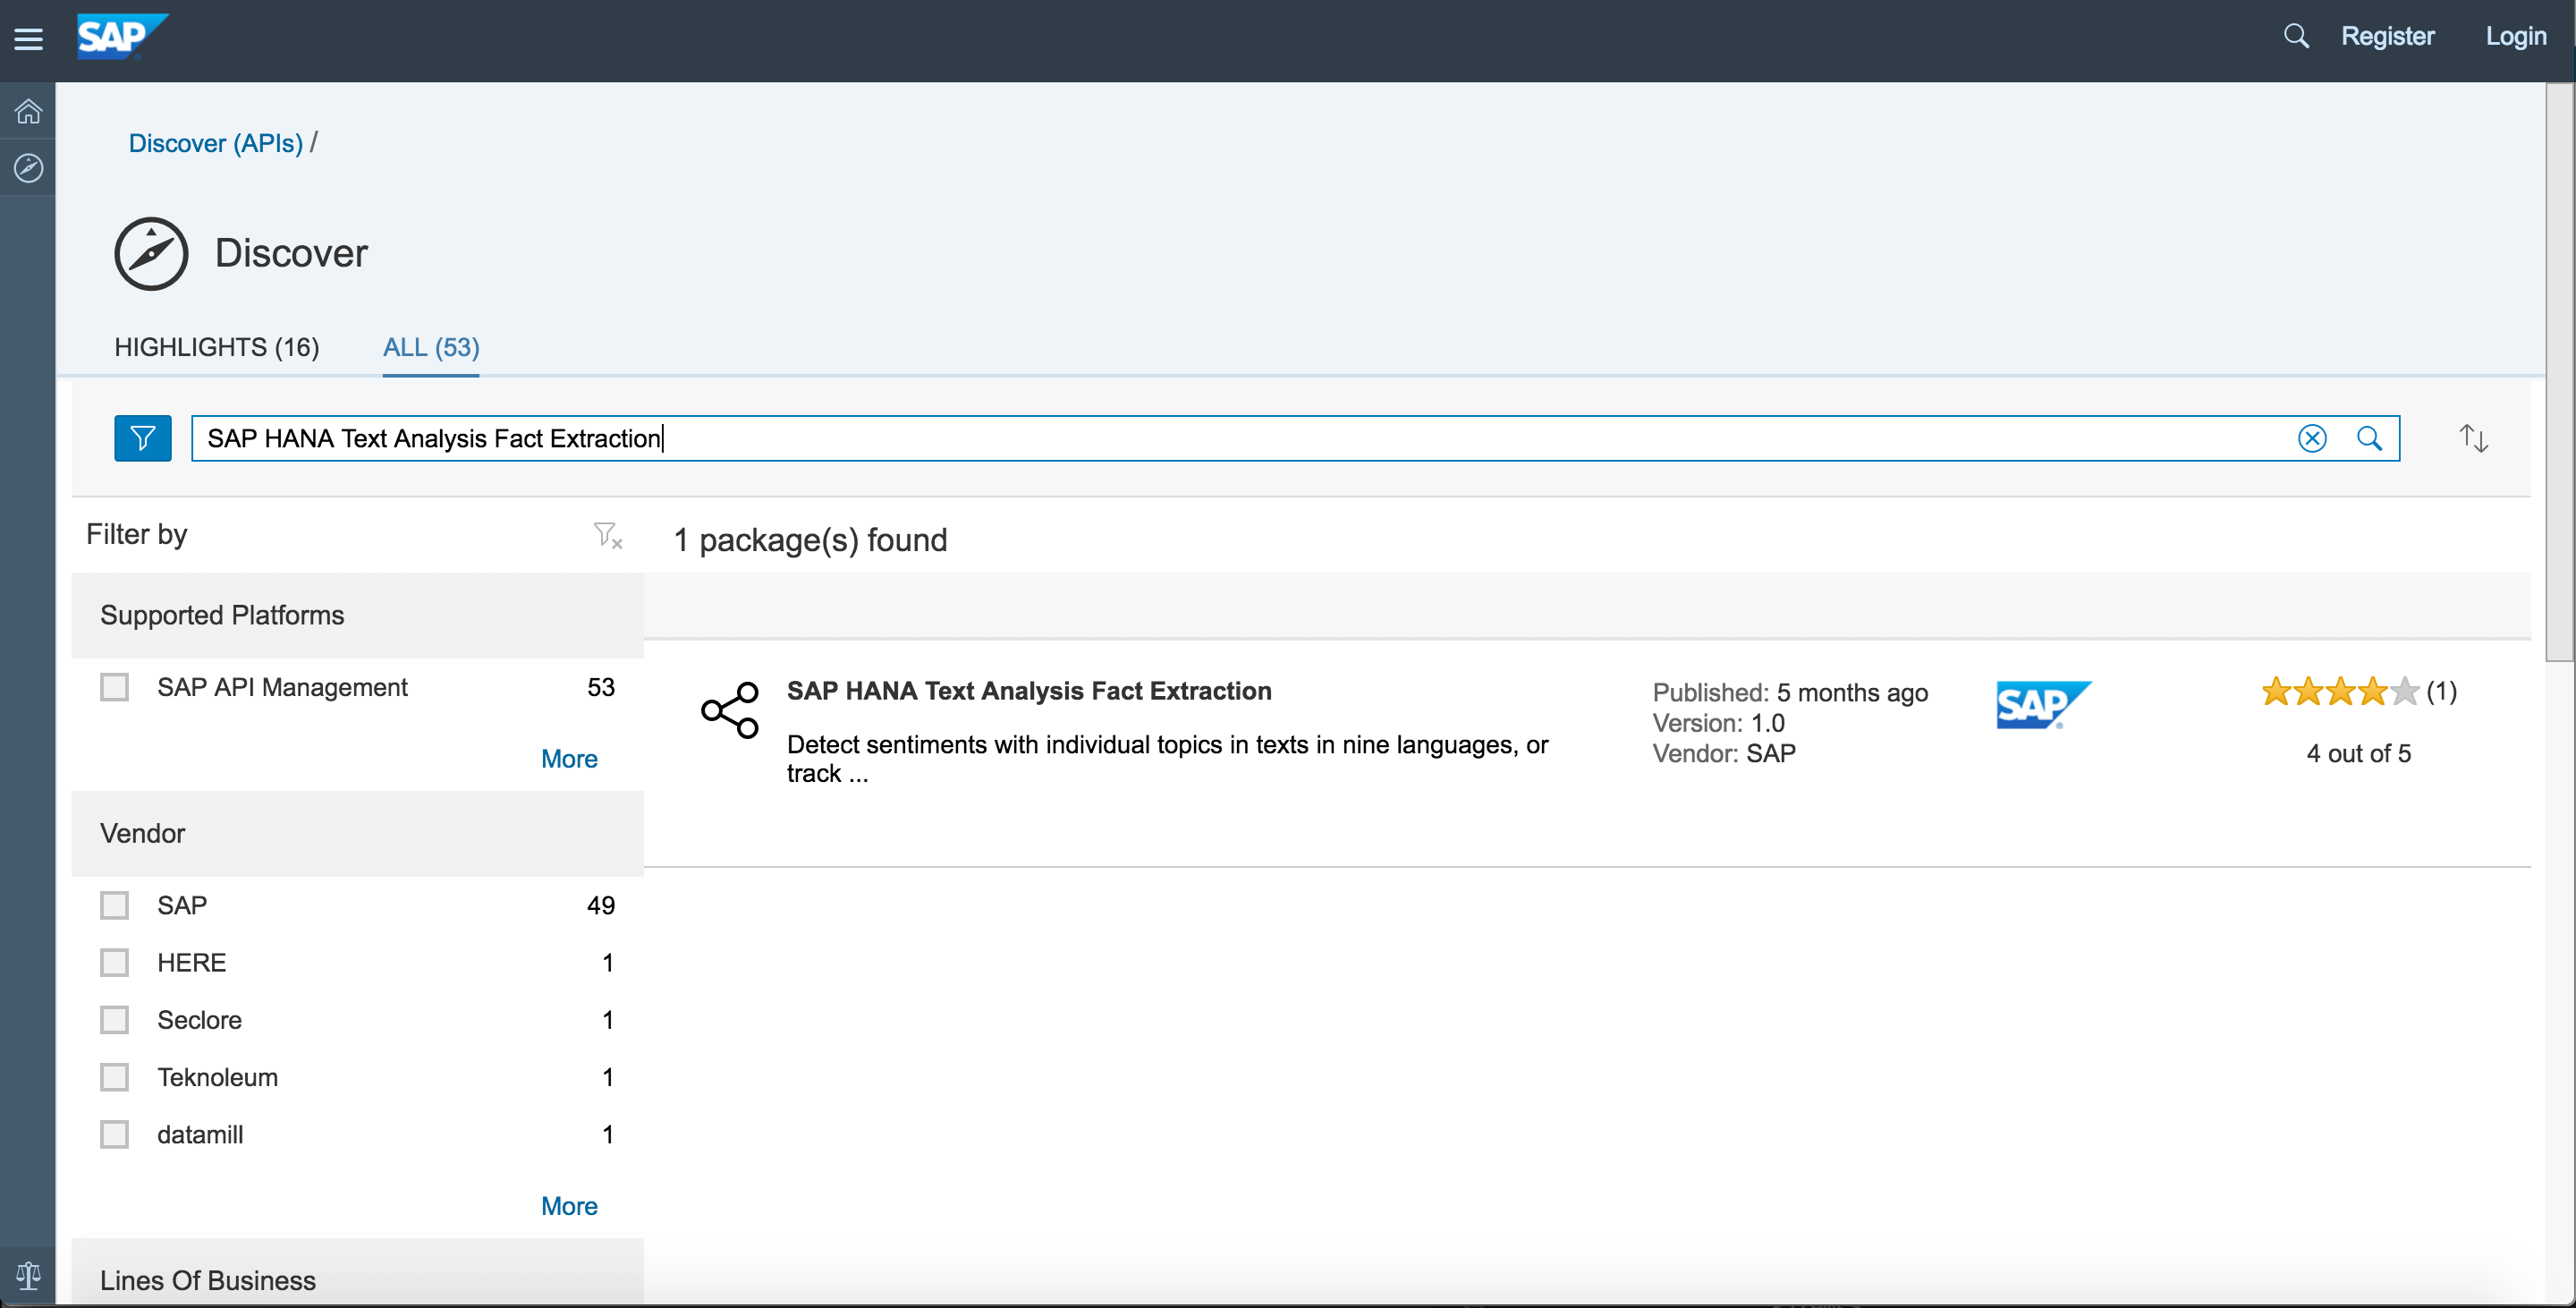
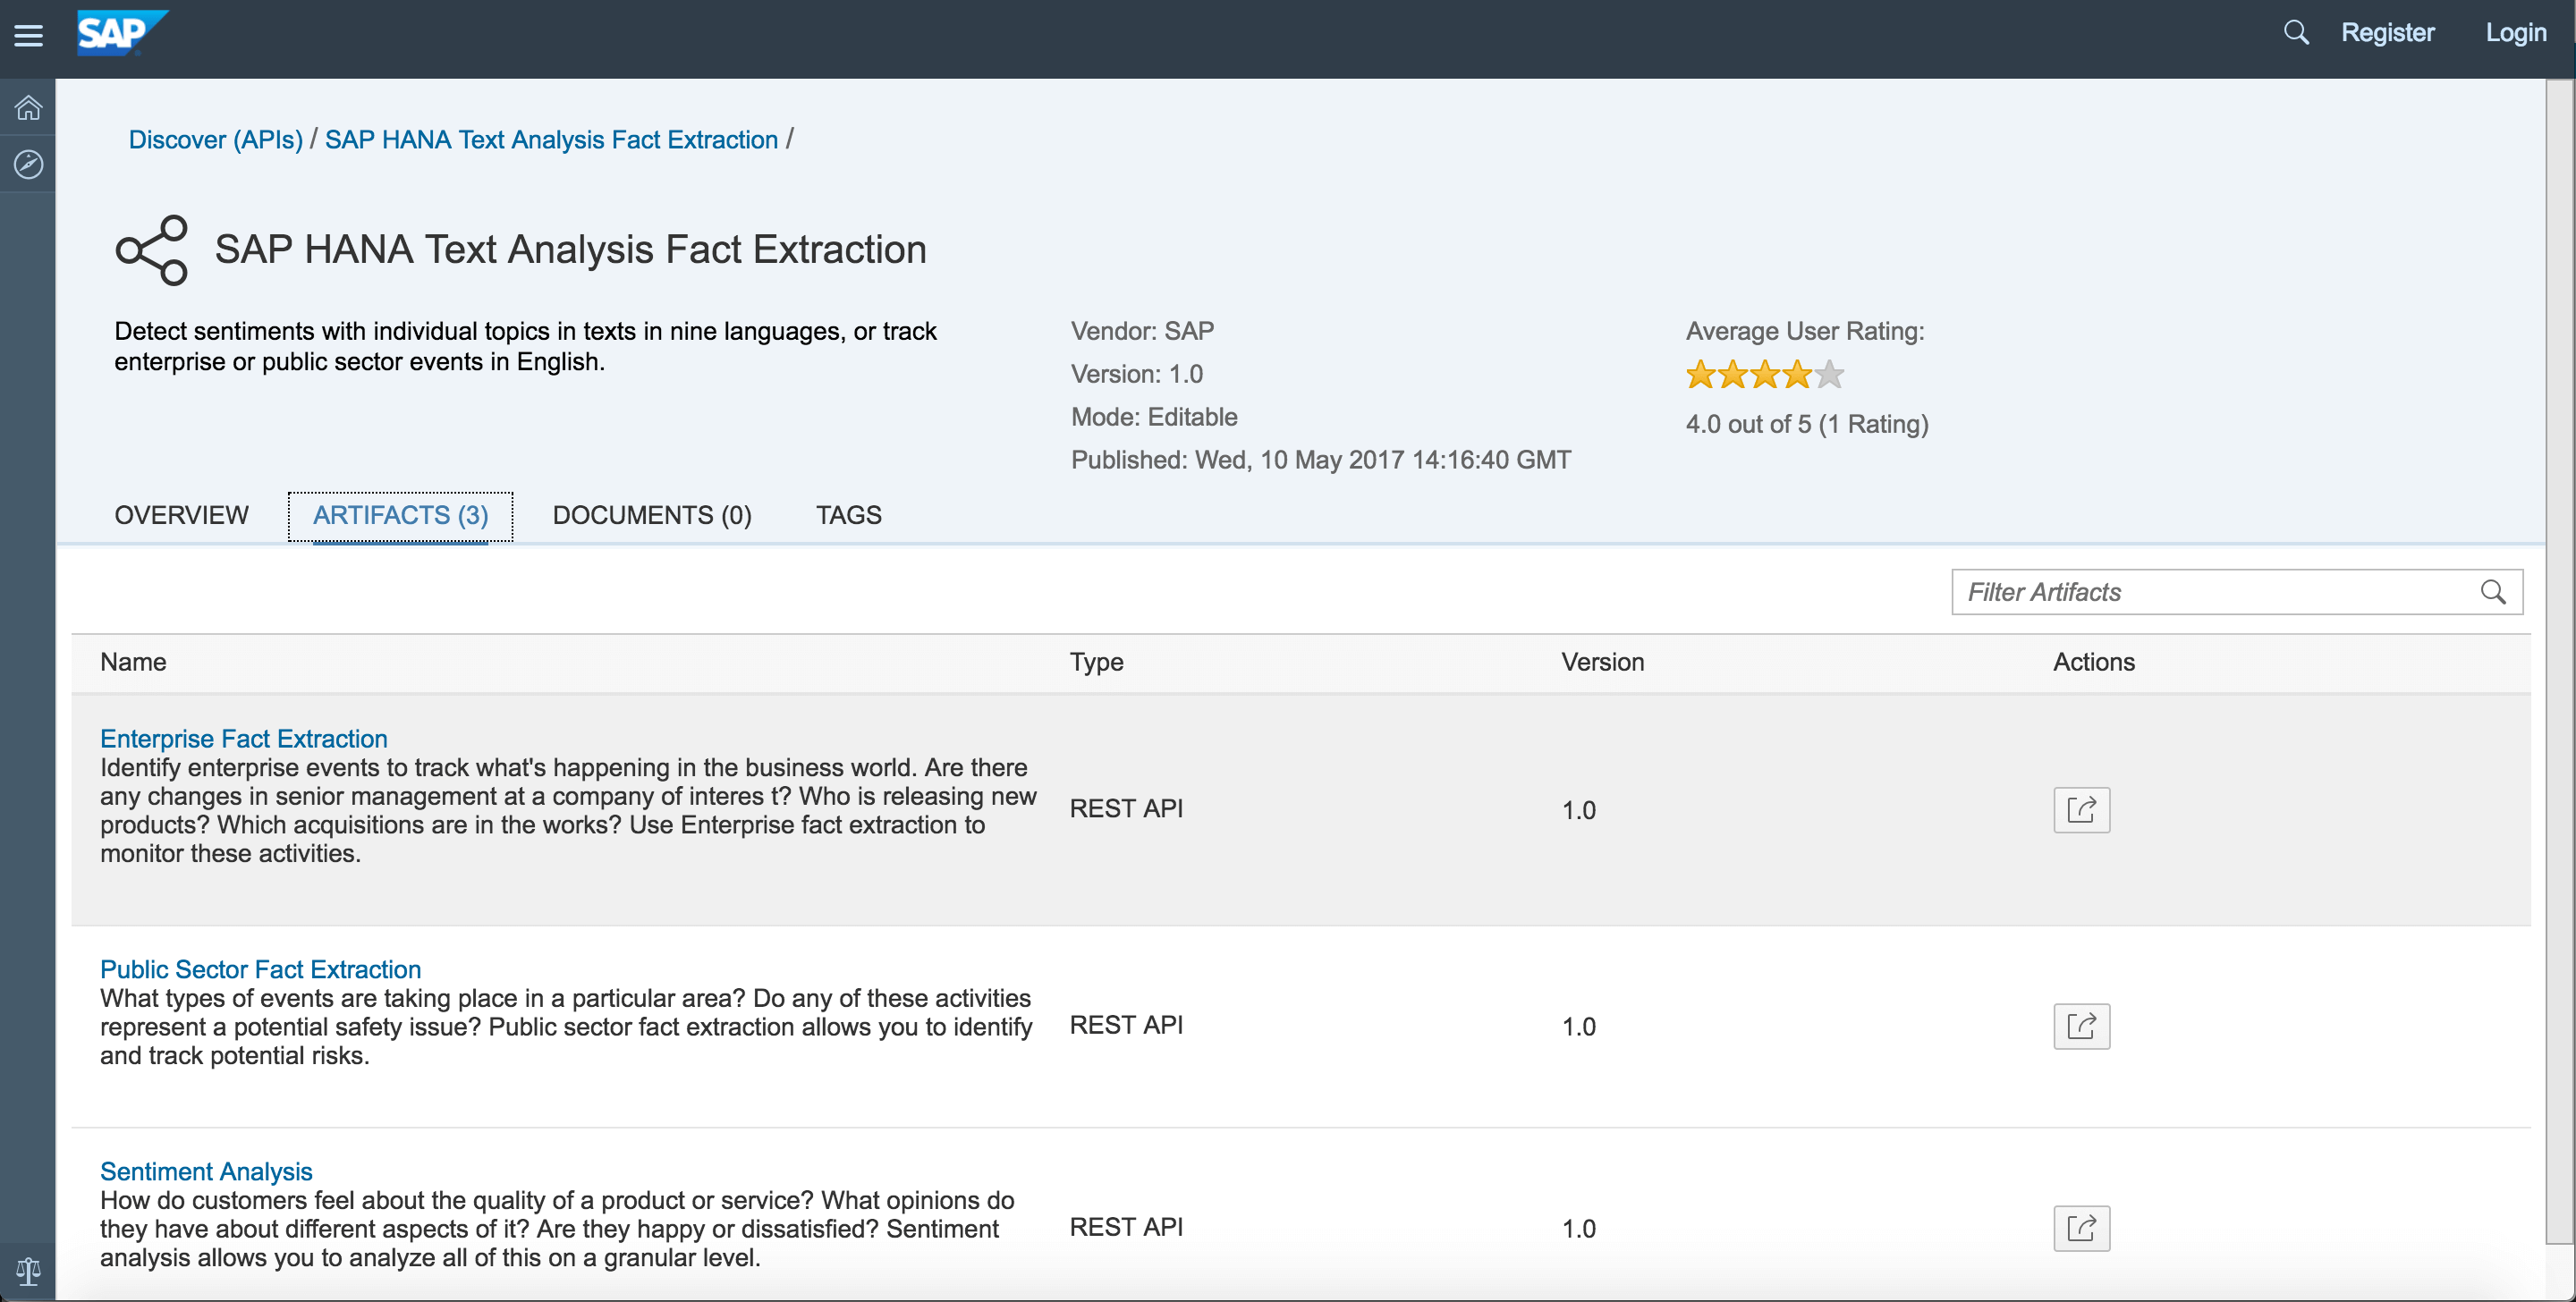
Step 7: For this exercise we will use the SAP HANA Text Analysis Fact Extraction package. Type “SAP HANA Text Analysis Fact Extraction” into the search bar and click on the package that is found. Next, click on the “ARTIFACTS” tab to get to API. Here we will use “Enterprise Fact Extraction” API. Finally, click on that name to get to the detail page.
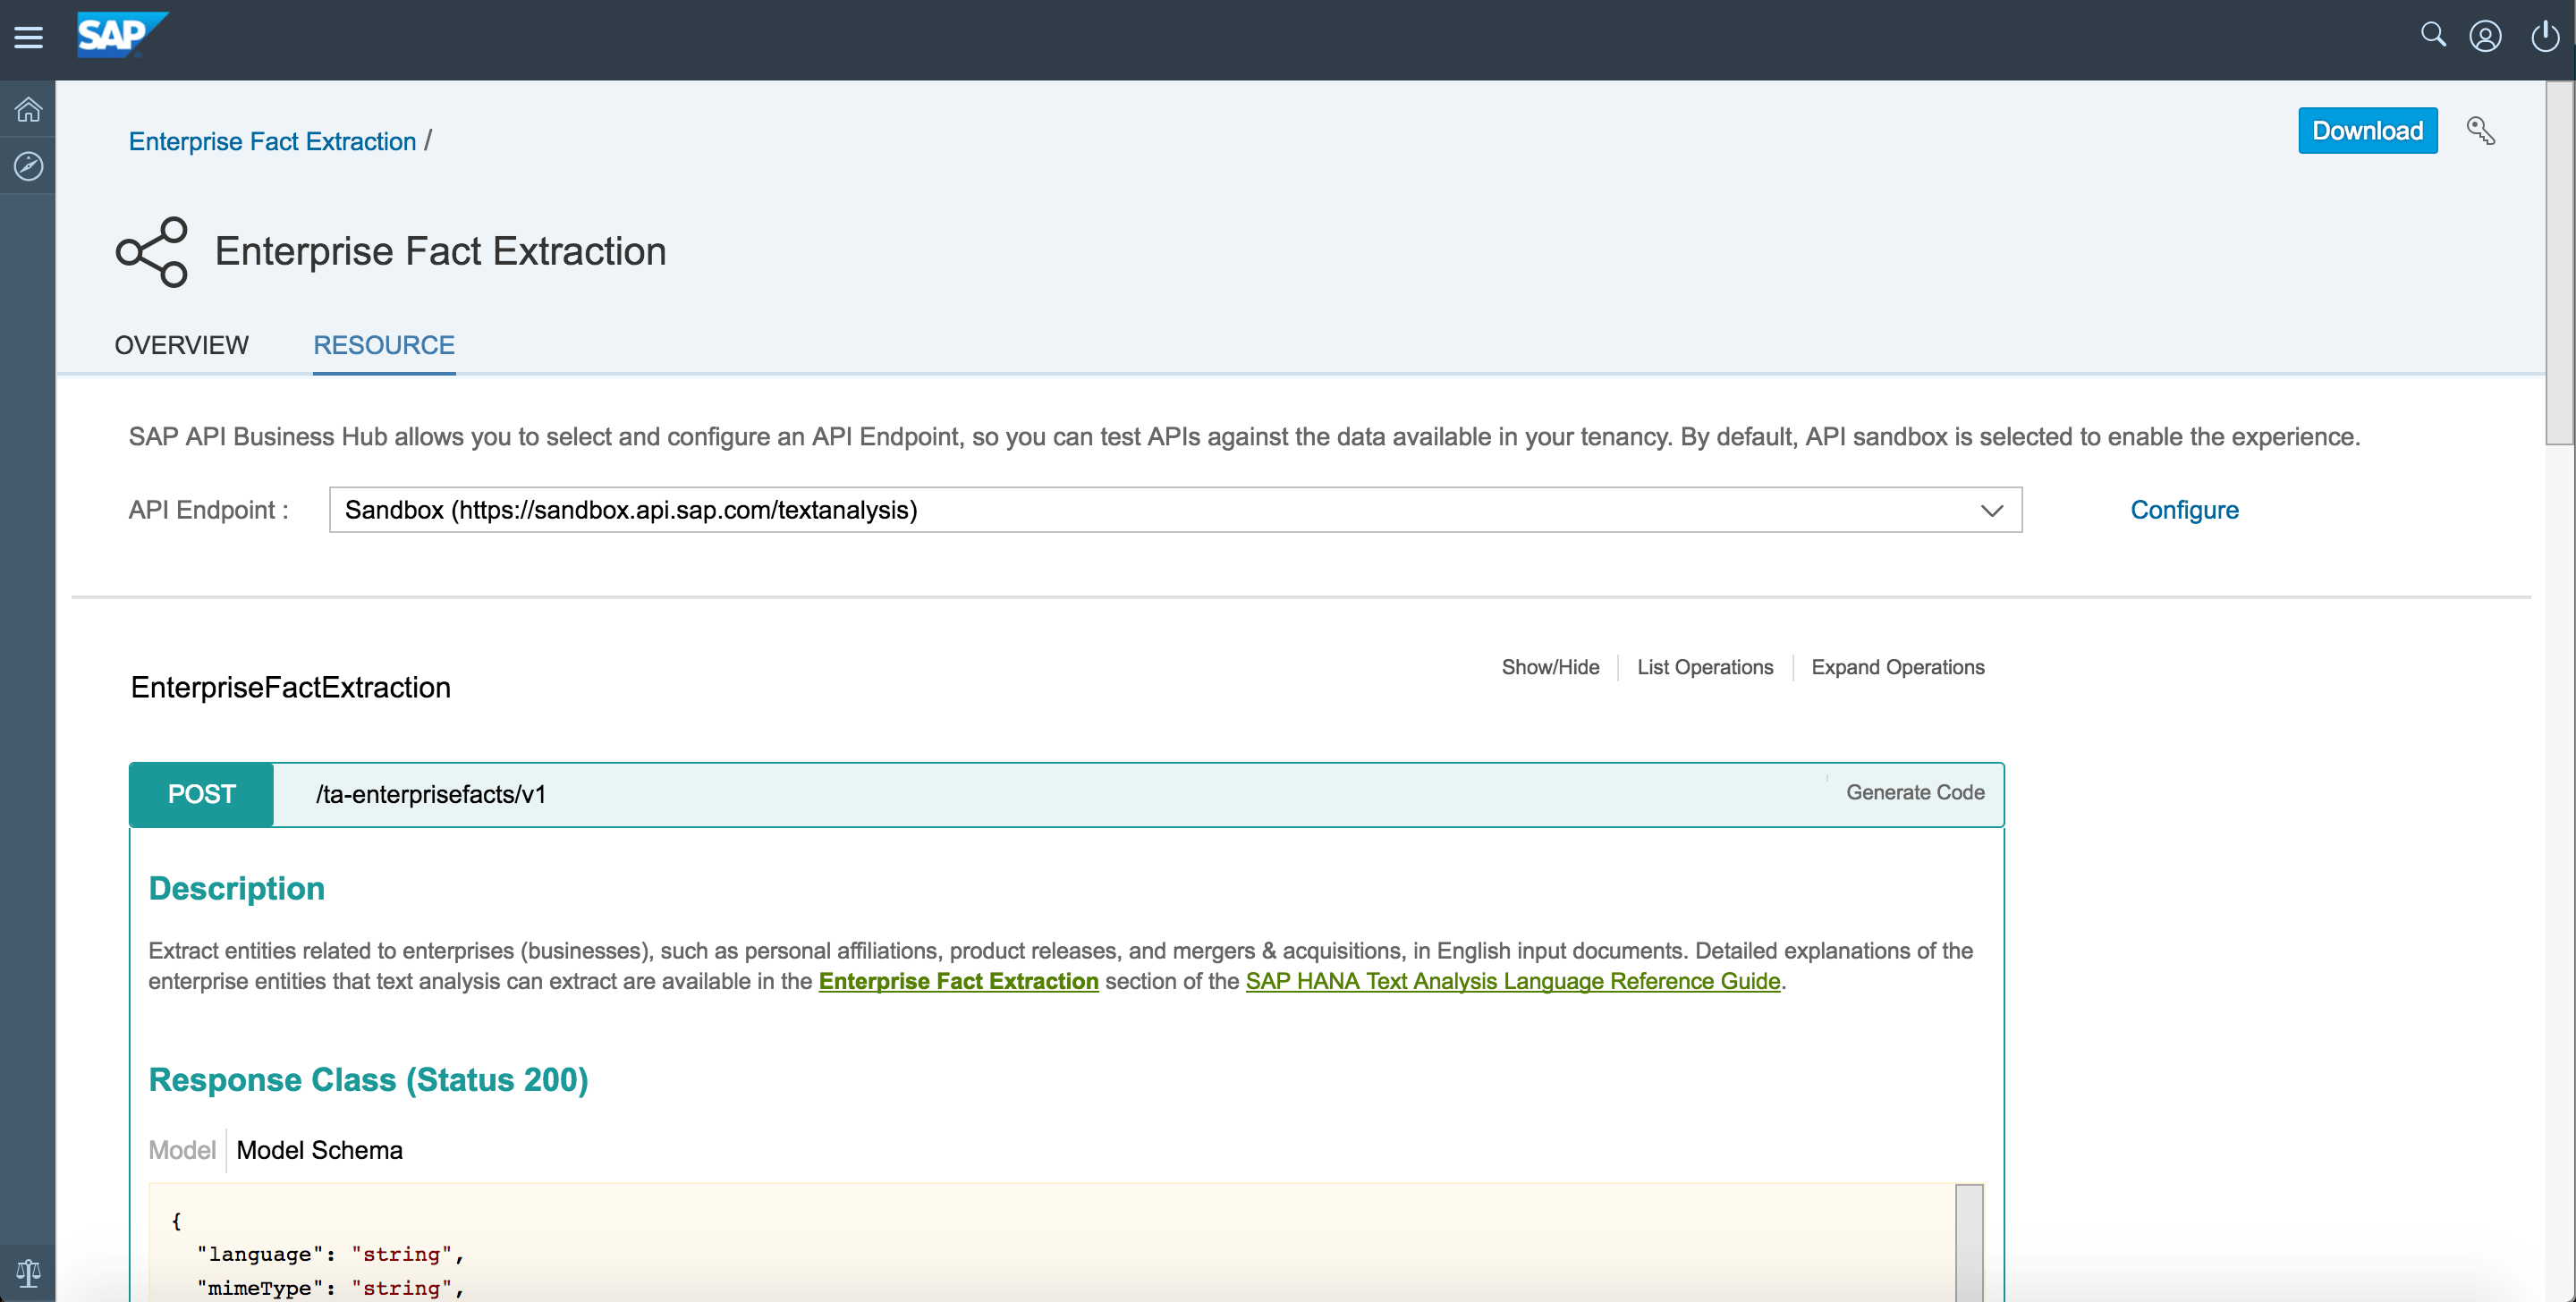
Step 8: For this API, there is only one POST service available. Click on “POST” to expand the detail of that service. Then, select “Generate Code” on the right end of “POST” bar to get a pop out window, then choose on “Copy to Clipboard” on the bottom of the pop out window.

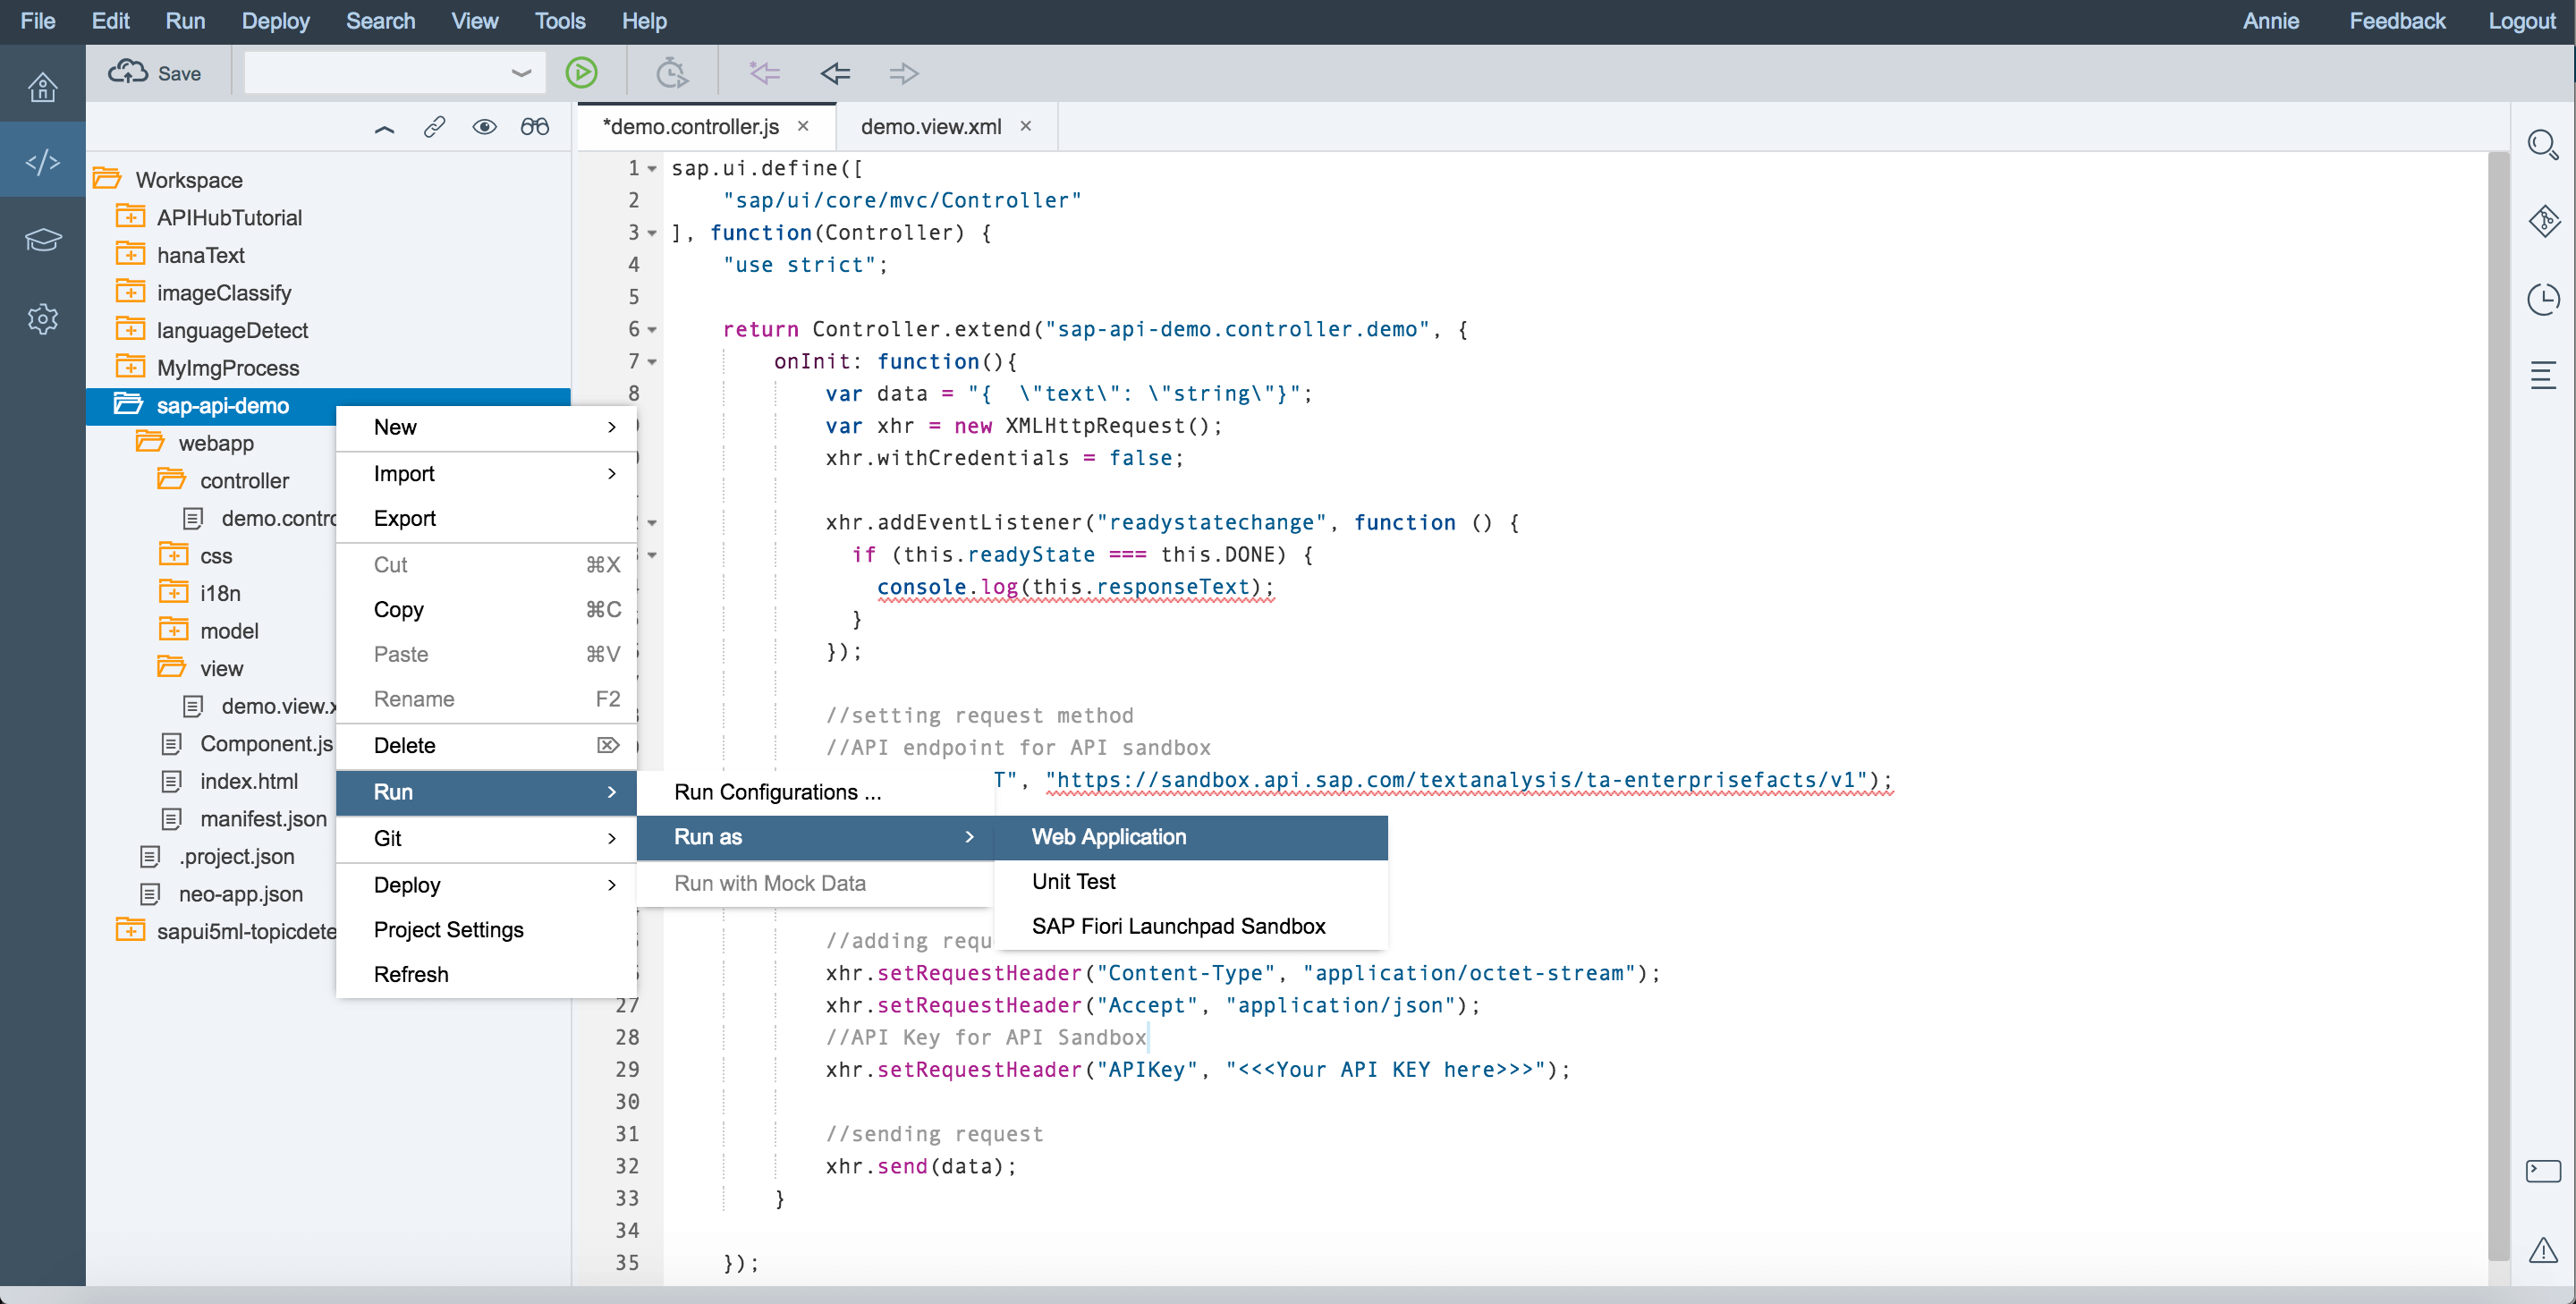
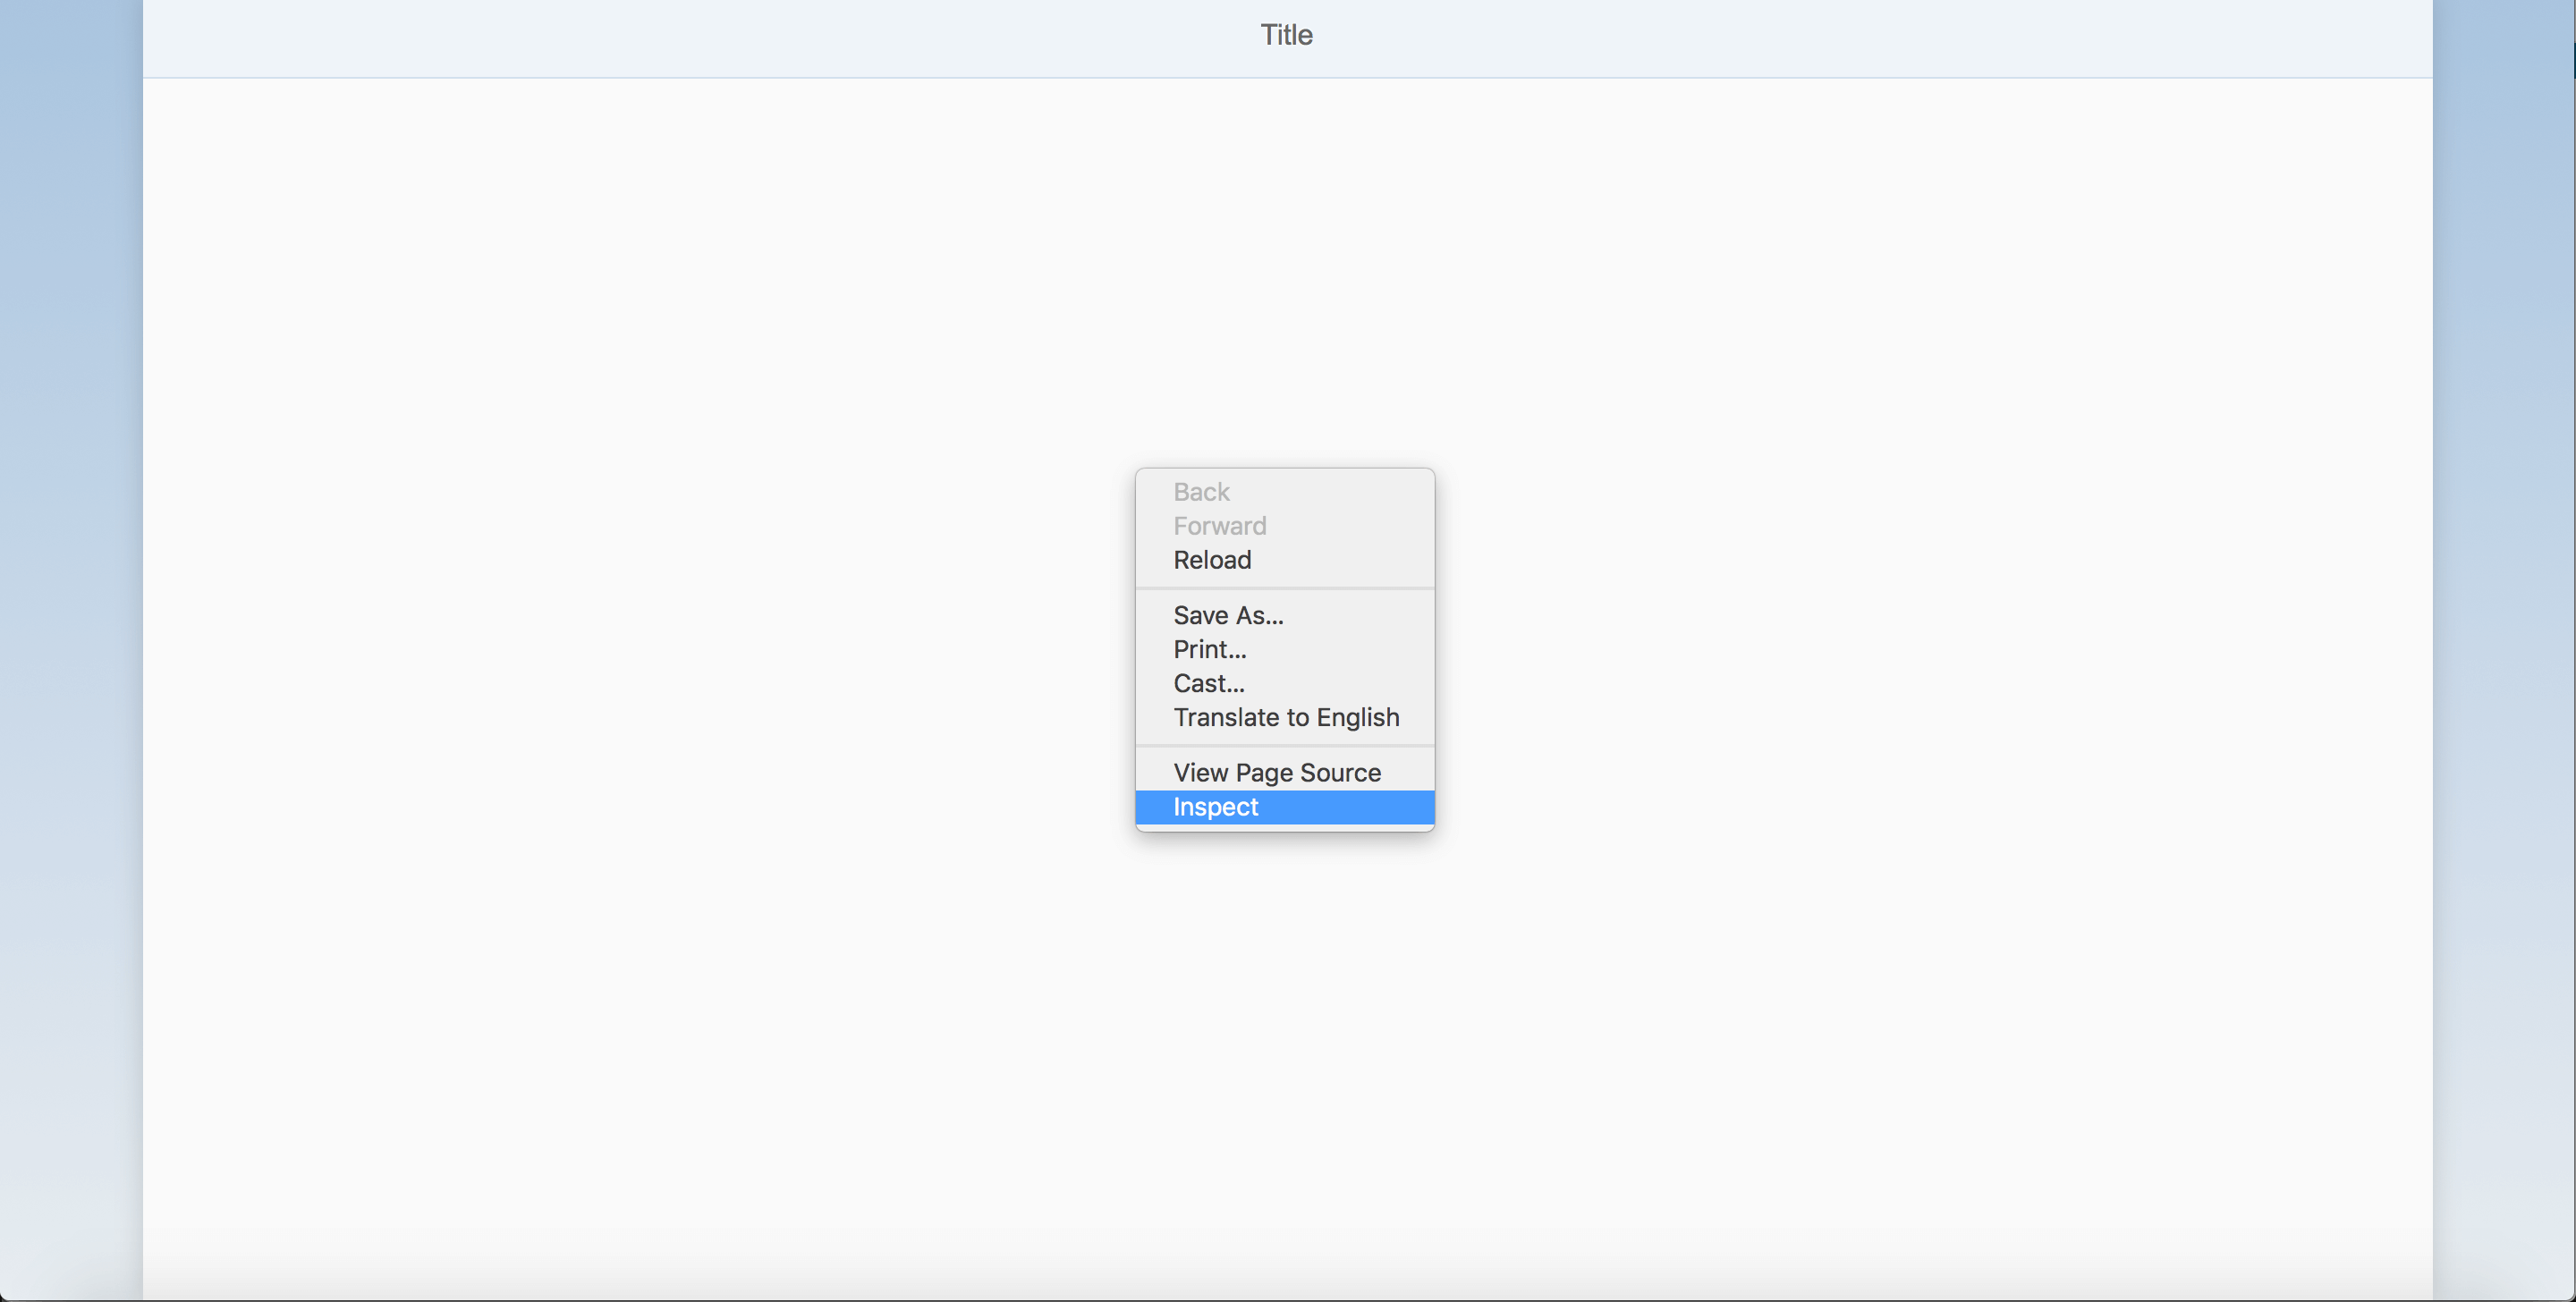
Step 10: When the application runs, a browser will be automatically opened. If you are not in Chrome, you’ll need to copy this url and paste it into Chrome to open it, as we are using the Chrome Developer tool. You should see a page which looks like the below image with a” Title” bar. You’ll need to right click in the window and choose “inspect”.
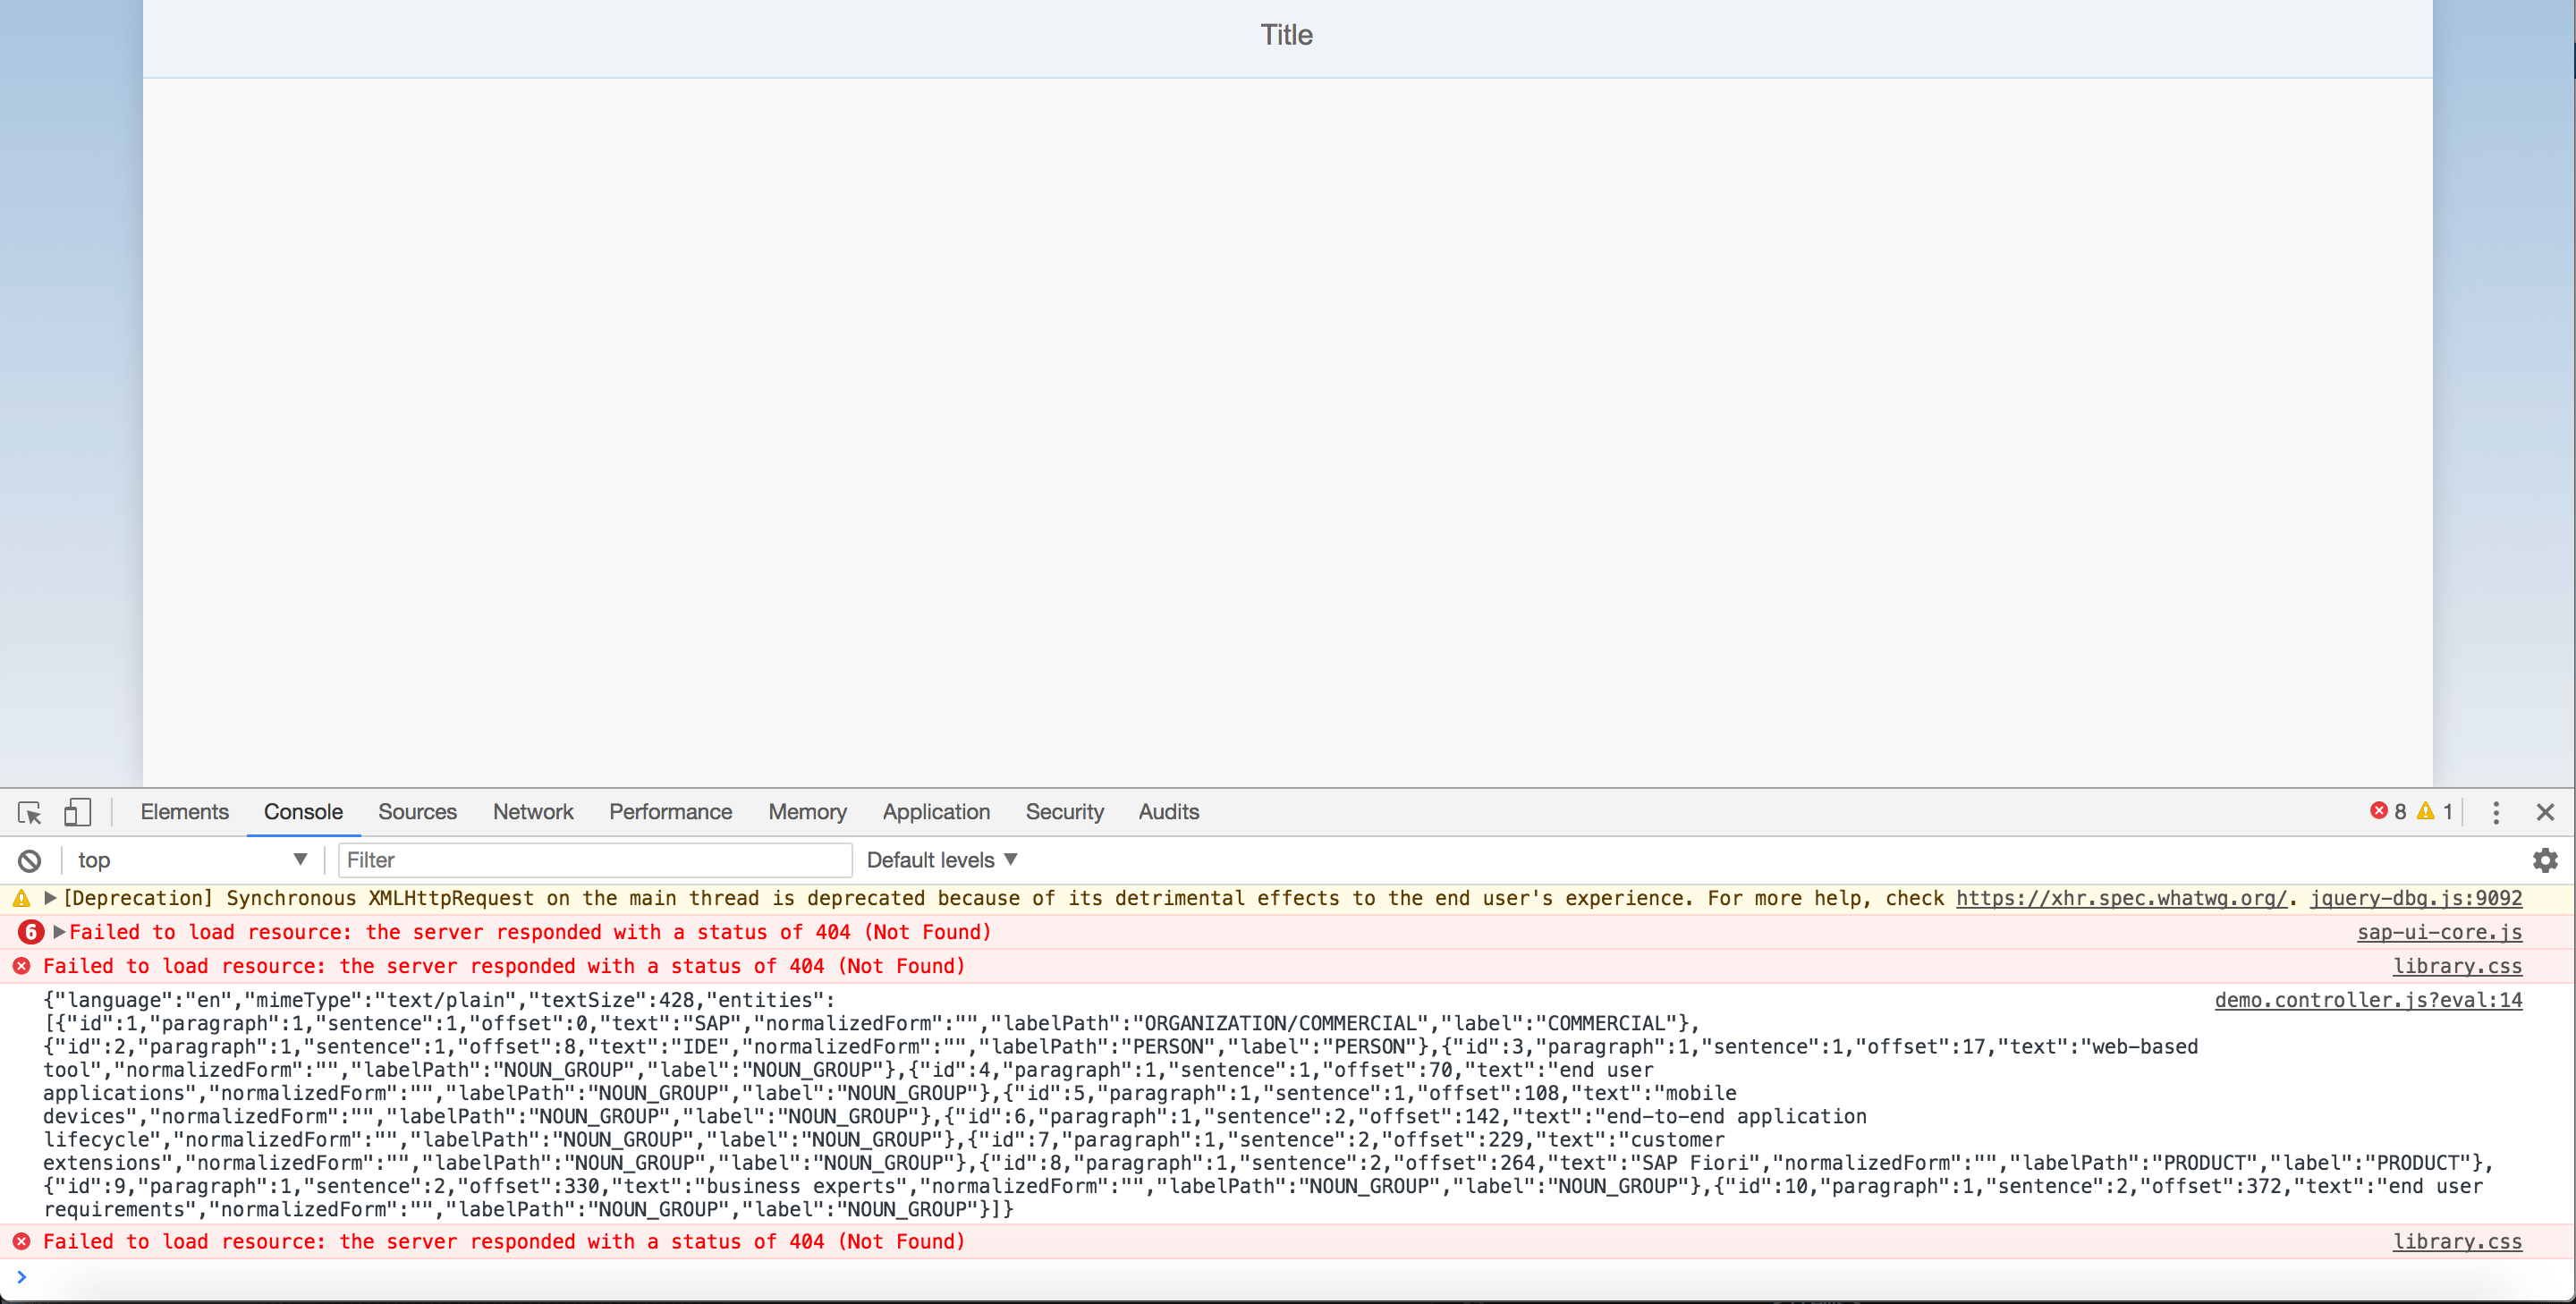
Step 11: Next, you’ll want to ignore the 404 error that is caused by inherent Web IDE elements. The return message of the POST will be recorded inside the ”Console” section. From the returned message, we can now make the design decision to use “Text” and “Label” information for the UI display.
Part 2: Designing the UI
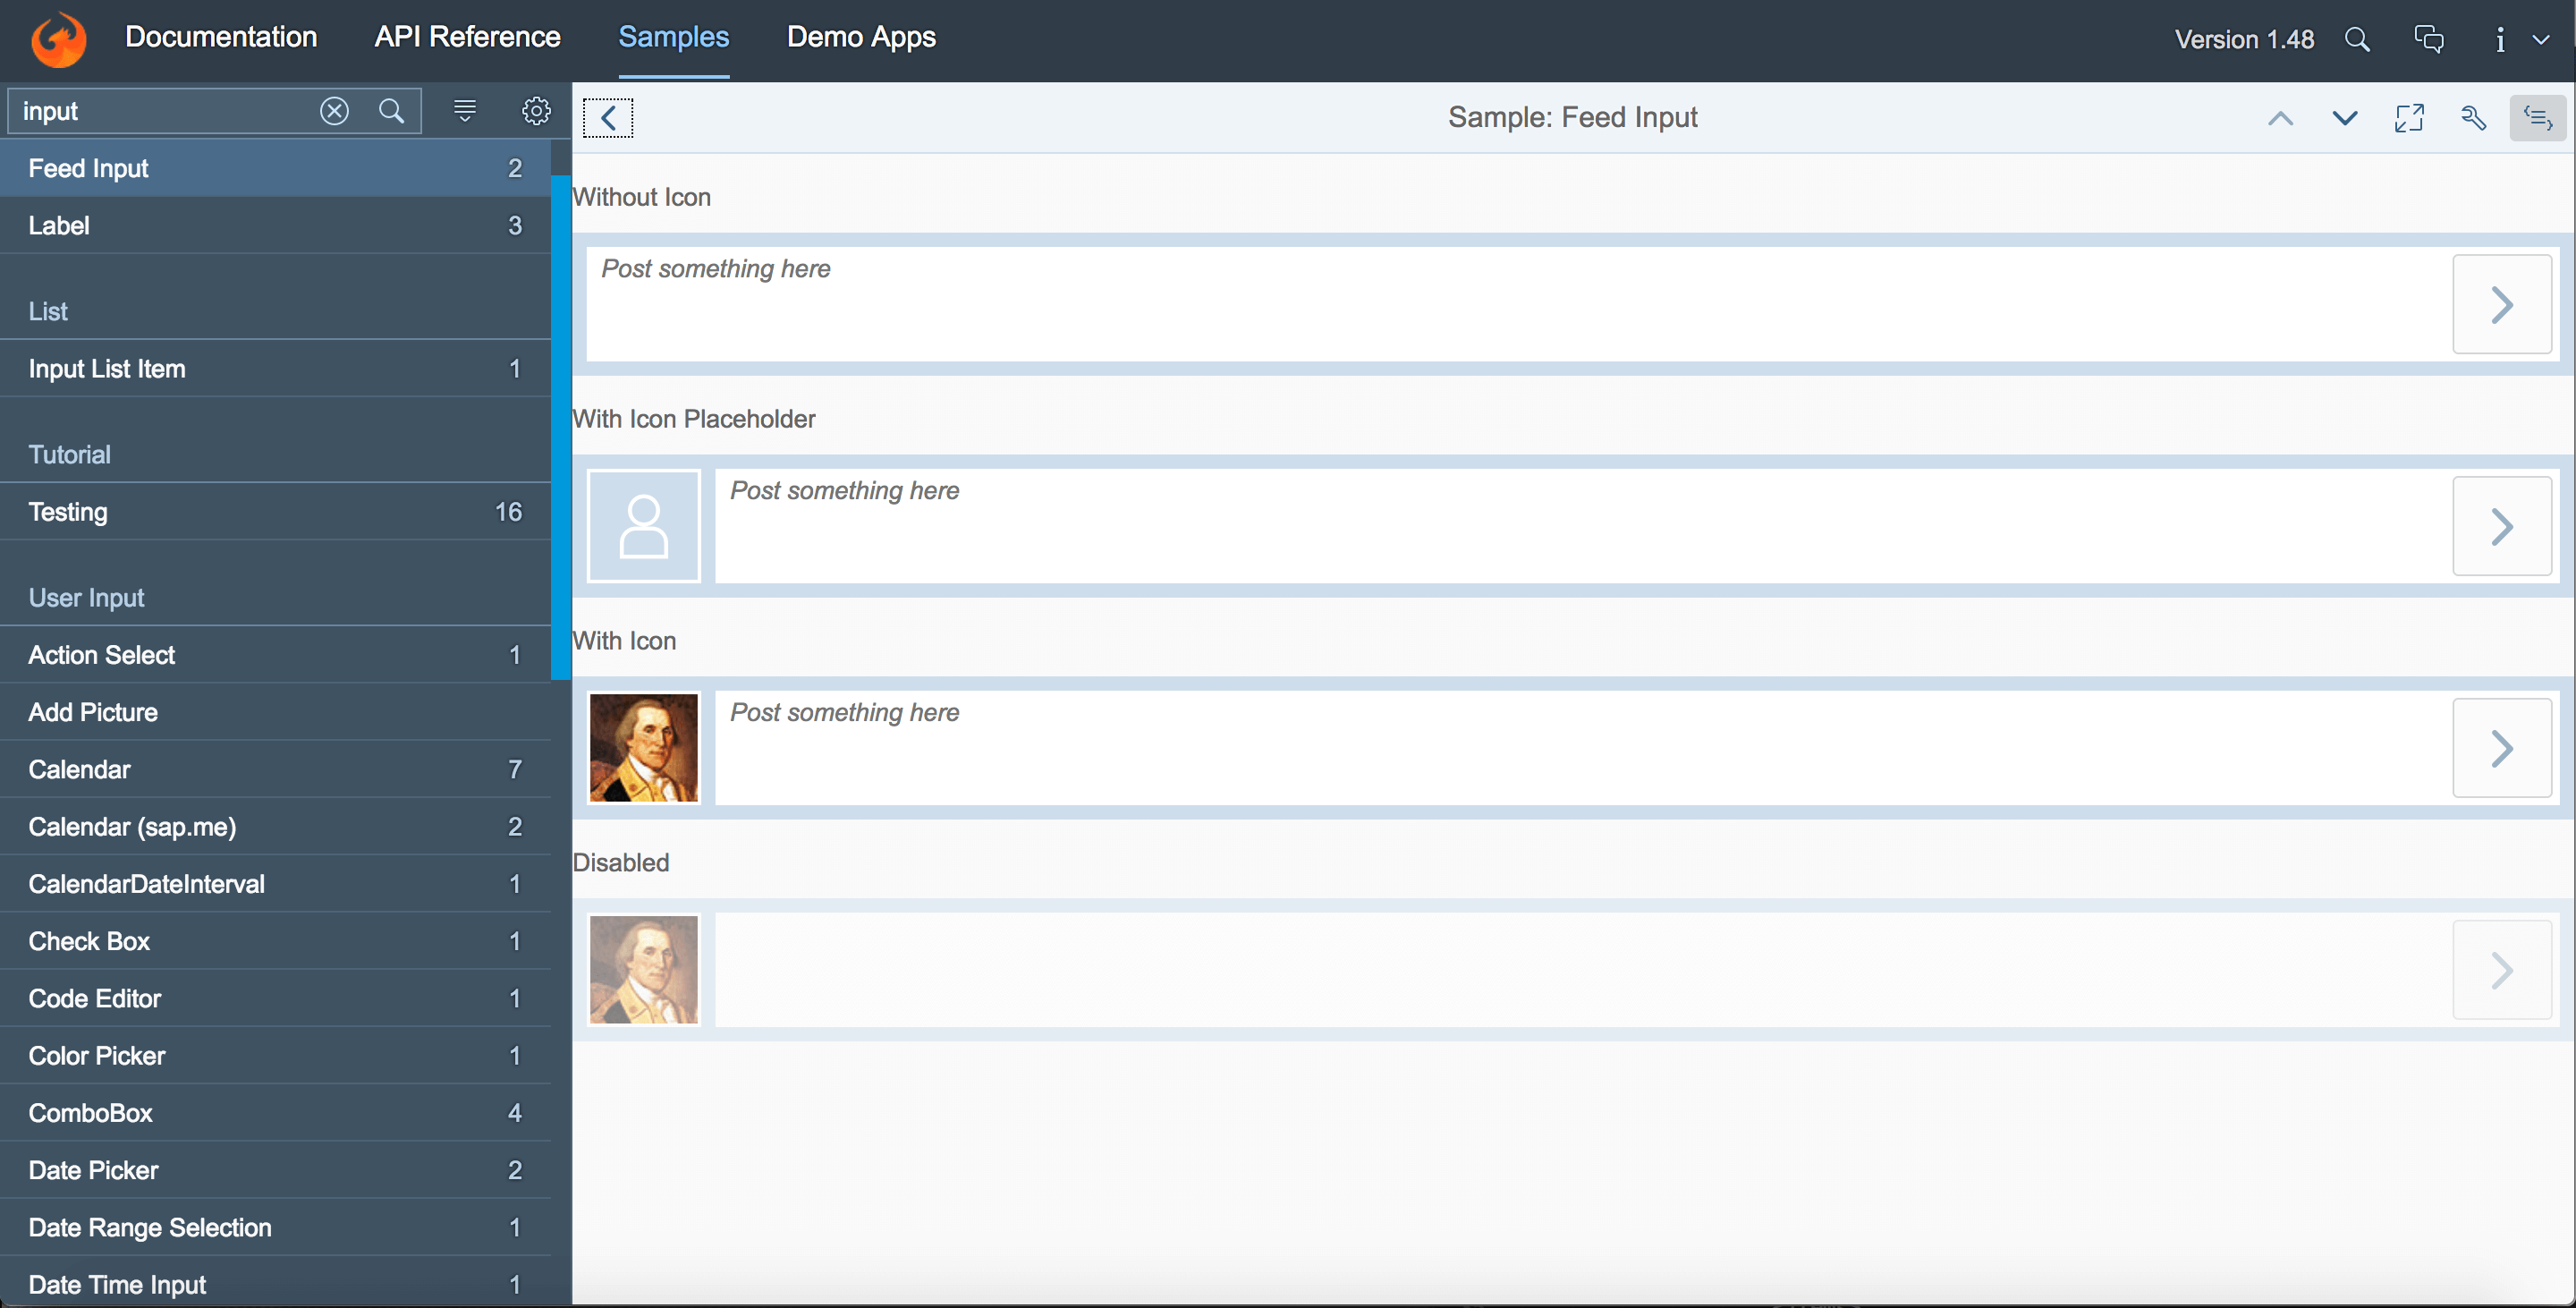
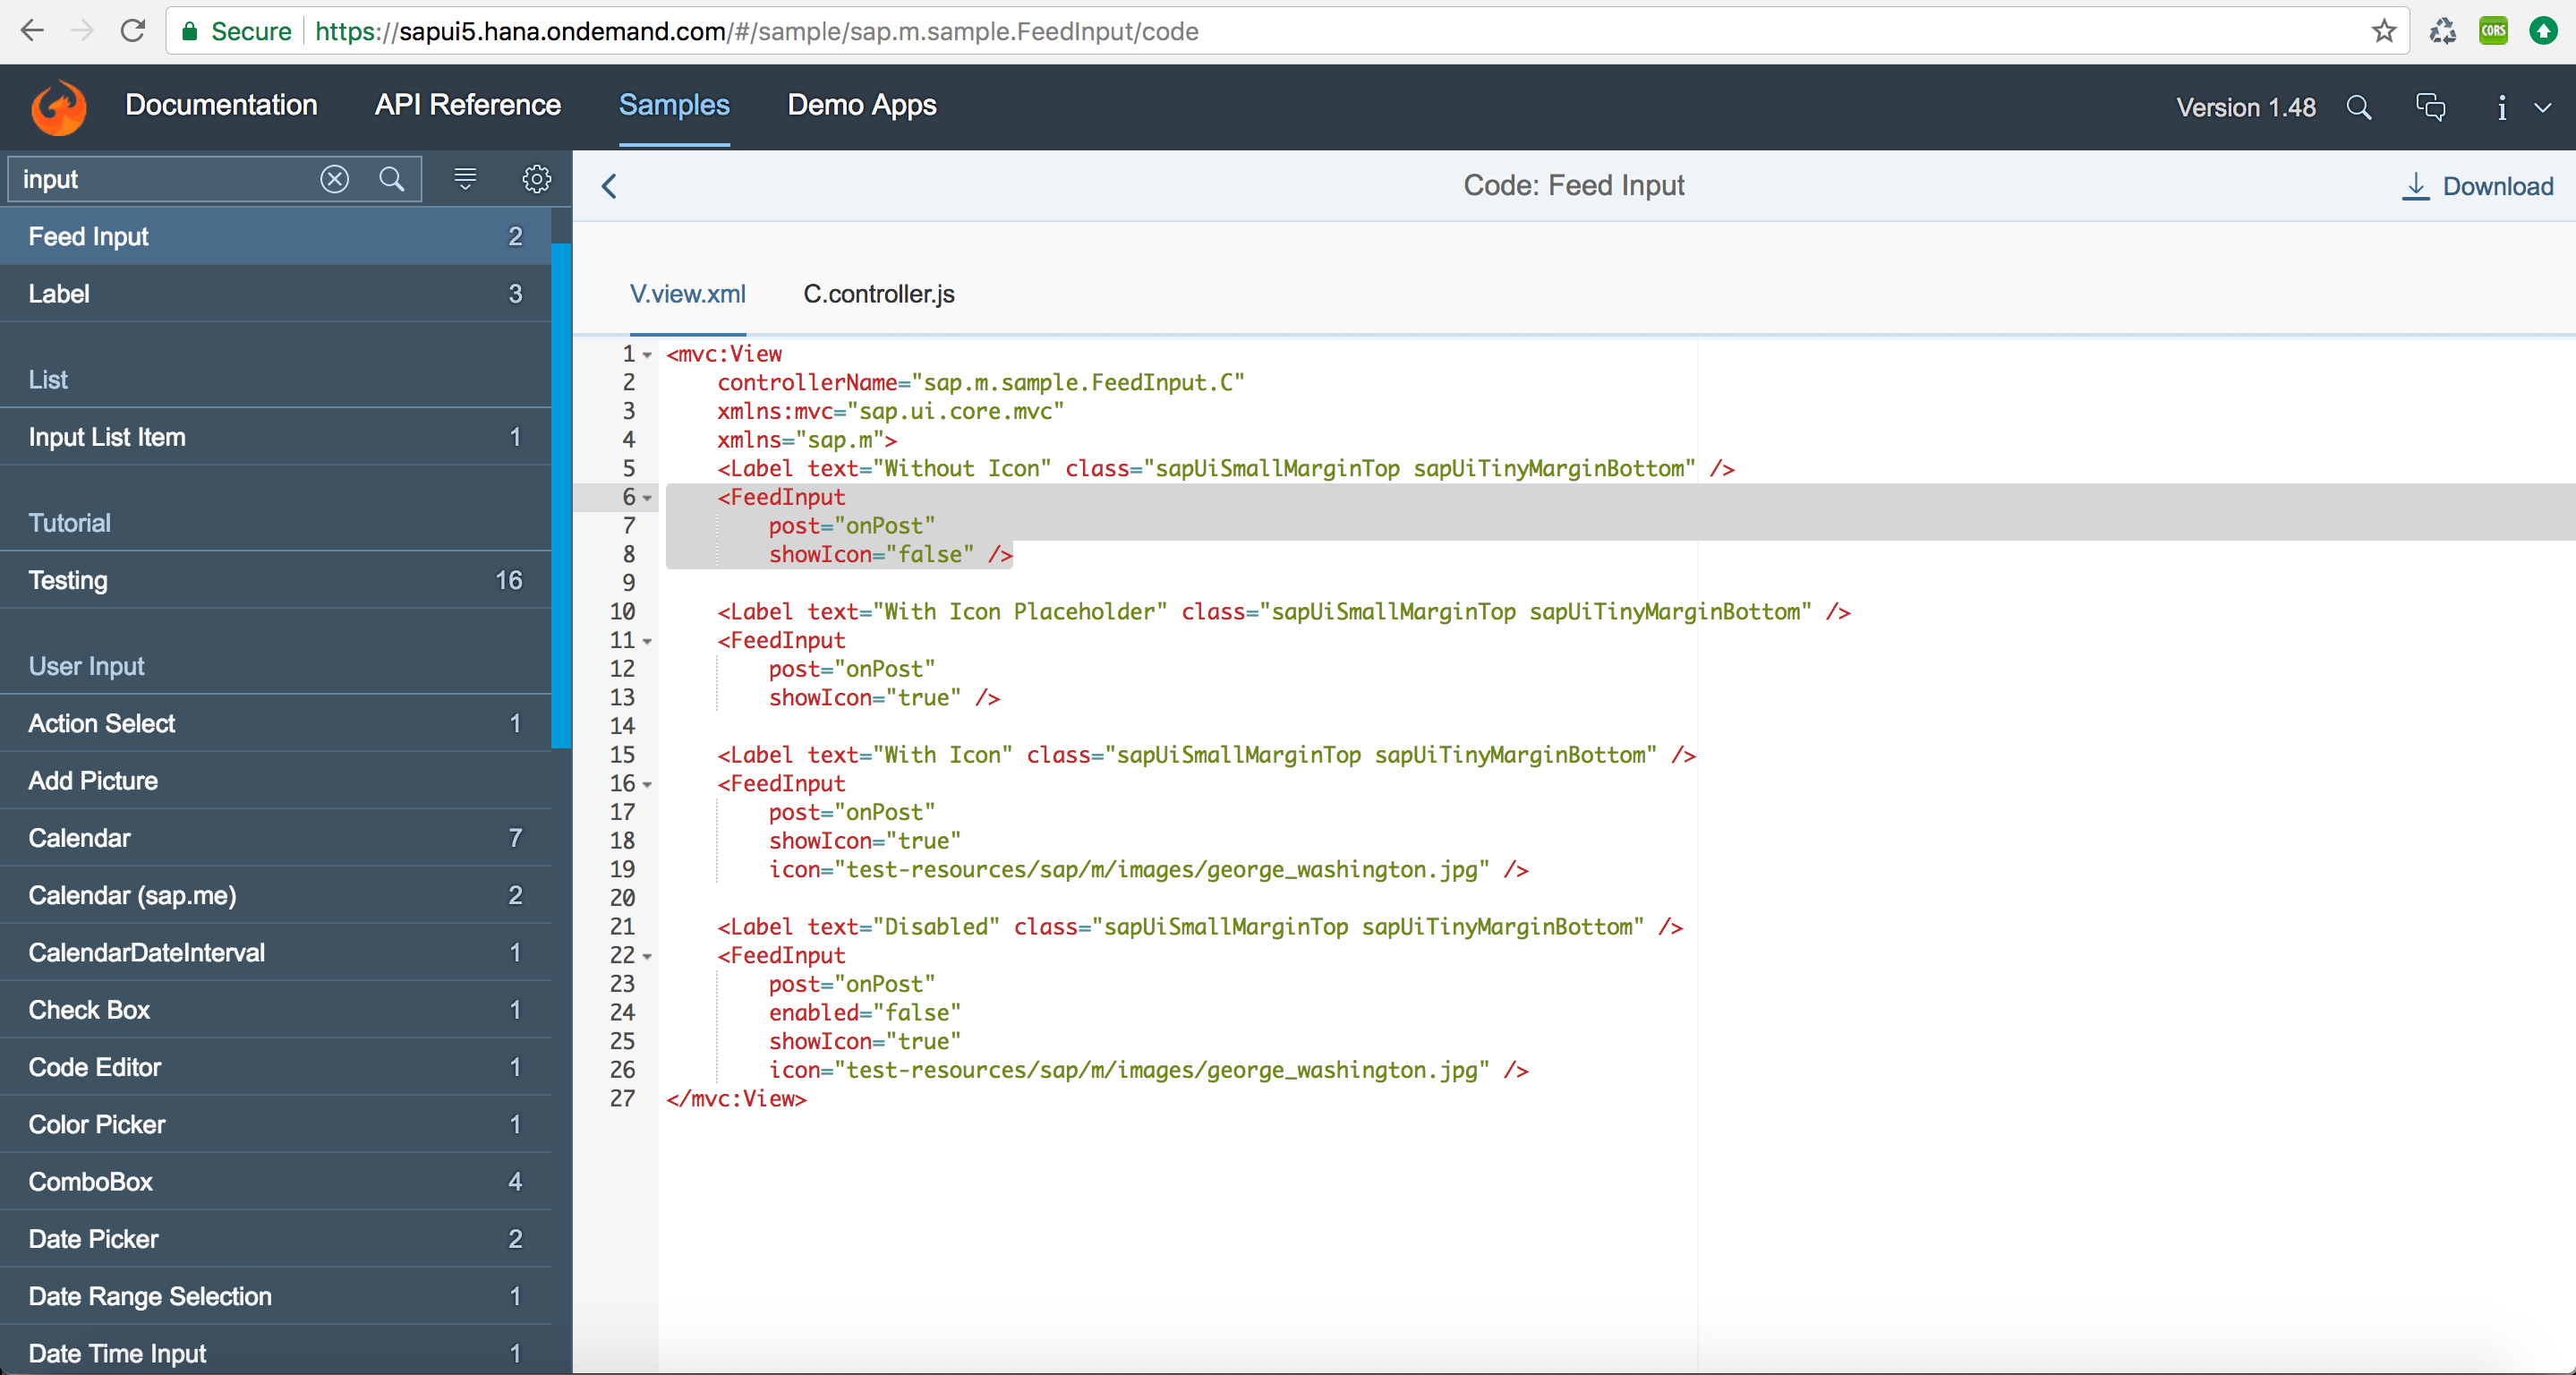
Step 1: Now that our WEB IDE is set up, we can begin to design the UI page. You can visit https://sapui5.hana.ondemand.com/#/sample/ to access well-done code for the UI component. Since we need an input box for text data input, we’ll first search for “input” on the top left, and choose “Feed Input”. Then we will select “Feed Input” from the Samples label.

Step 2: Once inside the Sample of Feed Input (as shown below), choose the top right icon that look like “<=>” to show the code. Select the first options, feedInput for use, then hit ctrl+C to copy it.
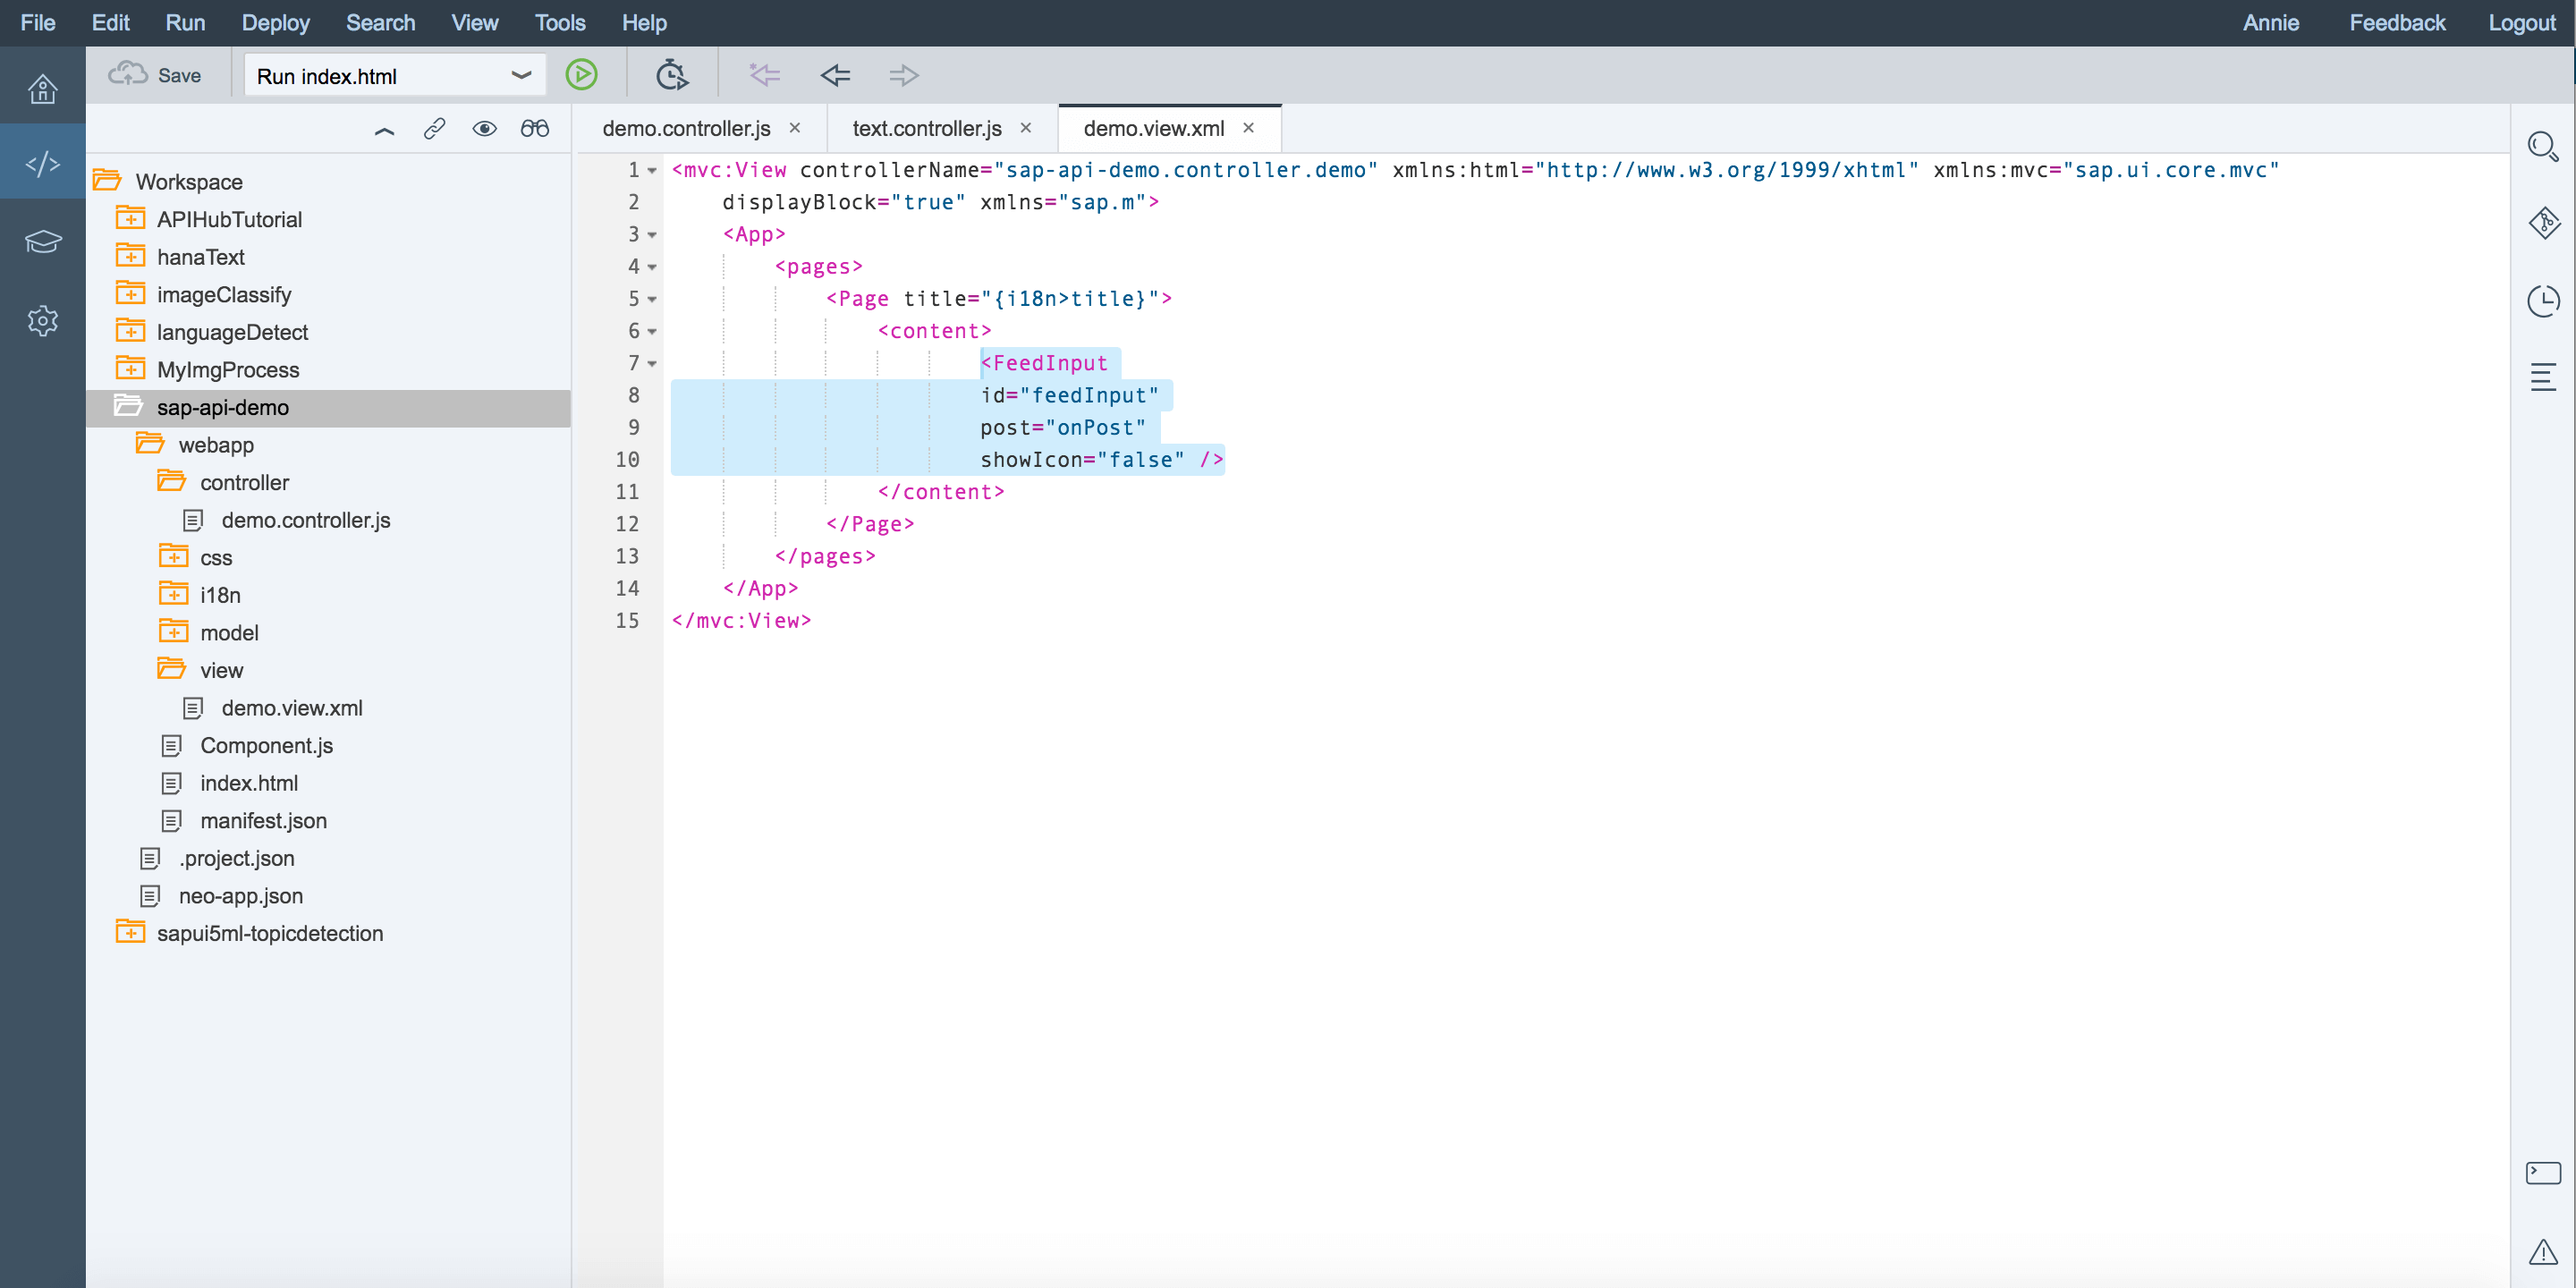
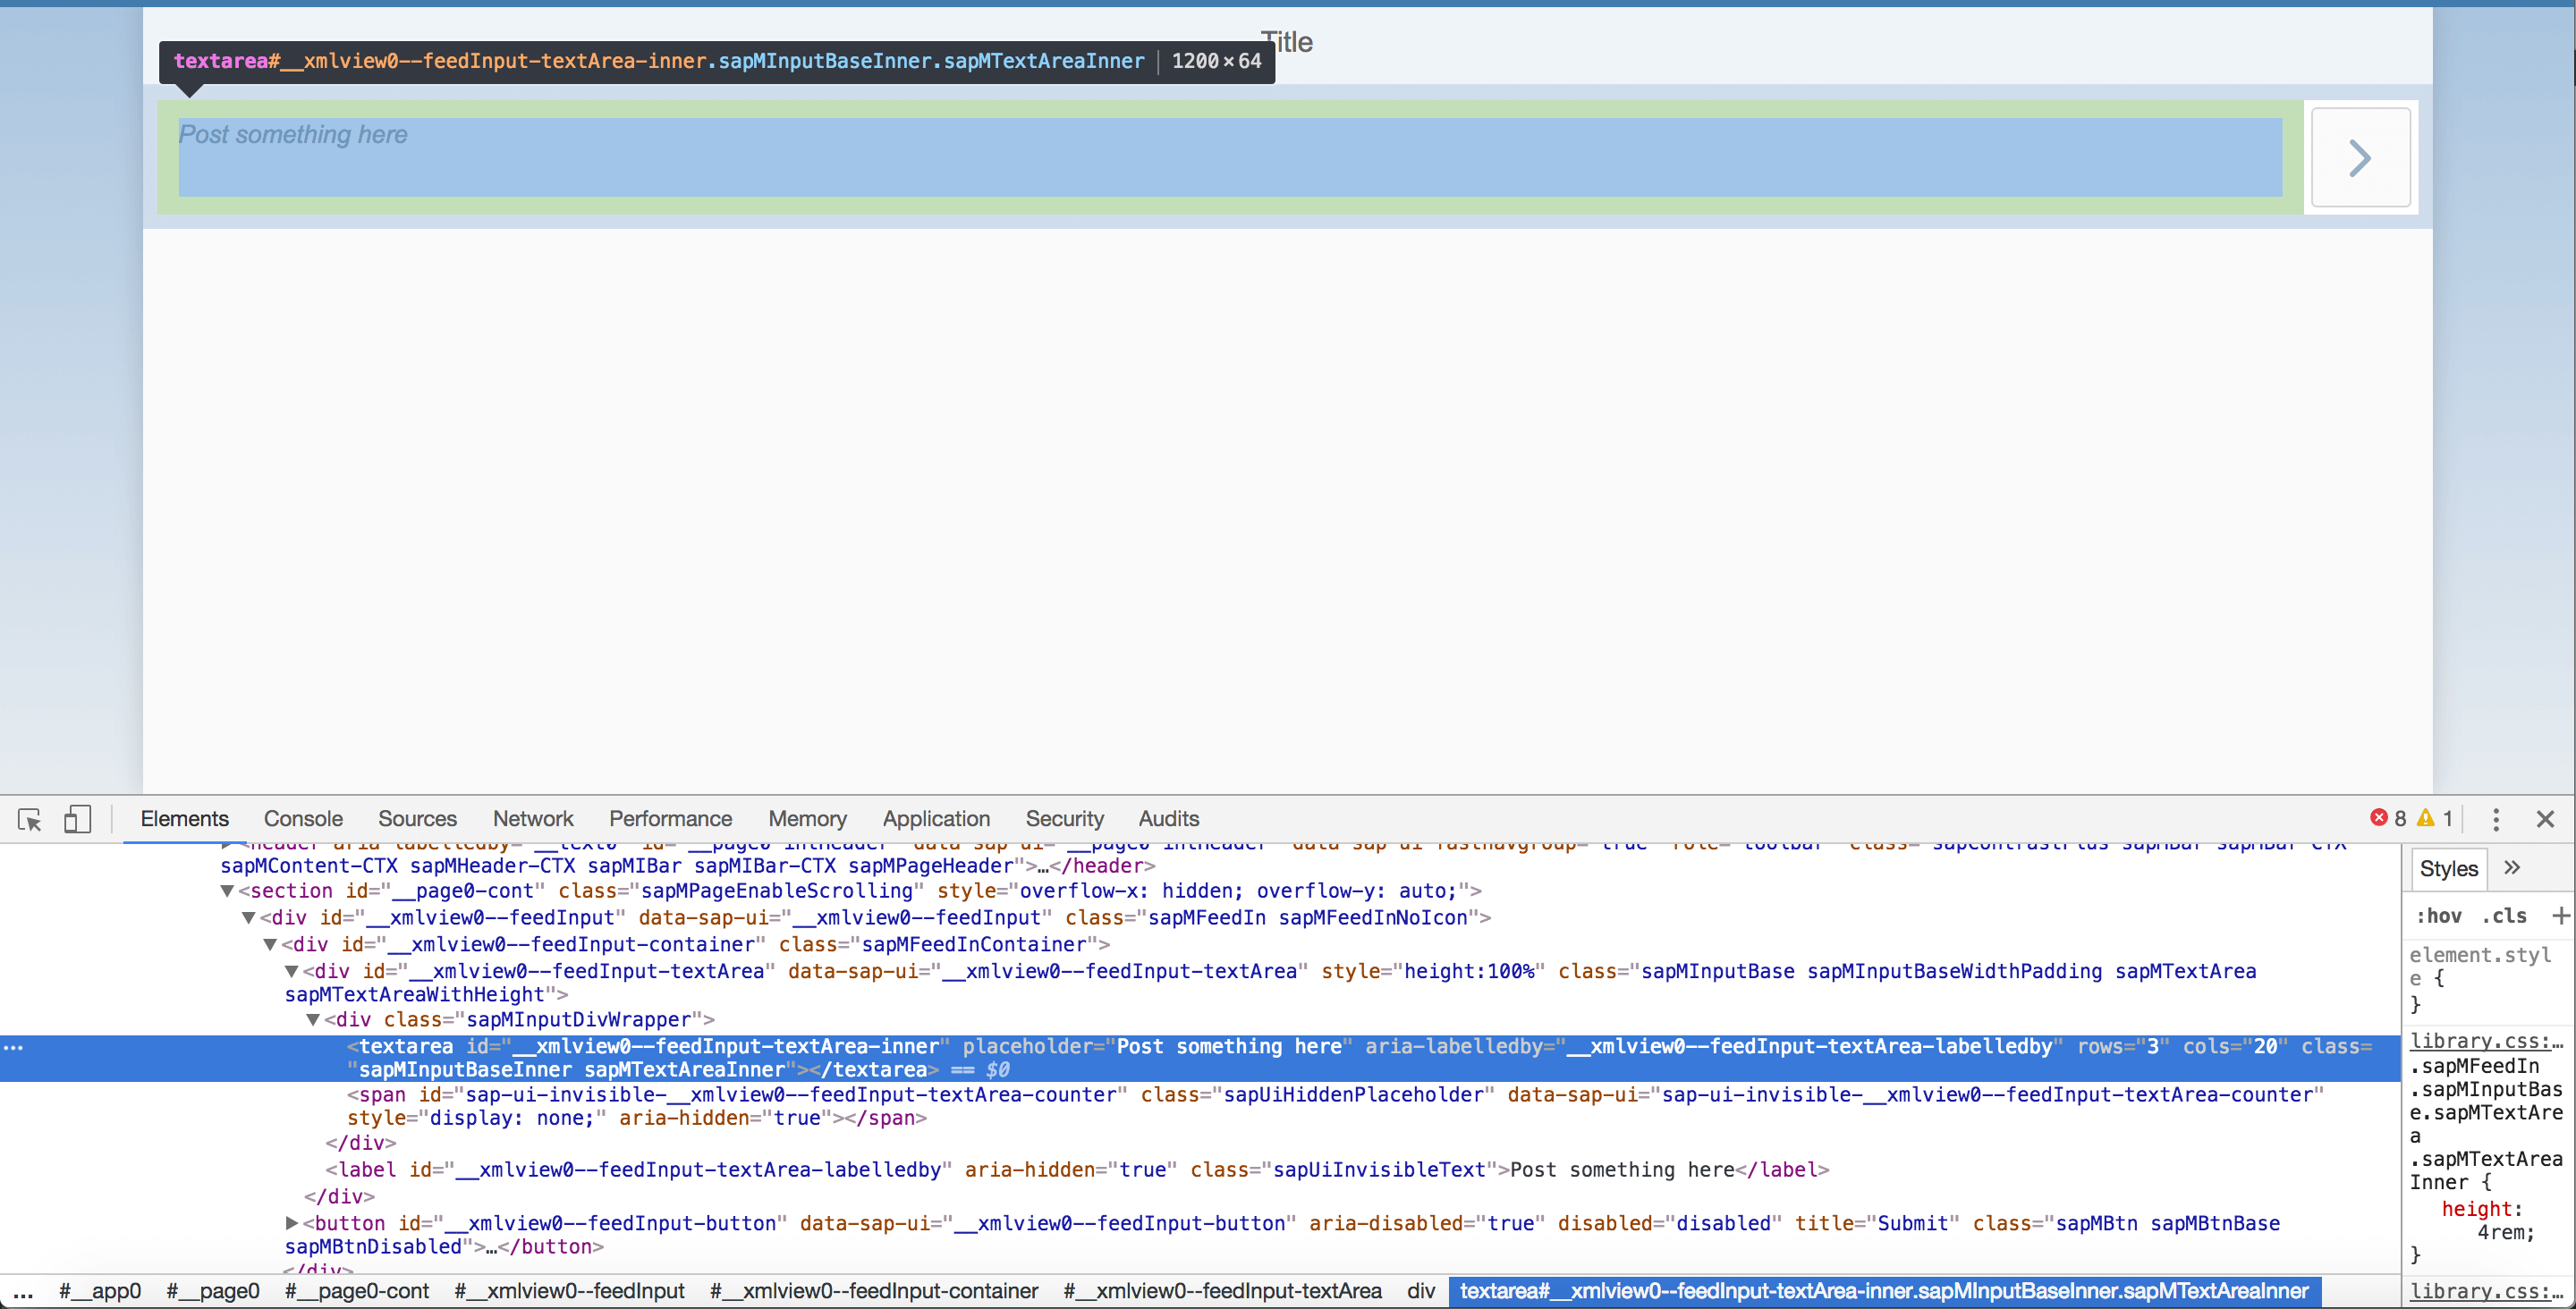
Step 3: Paste the code in <content> of demo.view.xml in the Web ID and add a line of id=”feedInput”. Choose “Save” and run the application again. Next, in the “Elements” section of the browser, copy the id of the newly created textarea.
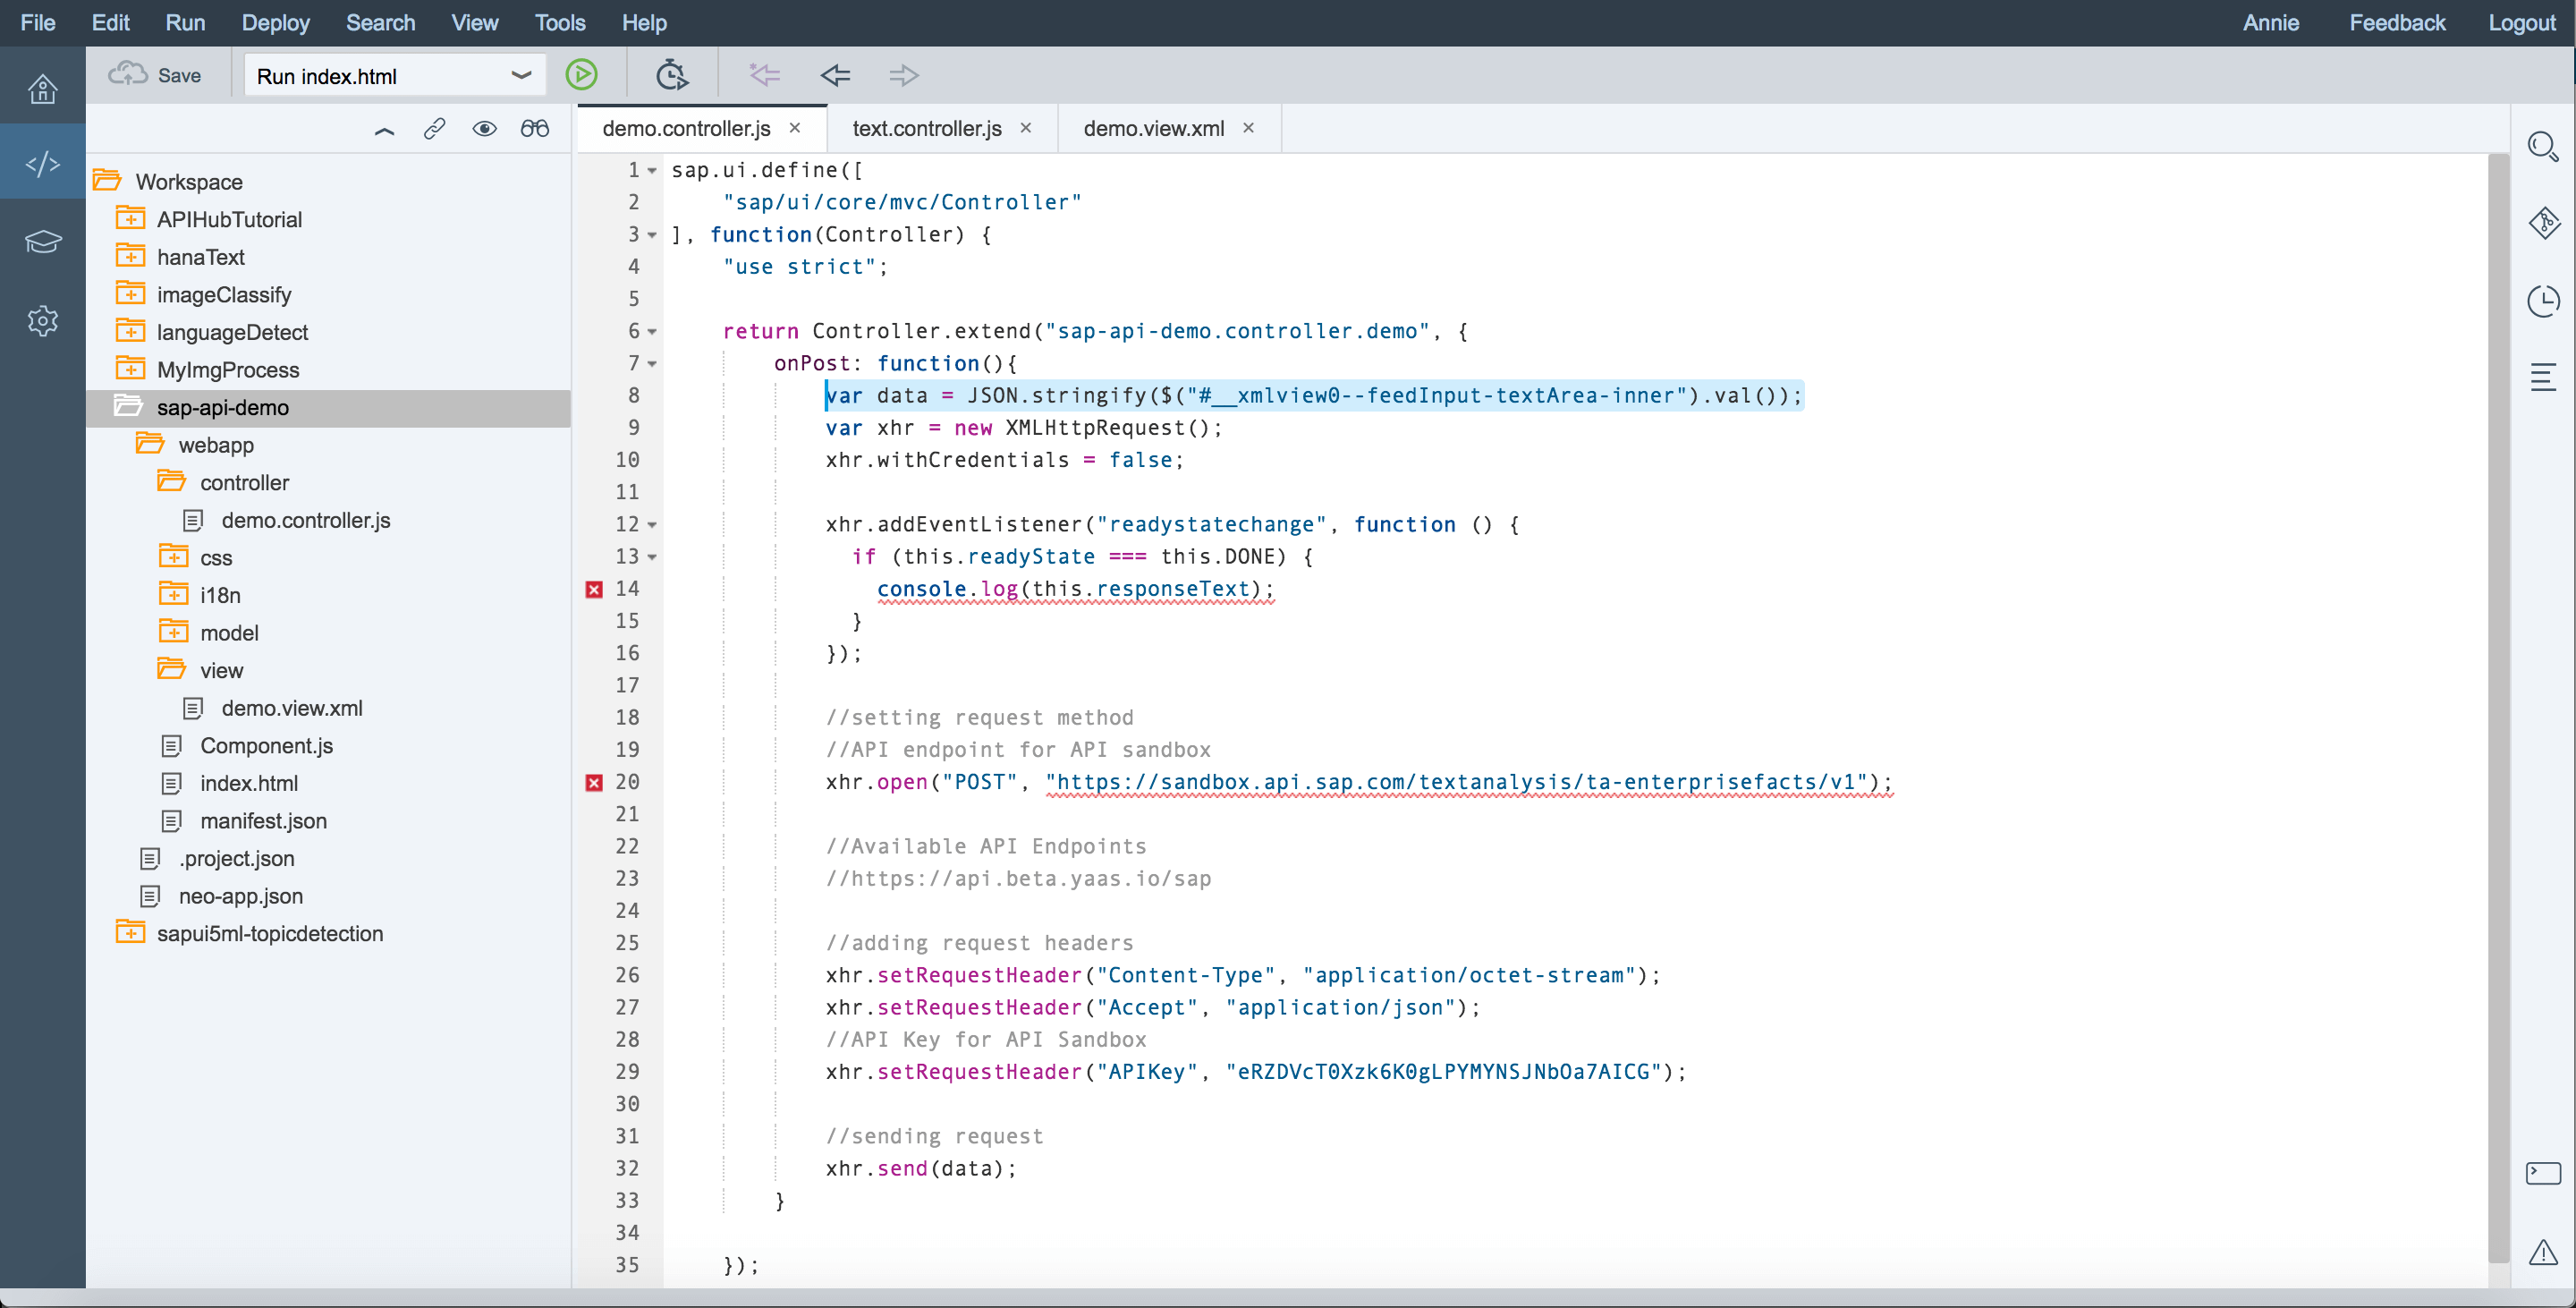
Step 4: Once inside demo.controller.js, change the function name from onInit to onPost. You’ll also need to modify the var data line as below, with the jQuery of the textarea id to retrieve the user’s input value.
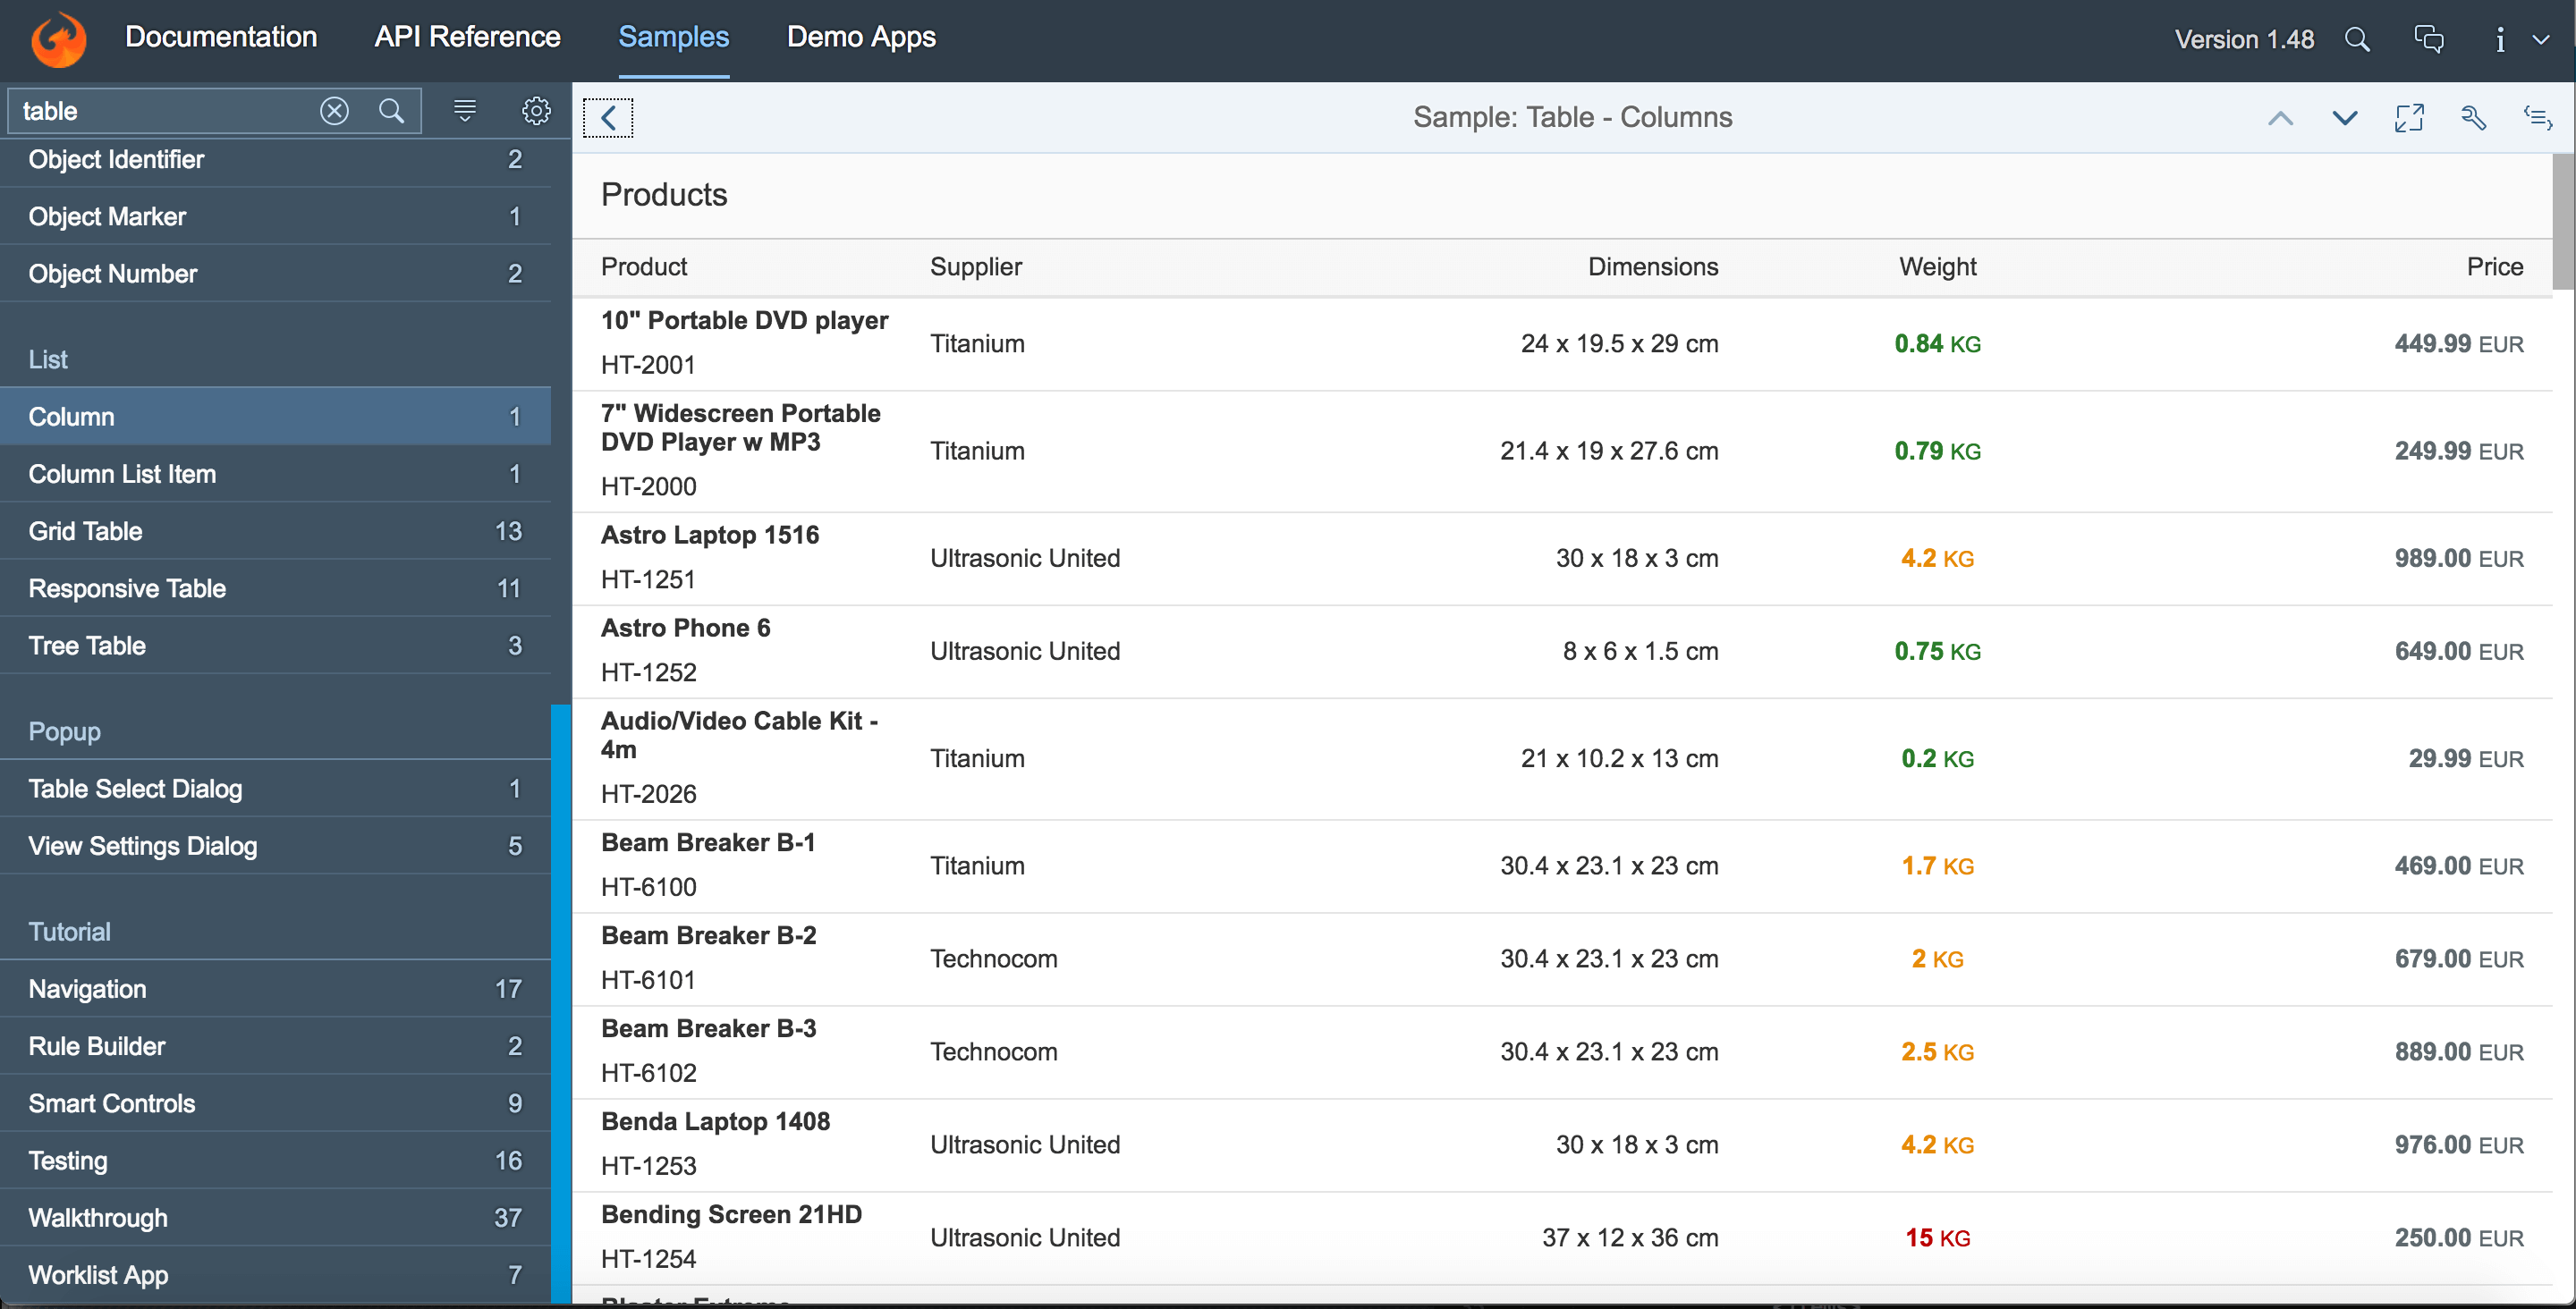
Step 5: Next, we’ll need to create a UI5 table to contain the analysis result of the user input. To do so, you’ll need to return to the SAPUI5 Documentation Samples and search for table, then choose Columns, and click on top right “<=>” to show, and copy the code.
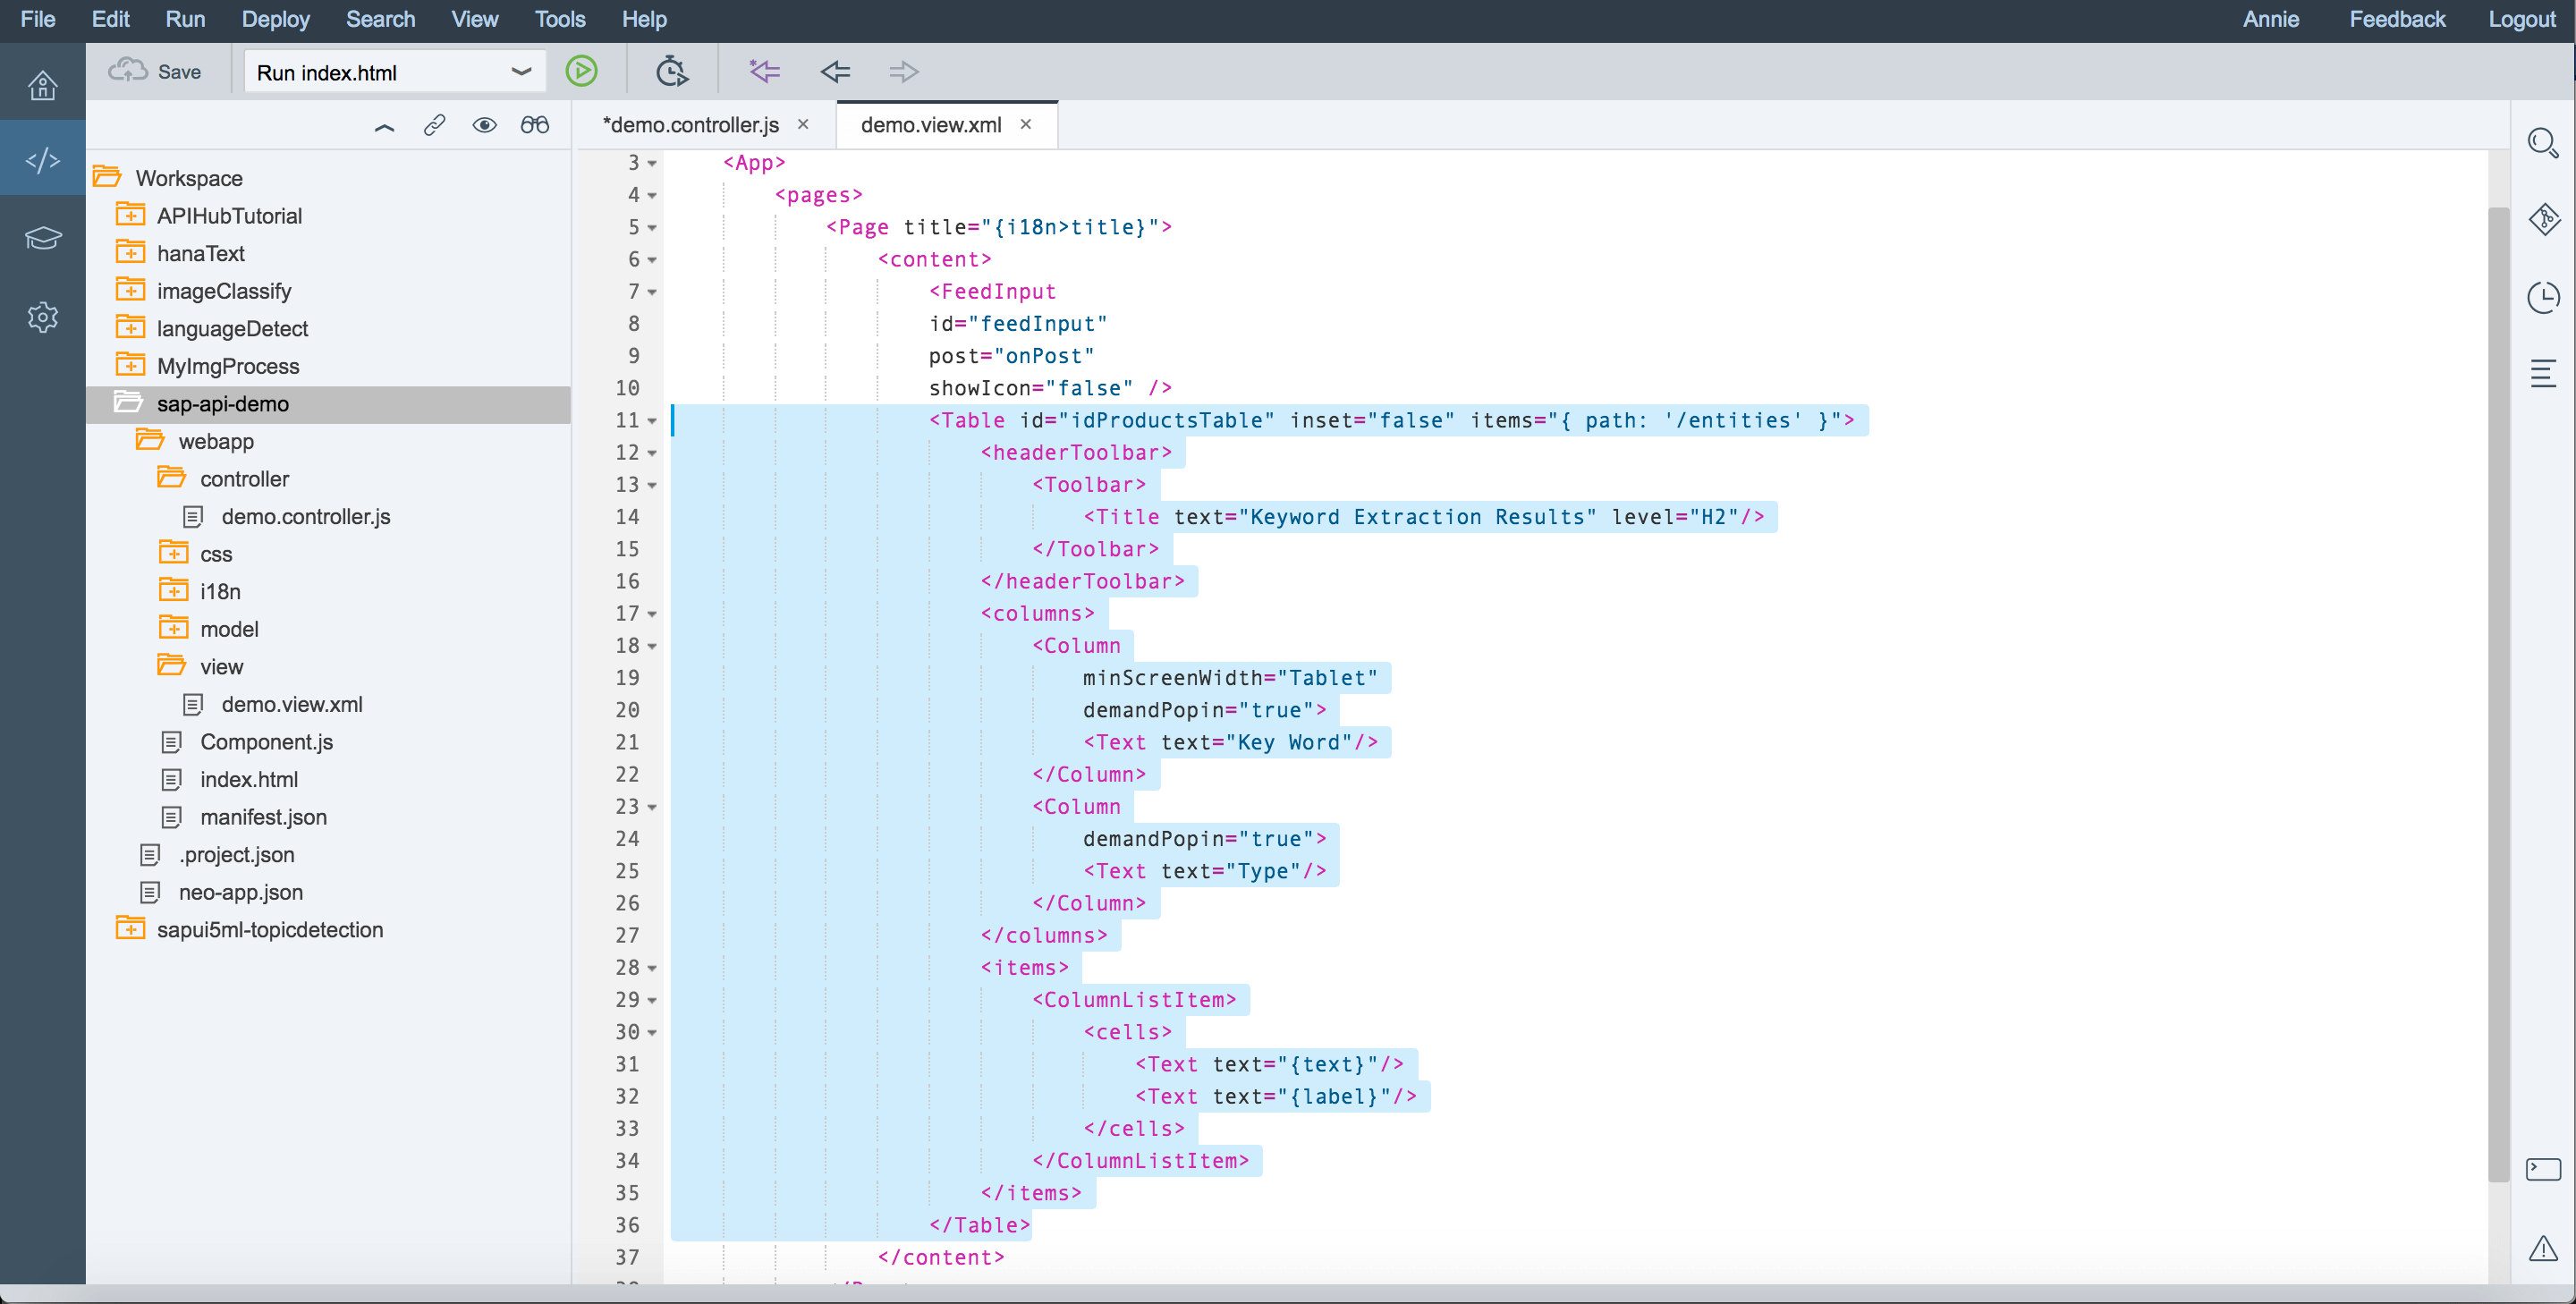
Step 6: Now that we’ve copied this code, we’ll want to paste it under the <FeedInput> component in demo.view.xml and modify the code as shown below. This modification was based on the return values we see from the Chrome console in step 11 of the first section.
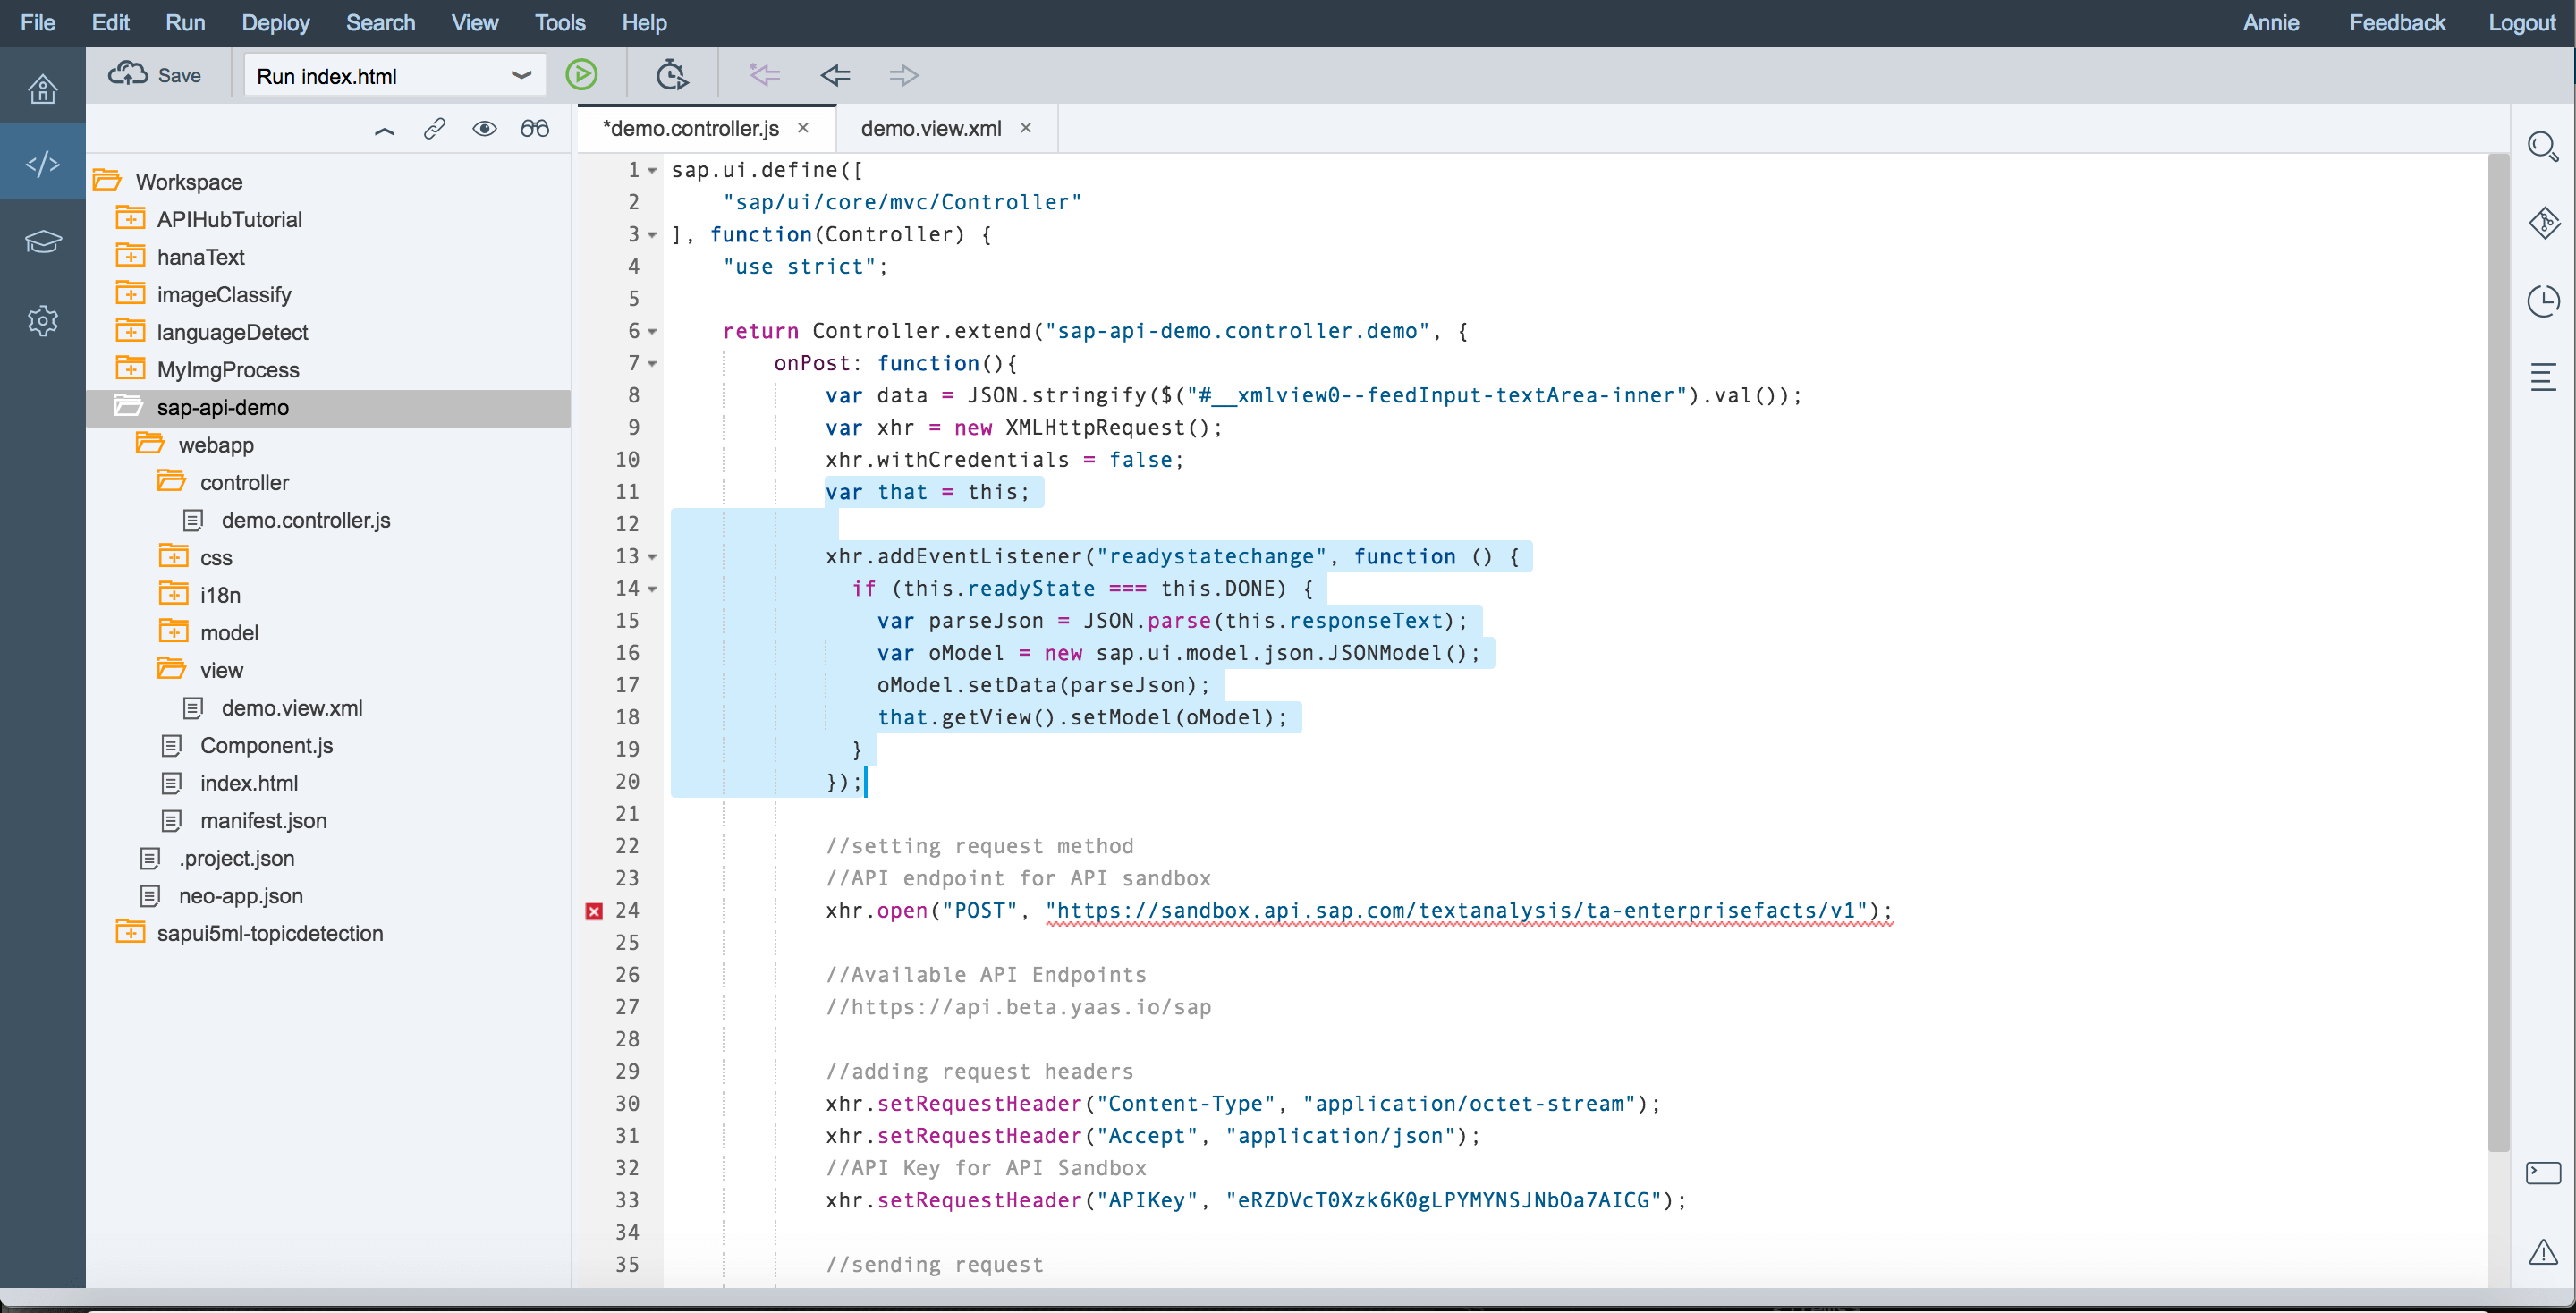
Step 7: Now, we will make changes in demo.controller.js as shown below. This will parse the responseText into a model to display in the UI later.
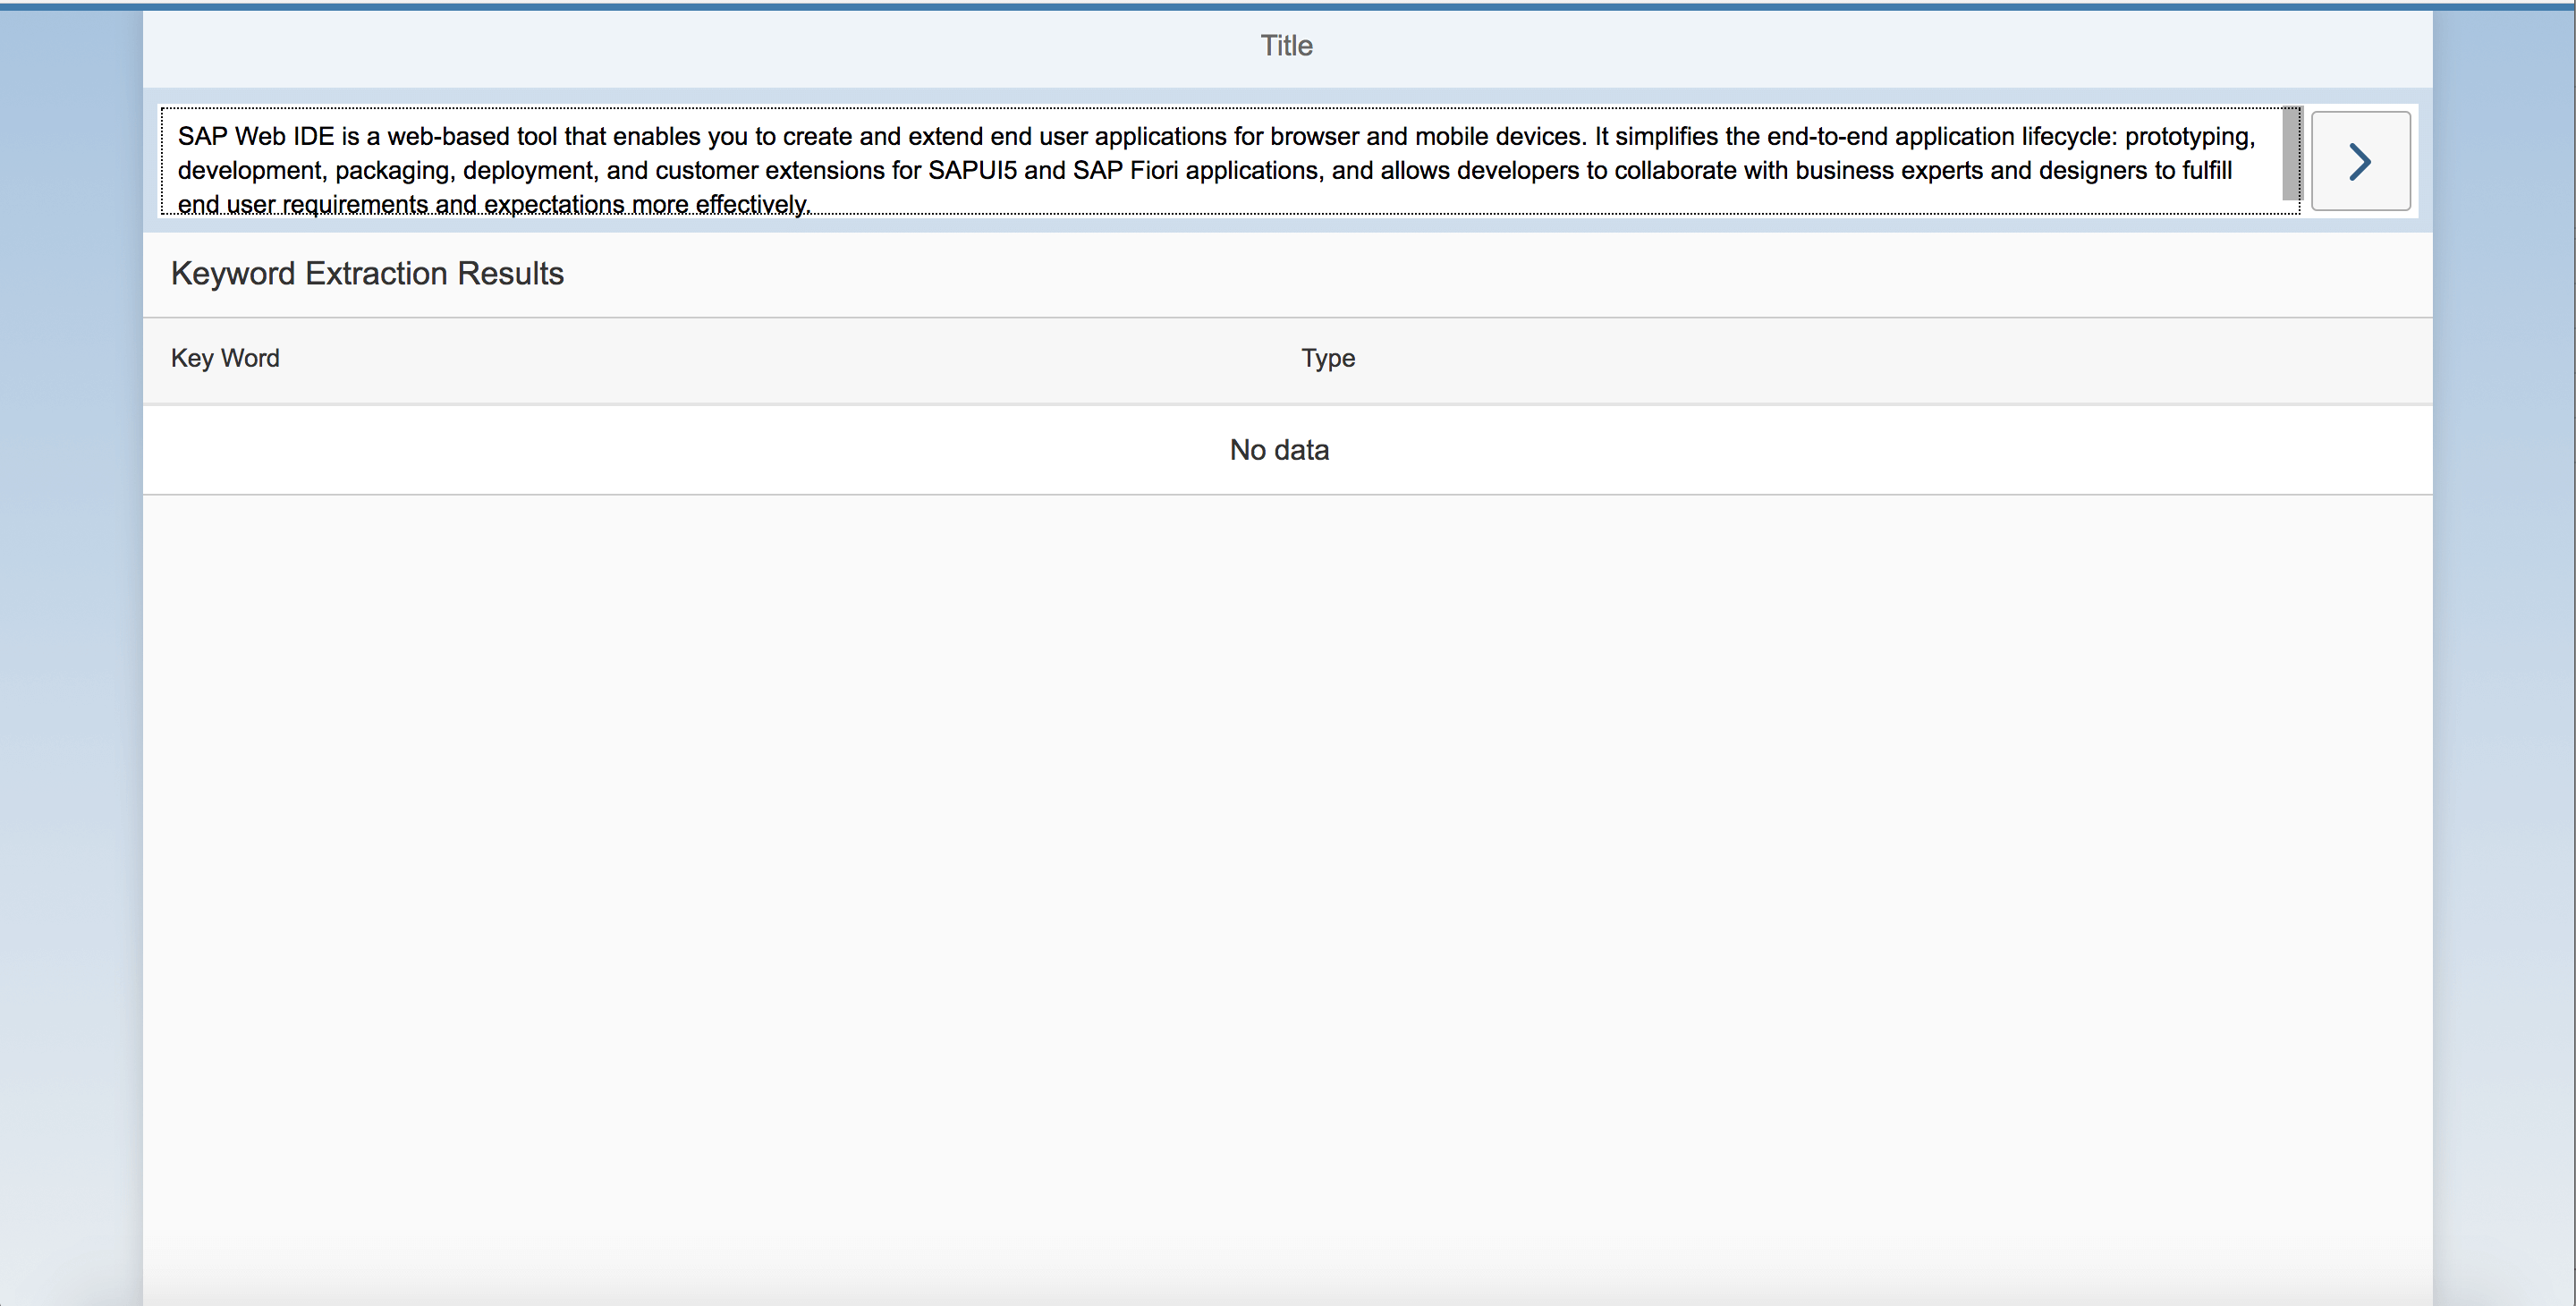
Step 8: As our final step, we will now Save everything and run the application. You should have an input with an empty data table as default. We will input text into the text input and click on “>” on the right to submit. You can now view analyzed data display in the table below.

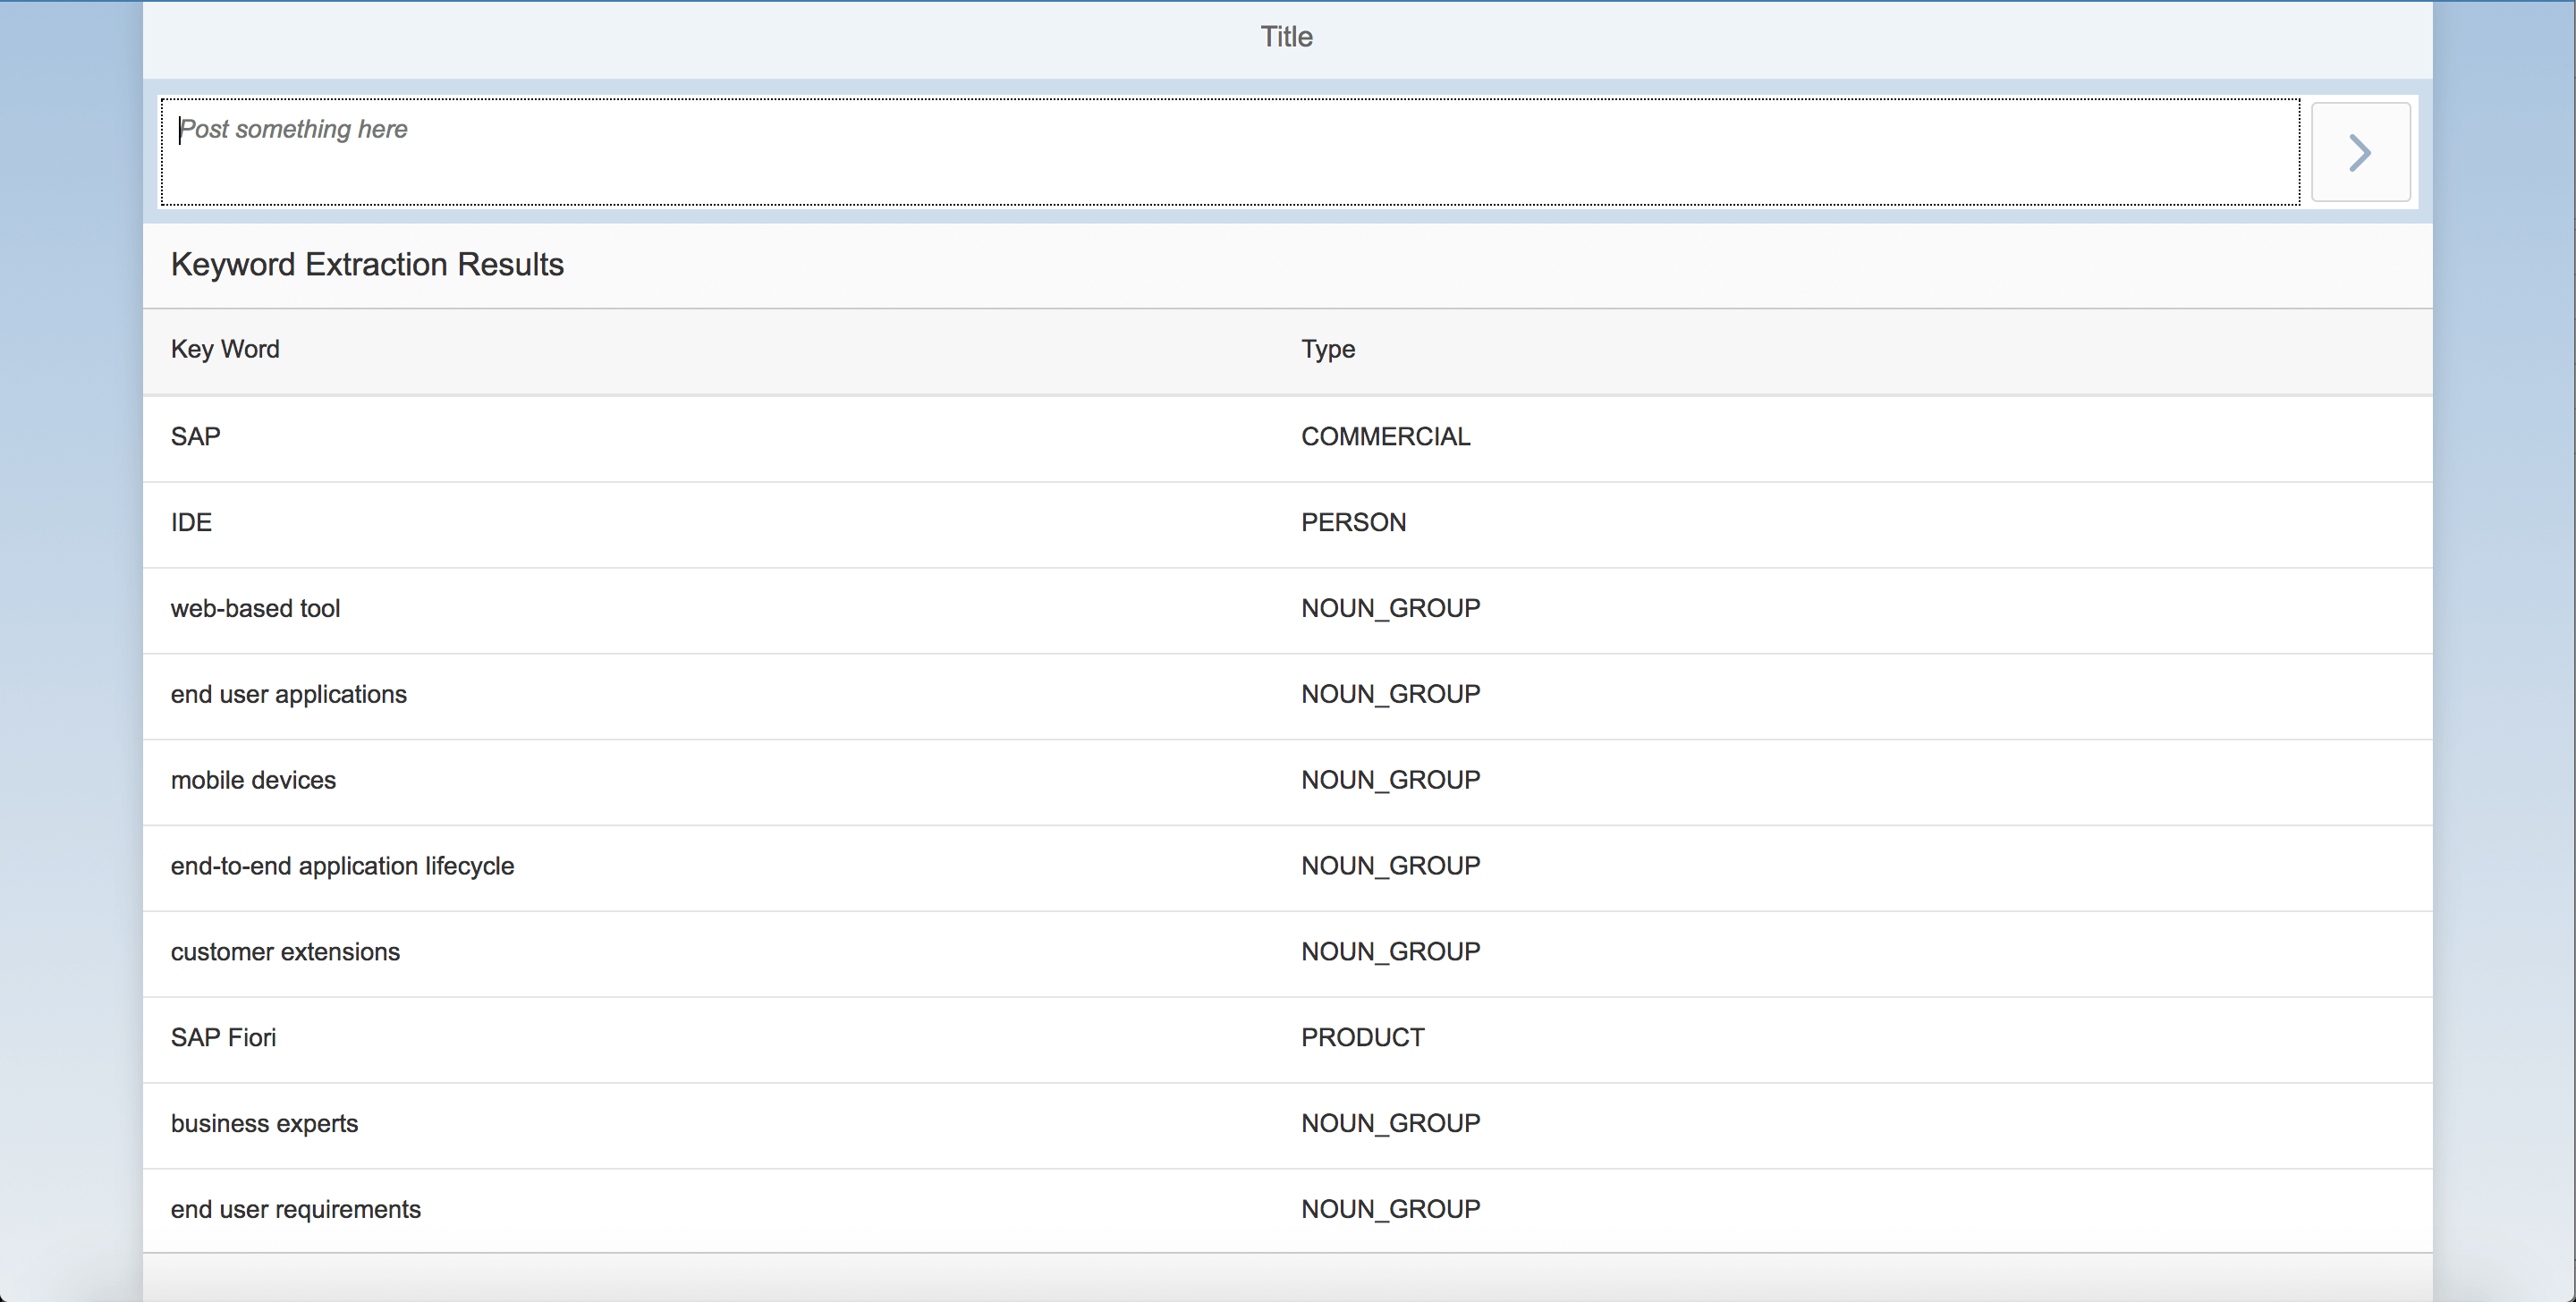
Utilizing the steps above, it’s now possible to create a working text analysis application through a combination of an SAP API and an SAPUI5 sample display code, without the need for writing any custom functions. With the power of SAP APIs, it’s now easier than ever to create applications that are flexible and can be quickly adjusted to customer requirements.
Looking for more information on SAP Cloud Platform and how it integrates with the latest SAP technologies such as Machine Learning, IoT, and more? Schedule a one-on-one consultation with one of TruQua’s consultants by contacting us today at info@truqua.com.