Extending SAP S/4HANA Applications using the SAP Cloud Platform

Extending SAP S/4HANA Applications using the SAP Cloud Platform
Authored by: JS Irick, TruQua Enterprises
The purpose of this blog is walk through a real-world scenario that showcases how SAP Fiori apps can be extended using the SAP Cloud Platform. SAP Fiori applications are a revolutionary step forward for business users, streamlining key business processes, and providing centralized, role based applications for end users.
One of the key features of the S/4HANA Fiori based applications is that you can extend (provide new features) for these applications in the Cloud by leveraging SAP Cloud Platform. SAP Cloud Platform provides a simple, secure way to add additional visualizations as well as functional changes to your user’s key applications.
The below demo shows the complete end-to-end process of adding new functionality to the Fiori Purchase Order application. First, we will add an additional field to the purchase order screen, to show updating the “view”. We will also update the “controller” to add Slack integration, so that the requesting user will receive a chat message when their PO is approved or denied.
Please see the below video stepping through the complete end-to-end process of creating these extensions. A transcript is also included below.
If you would like to unlock the power of S/4HANA Applications for your users, contact TruQua today at info@truqua.com to learn how.
https://youtu.be/pLJITt9RSaA
Transcript:
To start a demo instance of SAP Fiori will be created. These instances are available via a free 90-trial available at: https://www.sapfioritrial.com (You’ll simply need your S-User ID to get started). Utilizing SAP’s free trial offer is a great way to explore new apps and examine extensibility options both of which can be a critical step towards building your business case for SAP S/4HANA or other various SAP Fiori Applications.
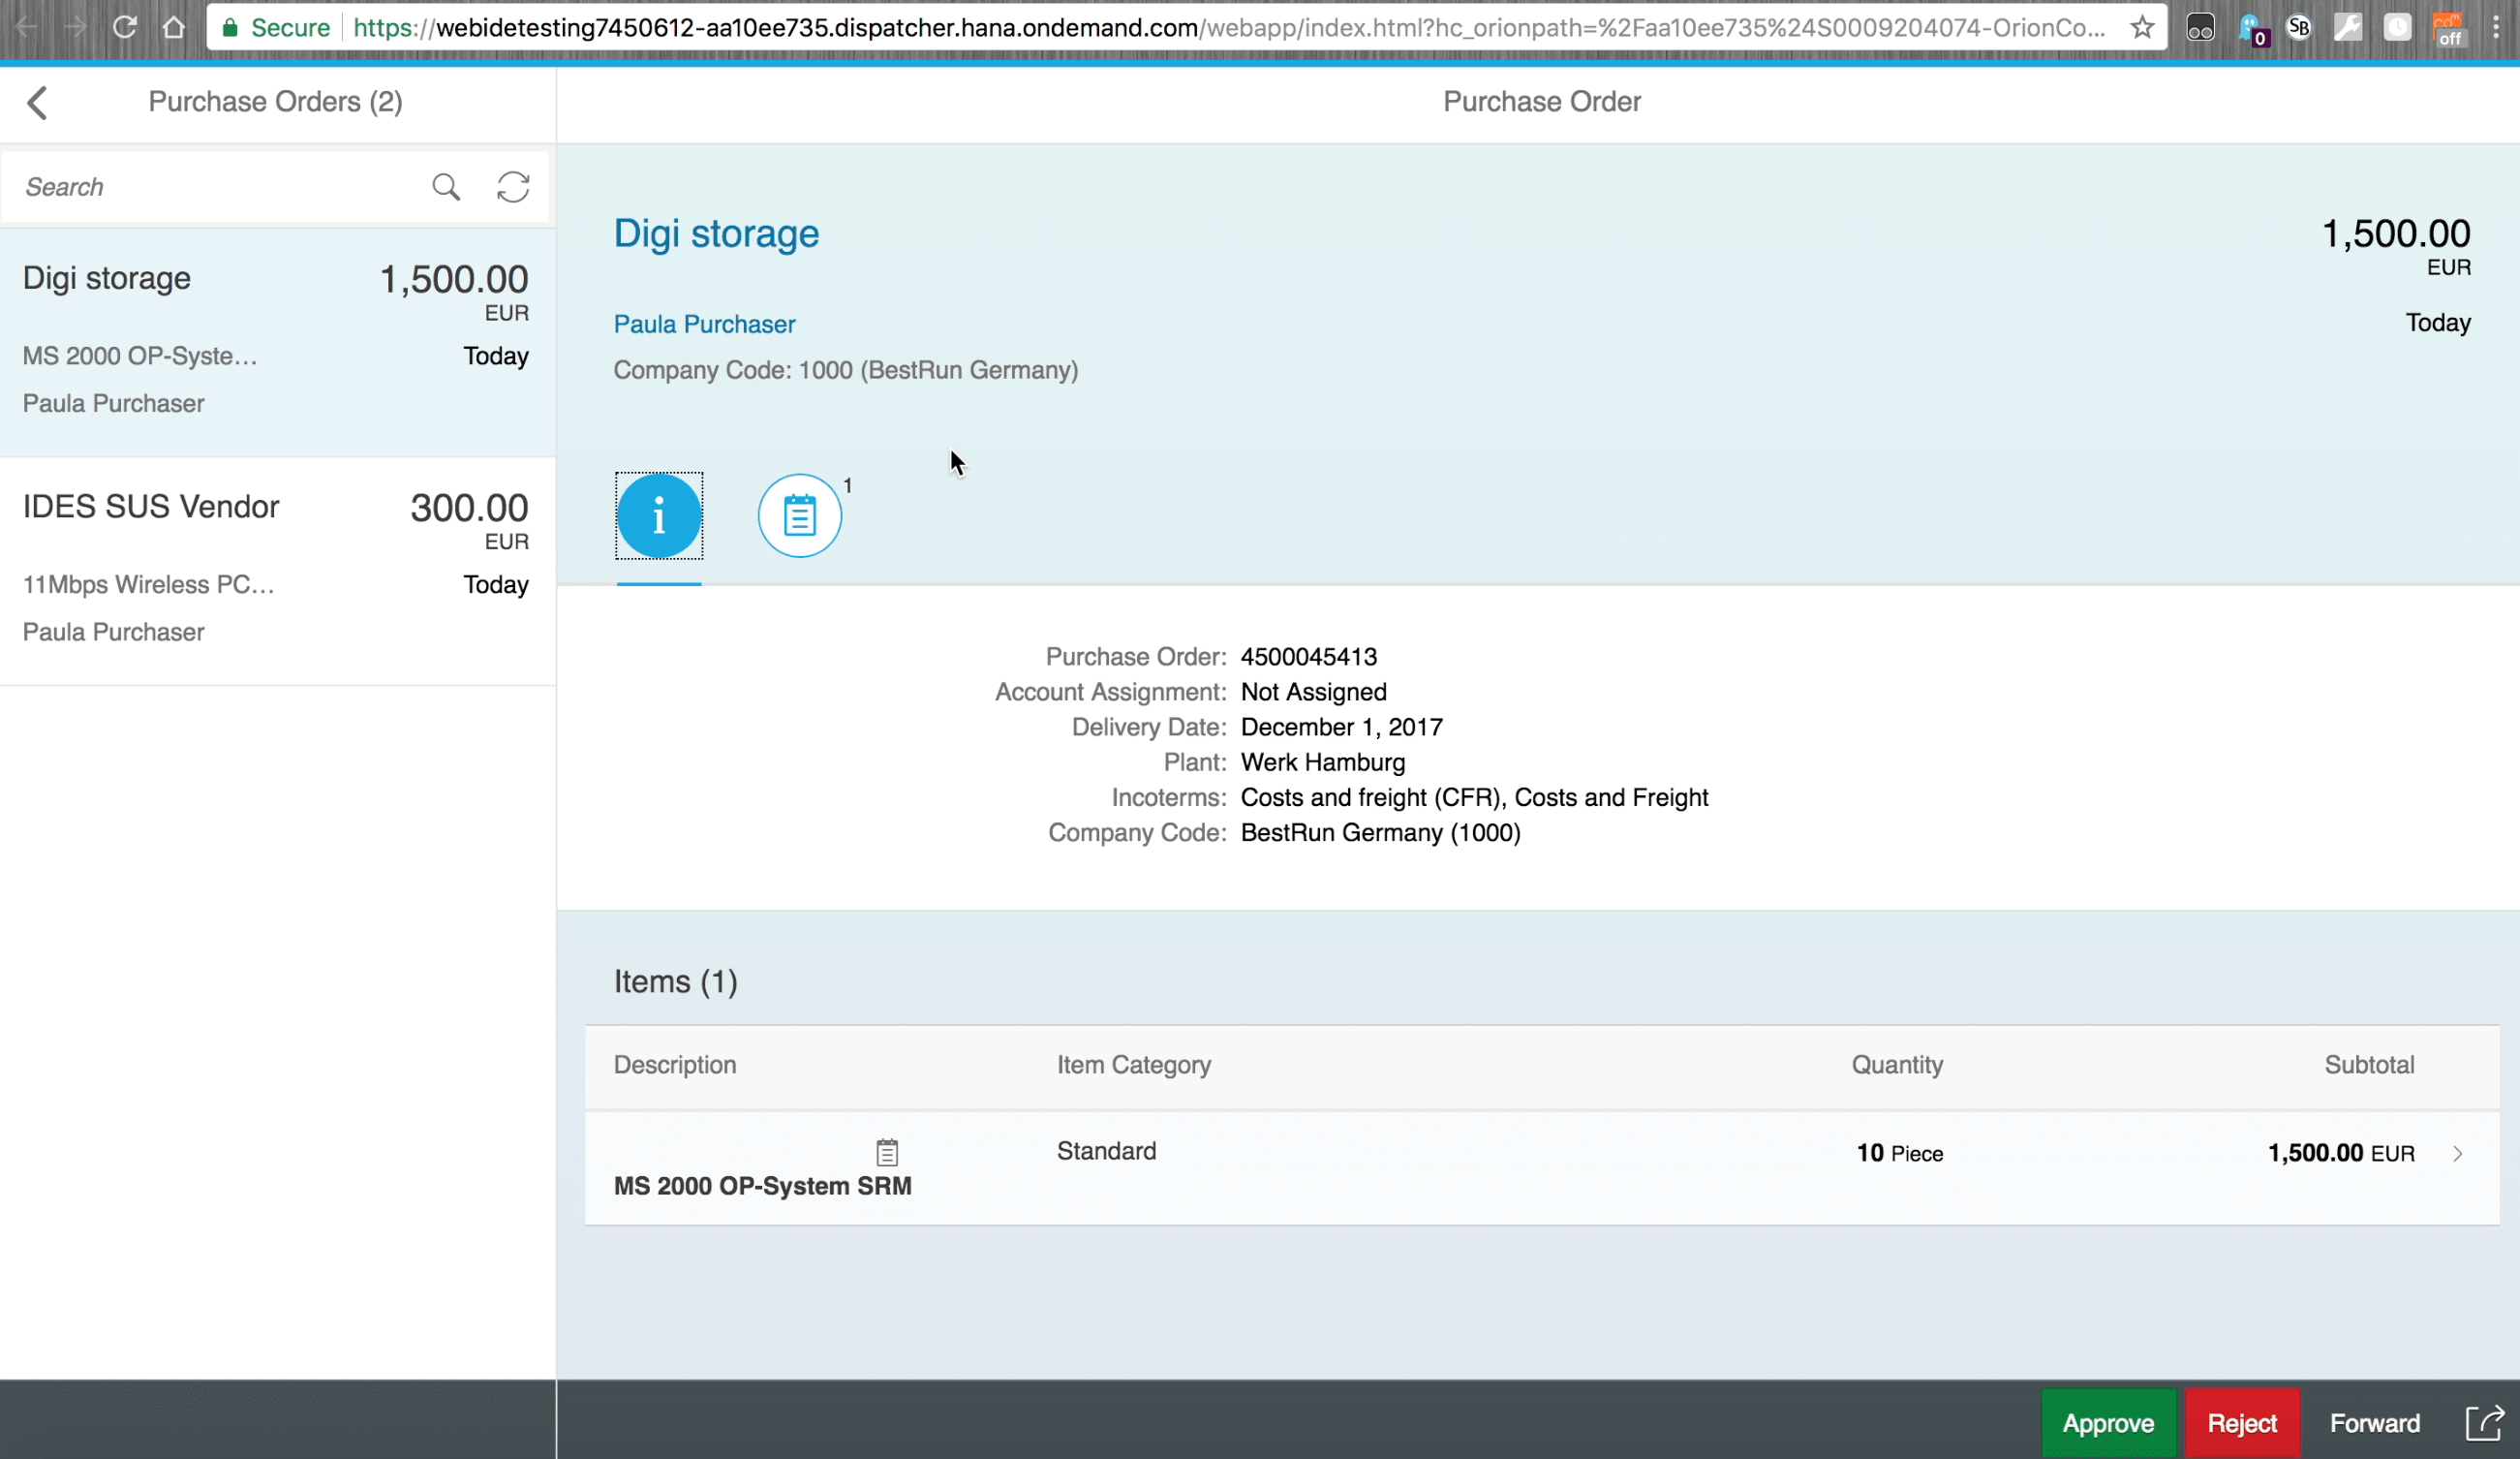
For the purposes of this example, we are going to extend the Approved Purchase Order screen. Within this Approved Purchase Order application, users are able to view existing purchase orders, approve or reject purchase orders, forward purchase orders to appropriate personnel with more details.
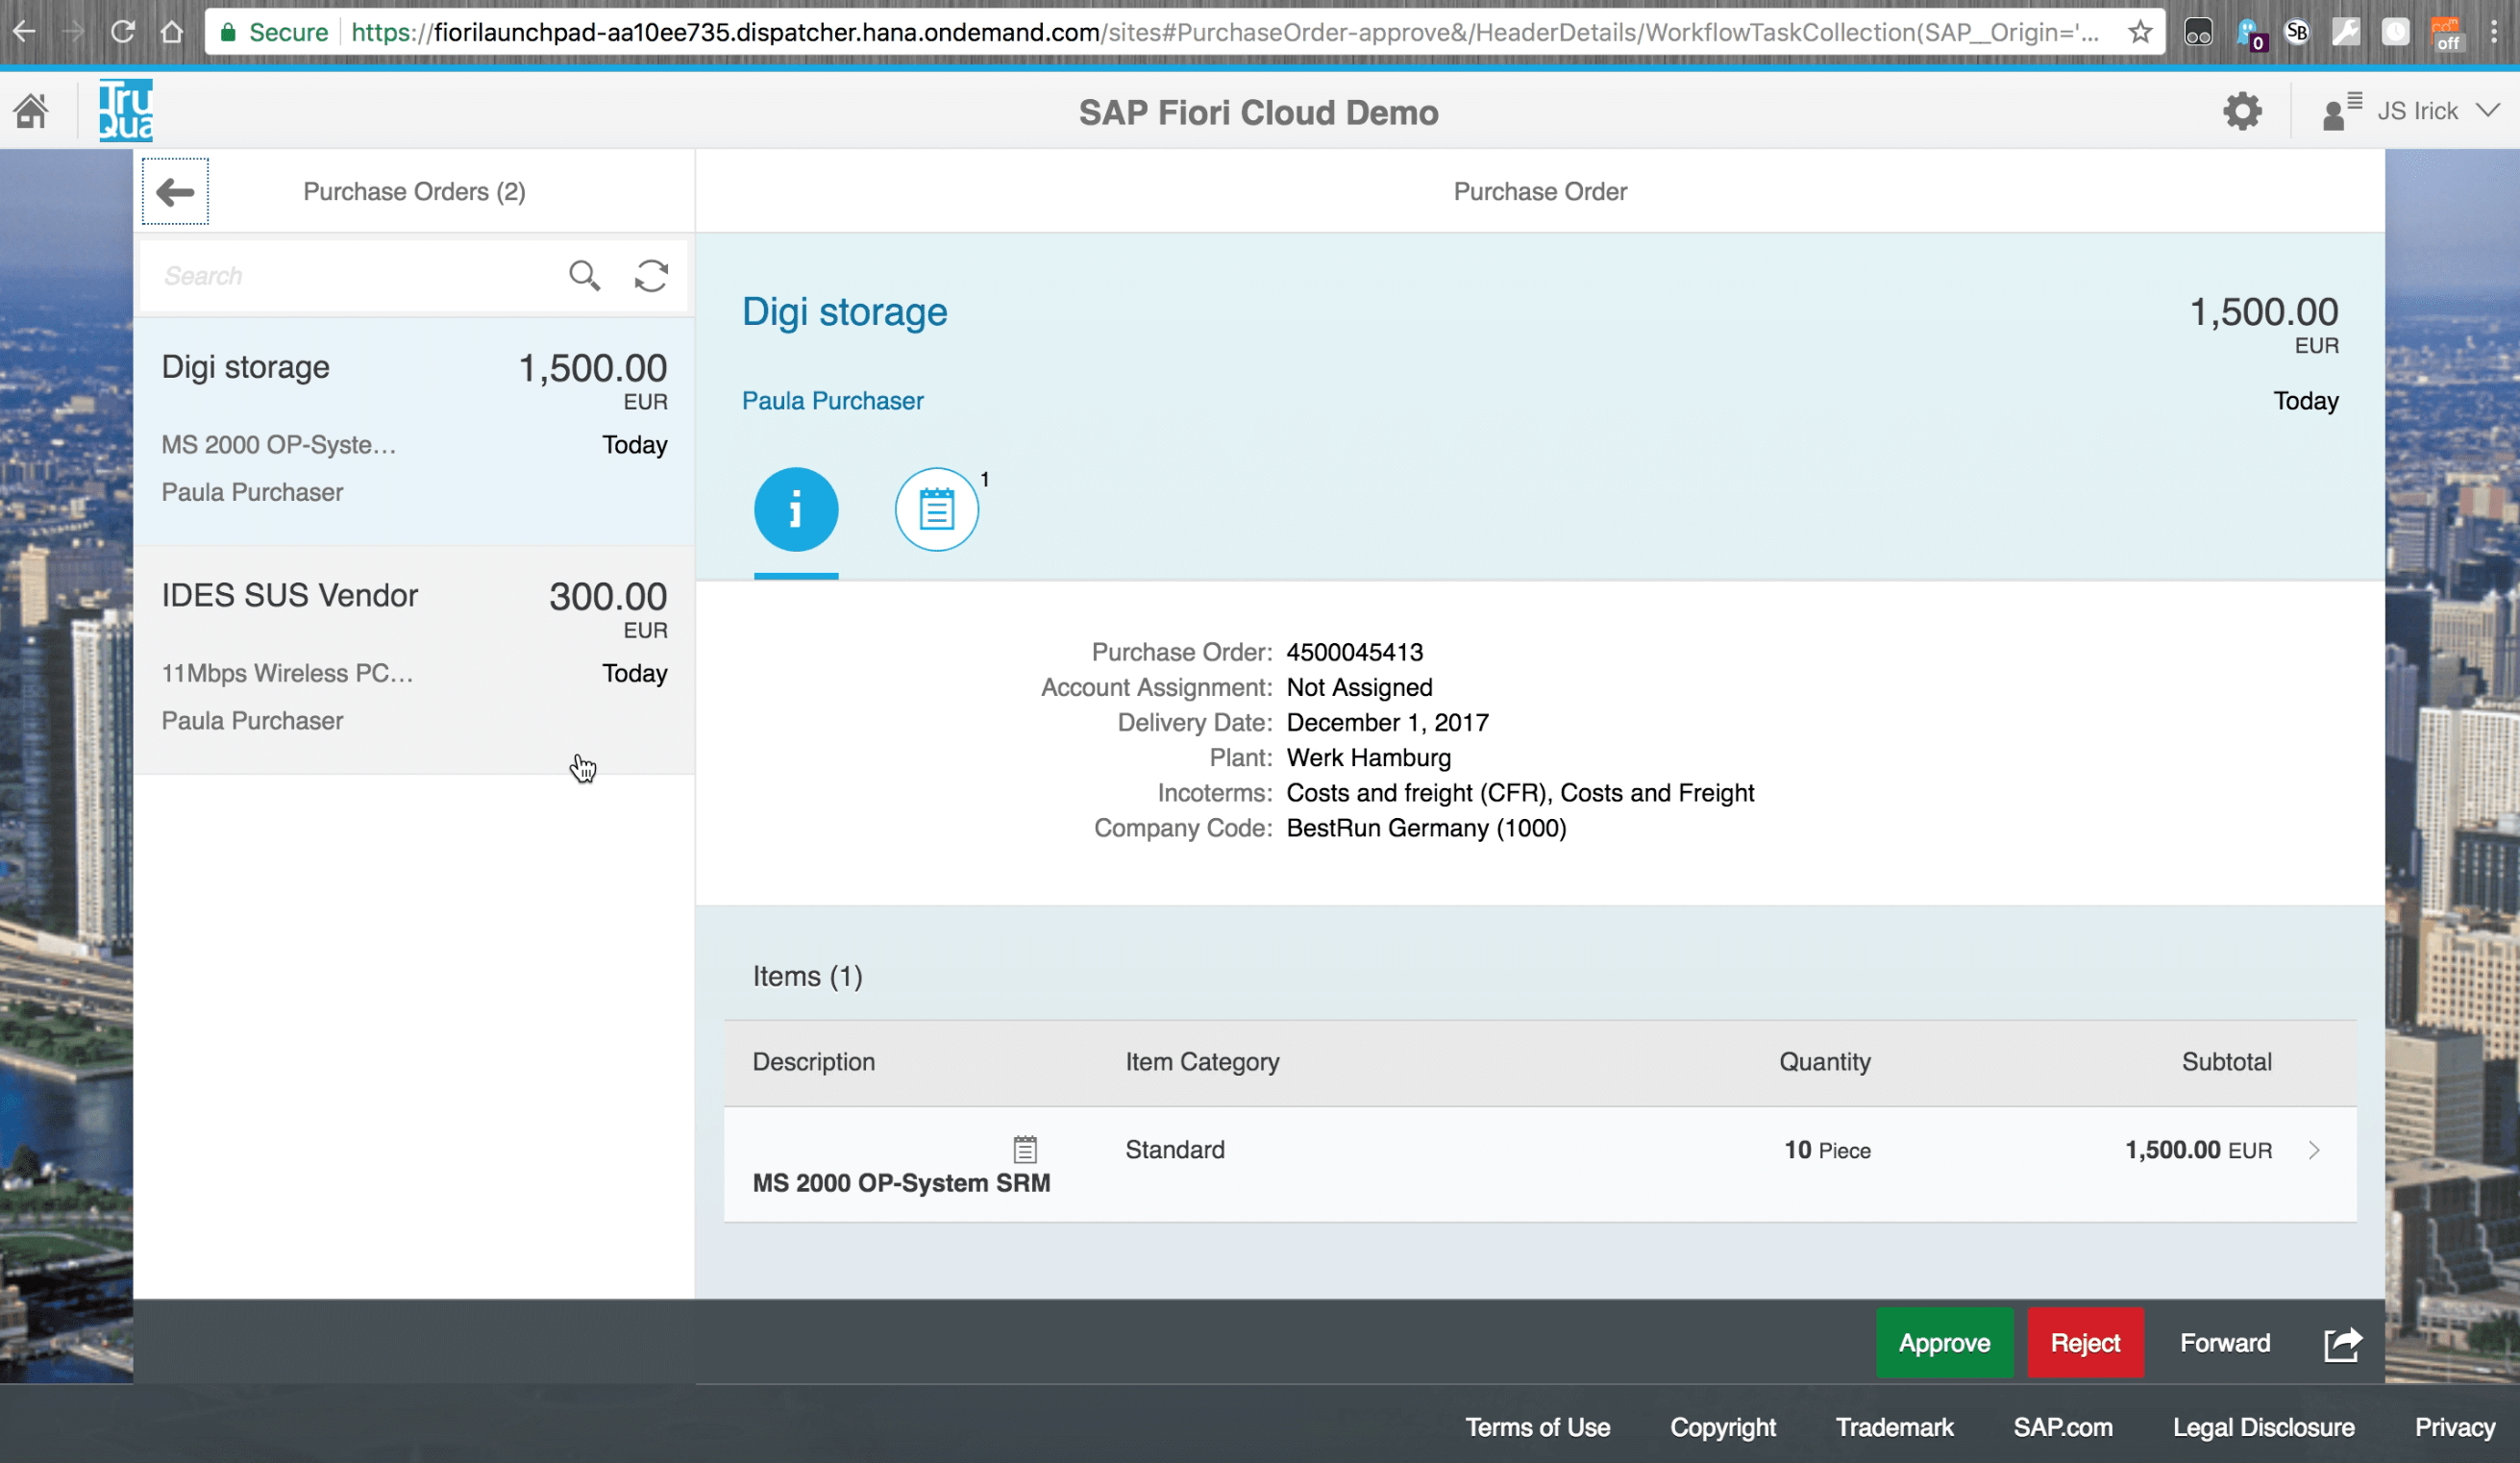
The first step is to change a few of the values that appear on screen. In order to complete this task, we’ll need to examine and change the logic that powers the application.
We can navigate over to SAP’s Web IDE to view a few of the ways that these extensions can be performed. It’s very easy to pull your applications in either through the SAP Cloud Connector or through various SAP Cloud Platform applications.
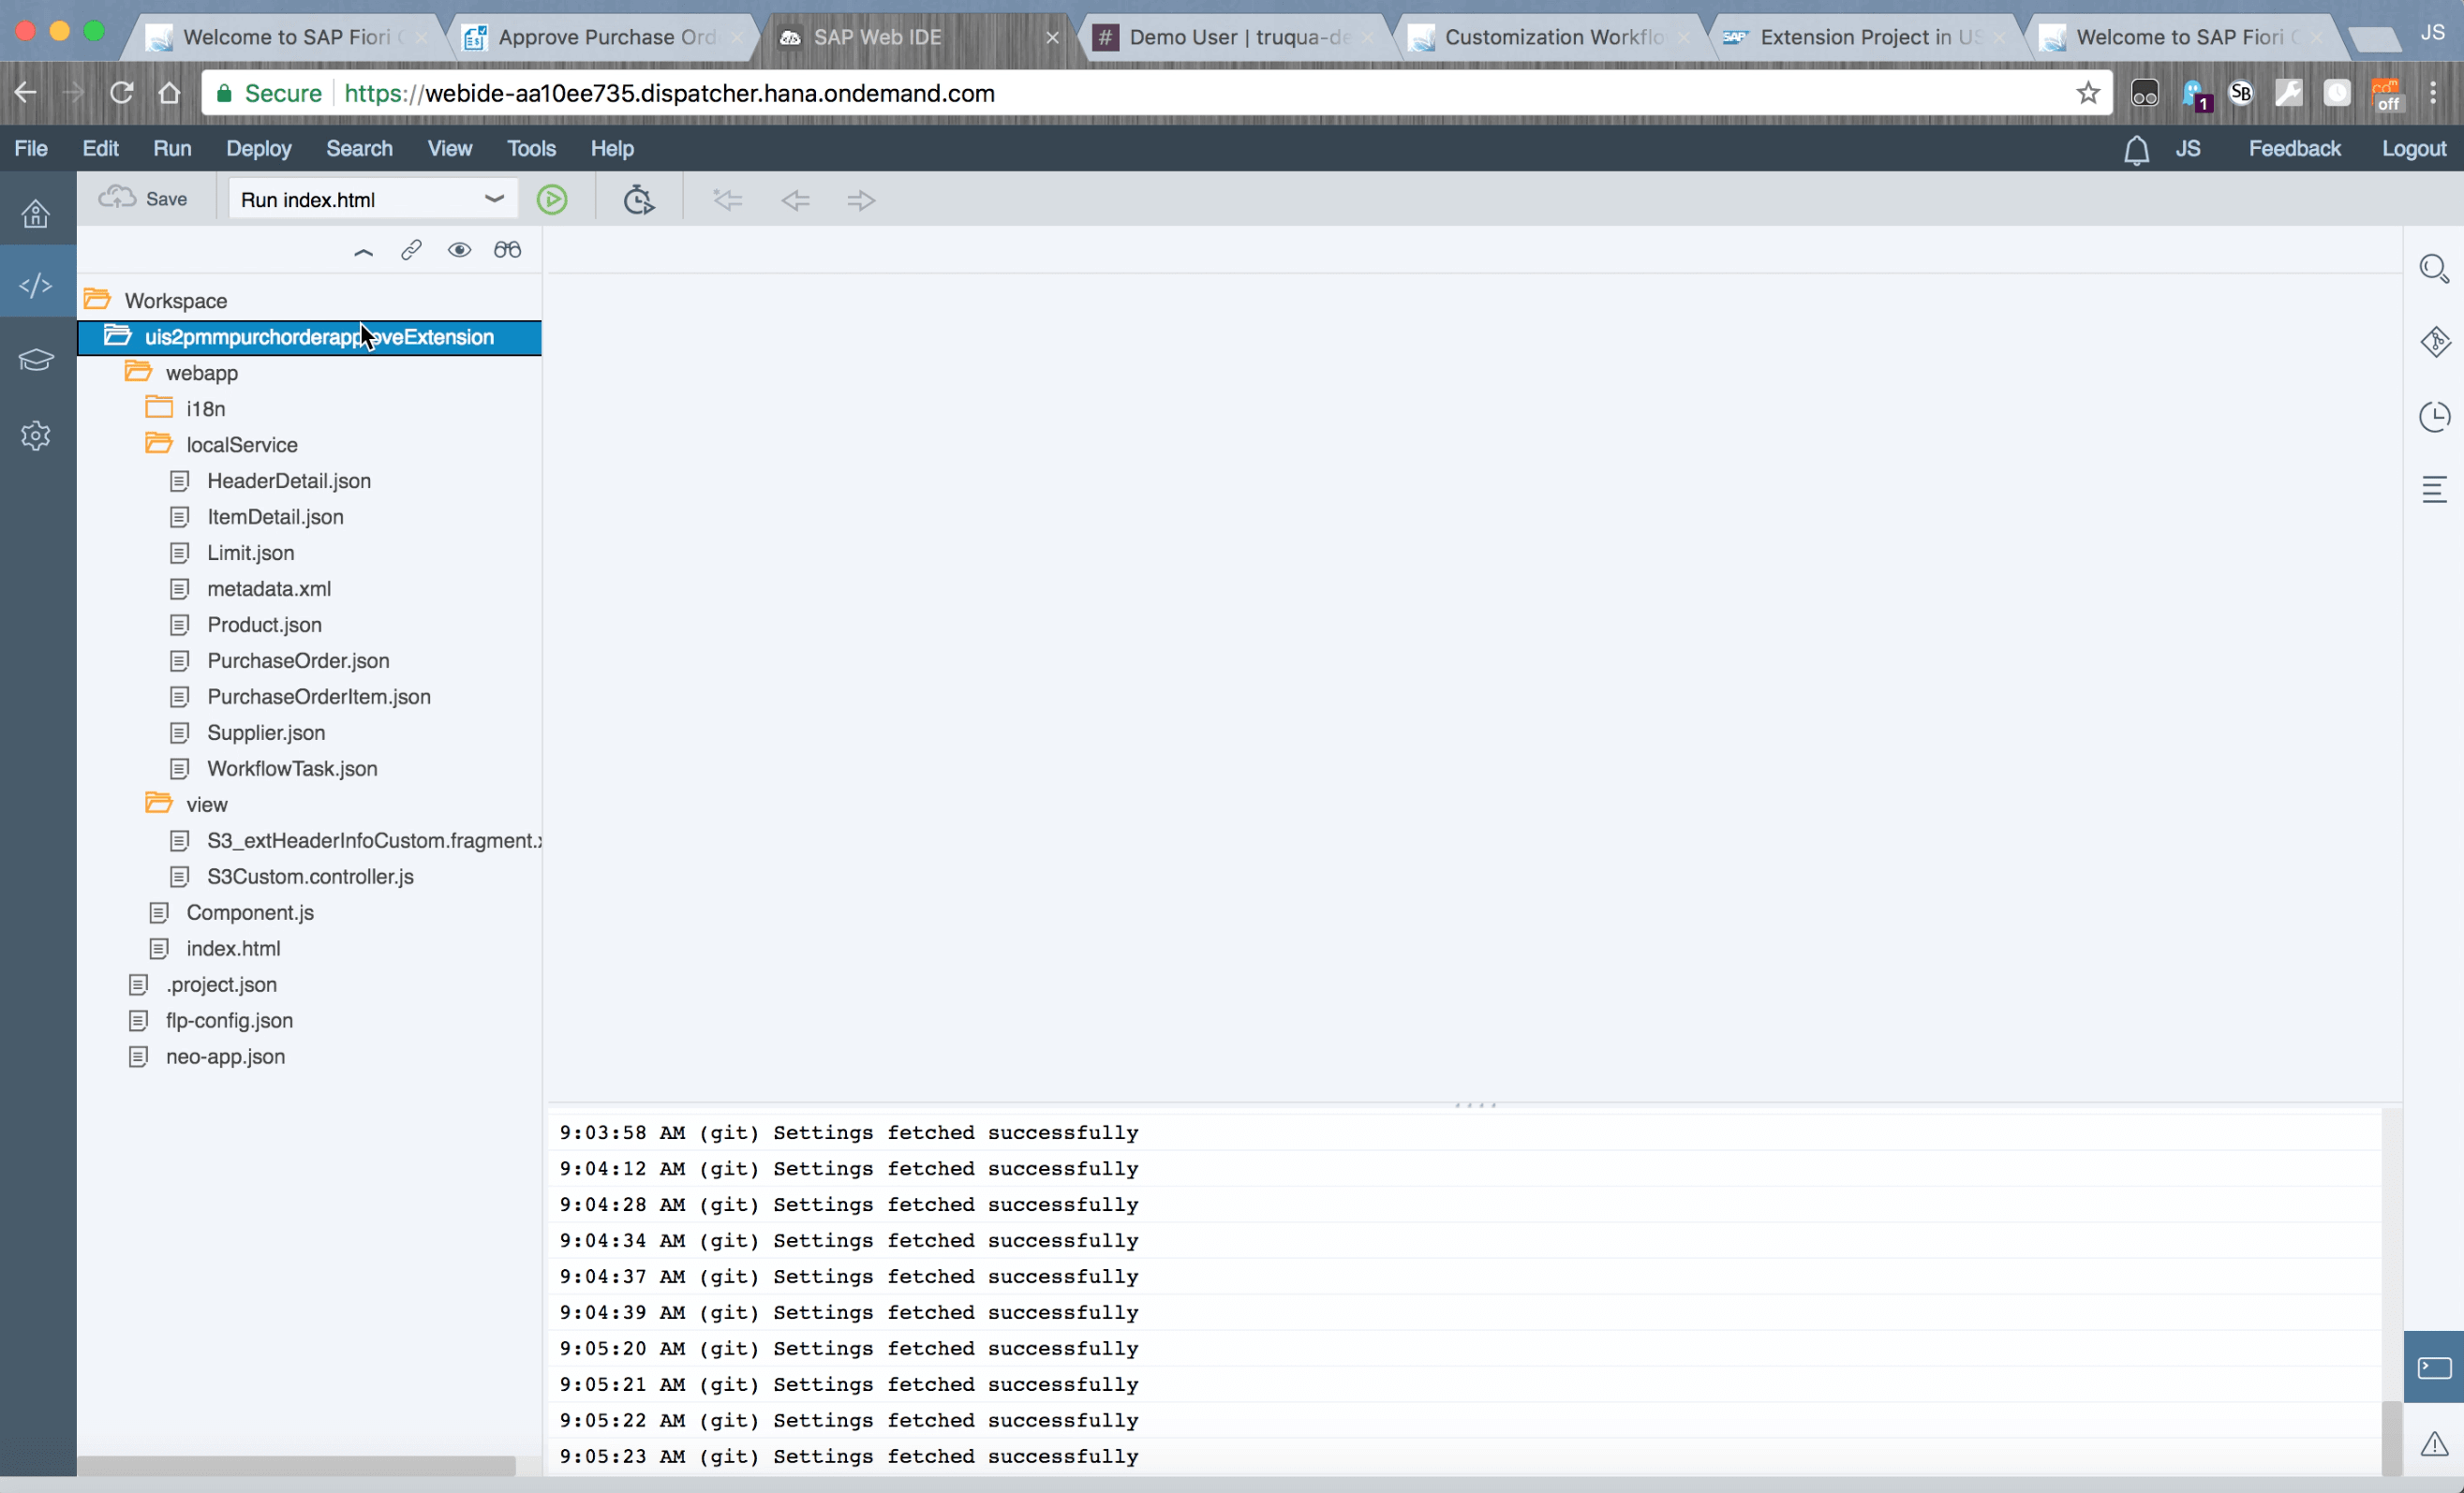
Let’s pull in a new extension project.
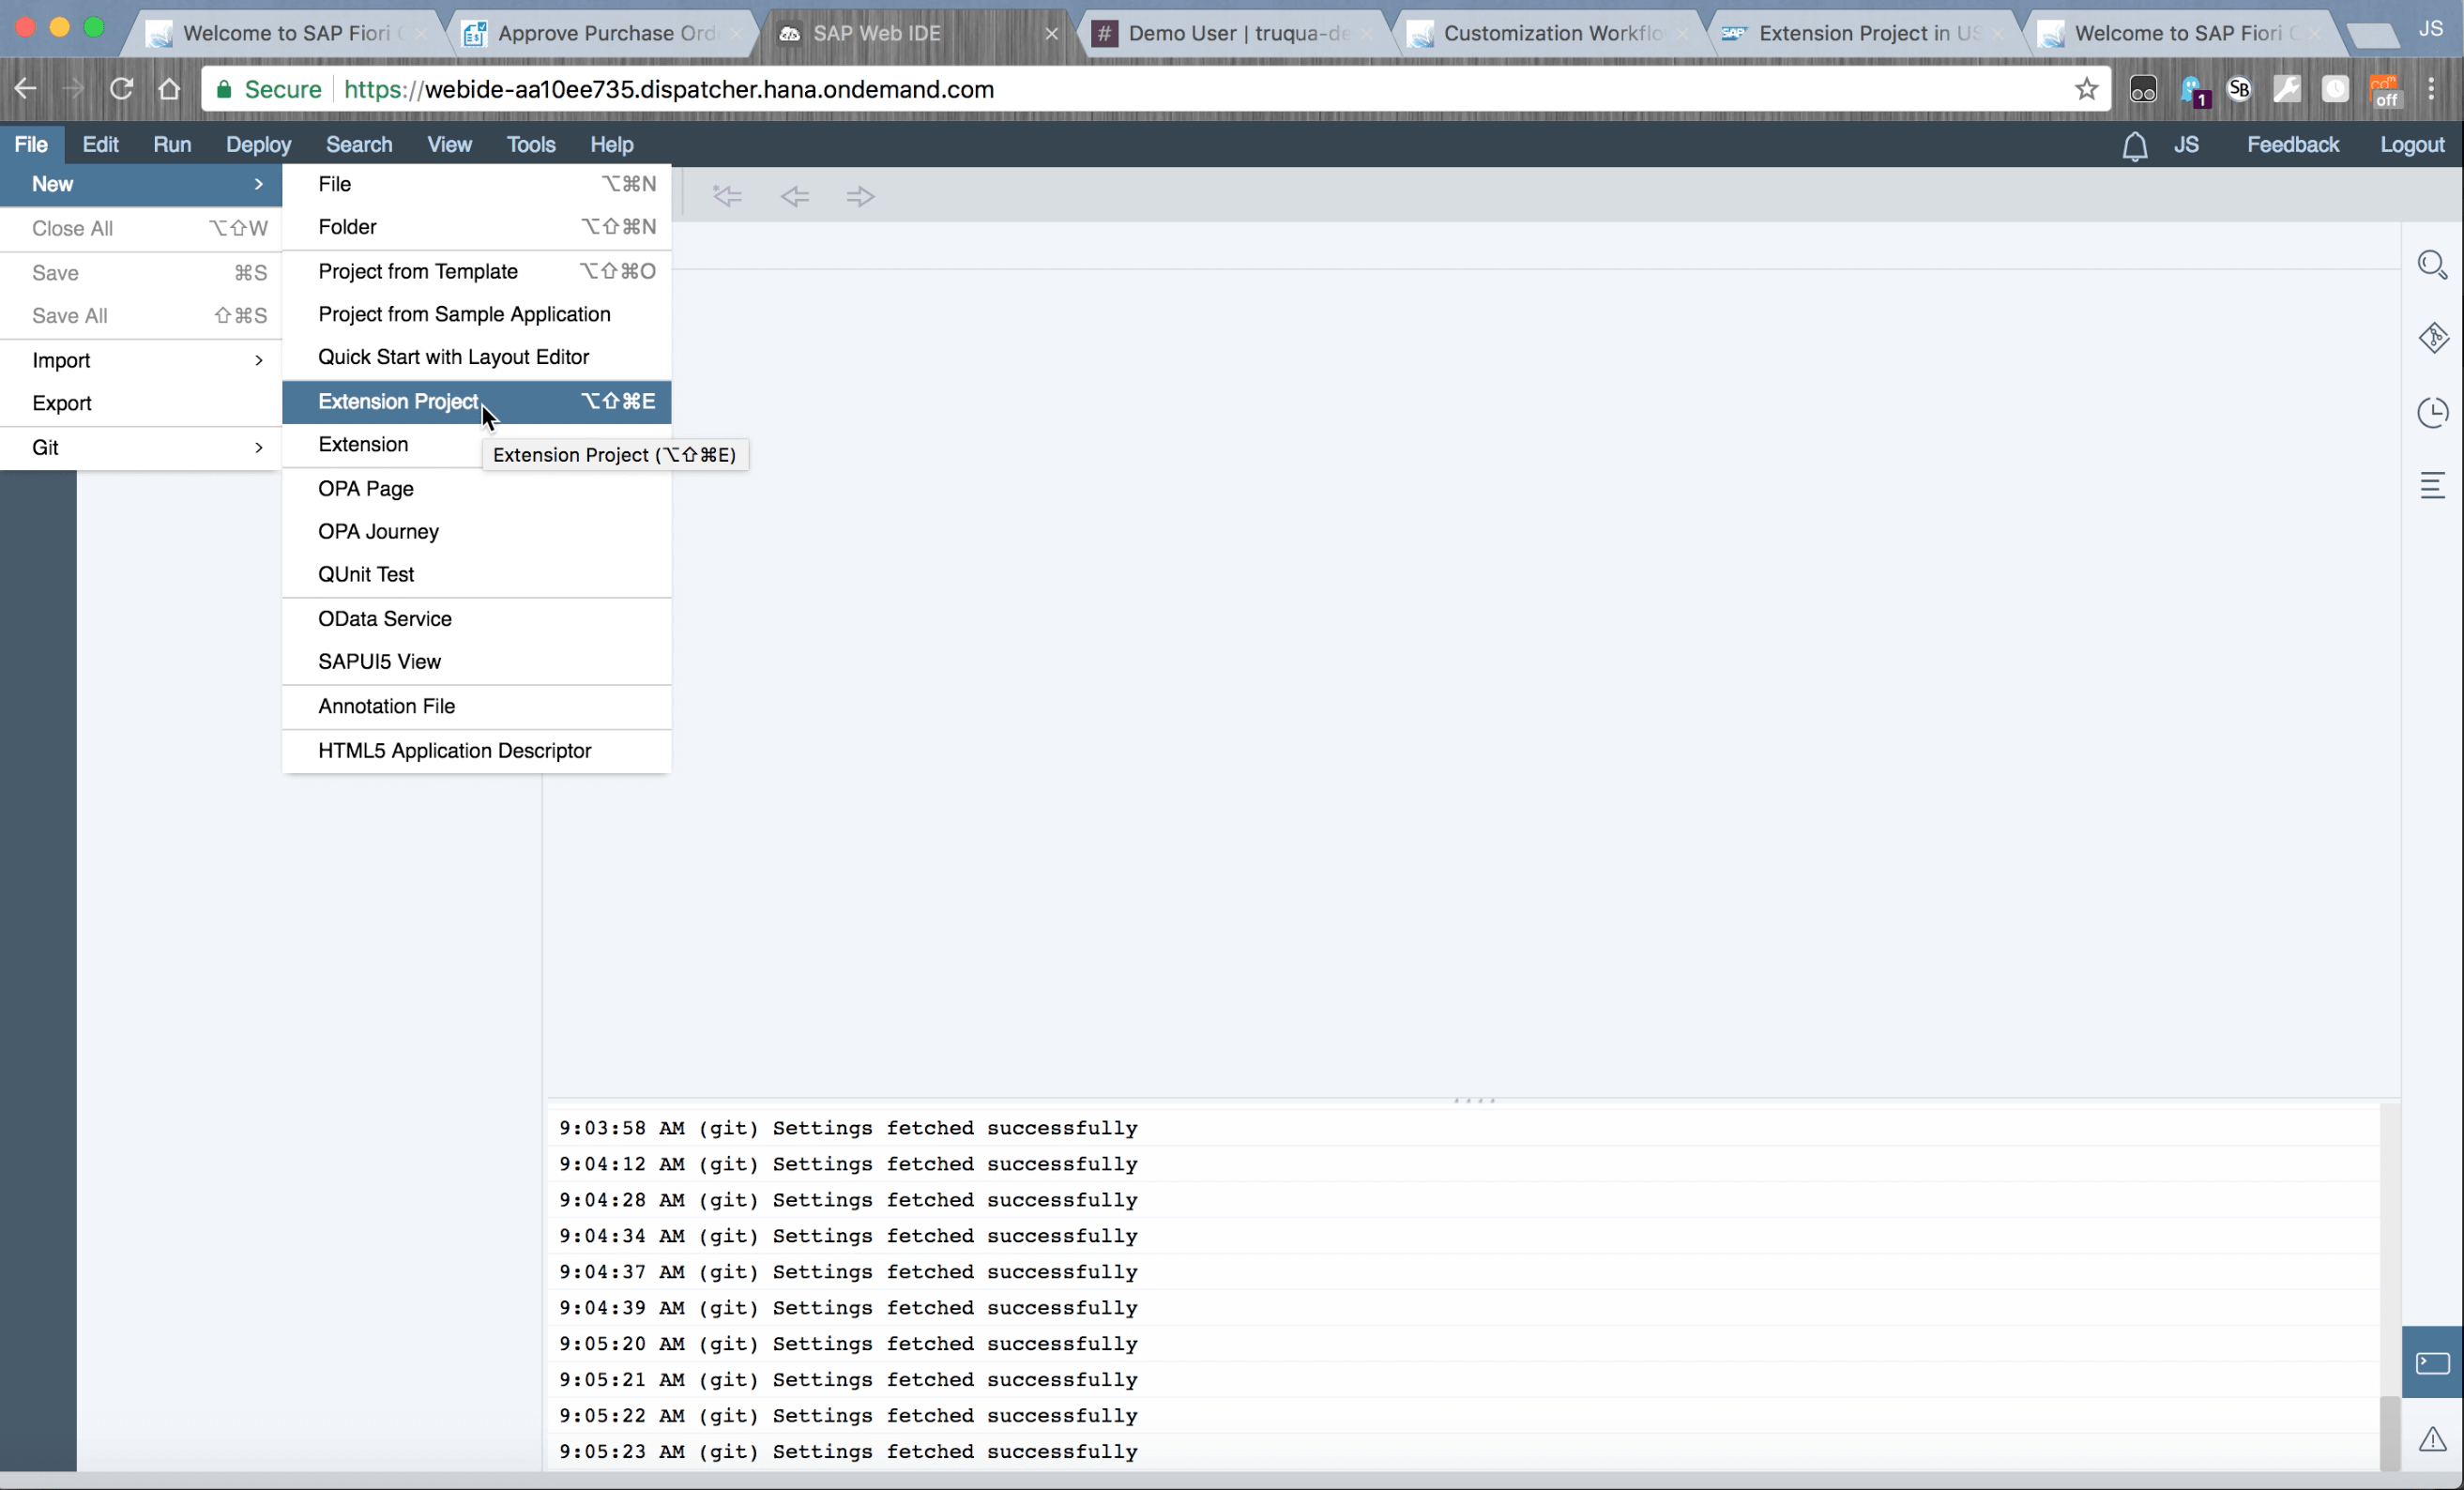
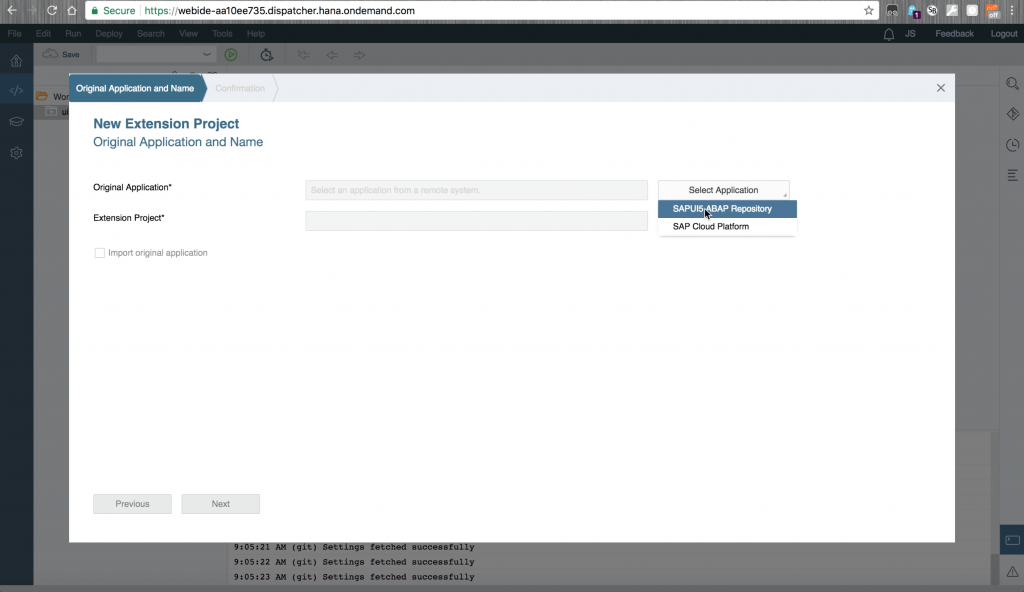
As you can see, there are a variety of applications available, so we can simply click the application we are looking for and it will be added as a new project.

Within these applications there are a number of extensibility points built in. In order to better understand extensibility points, let’s go ahead and walk through the process for generating them.
The first option is to create a new extension. However, through this wizard it can be challenging to understand what you’re really looking at.
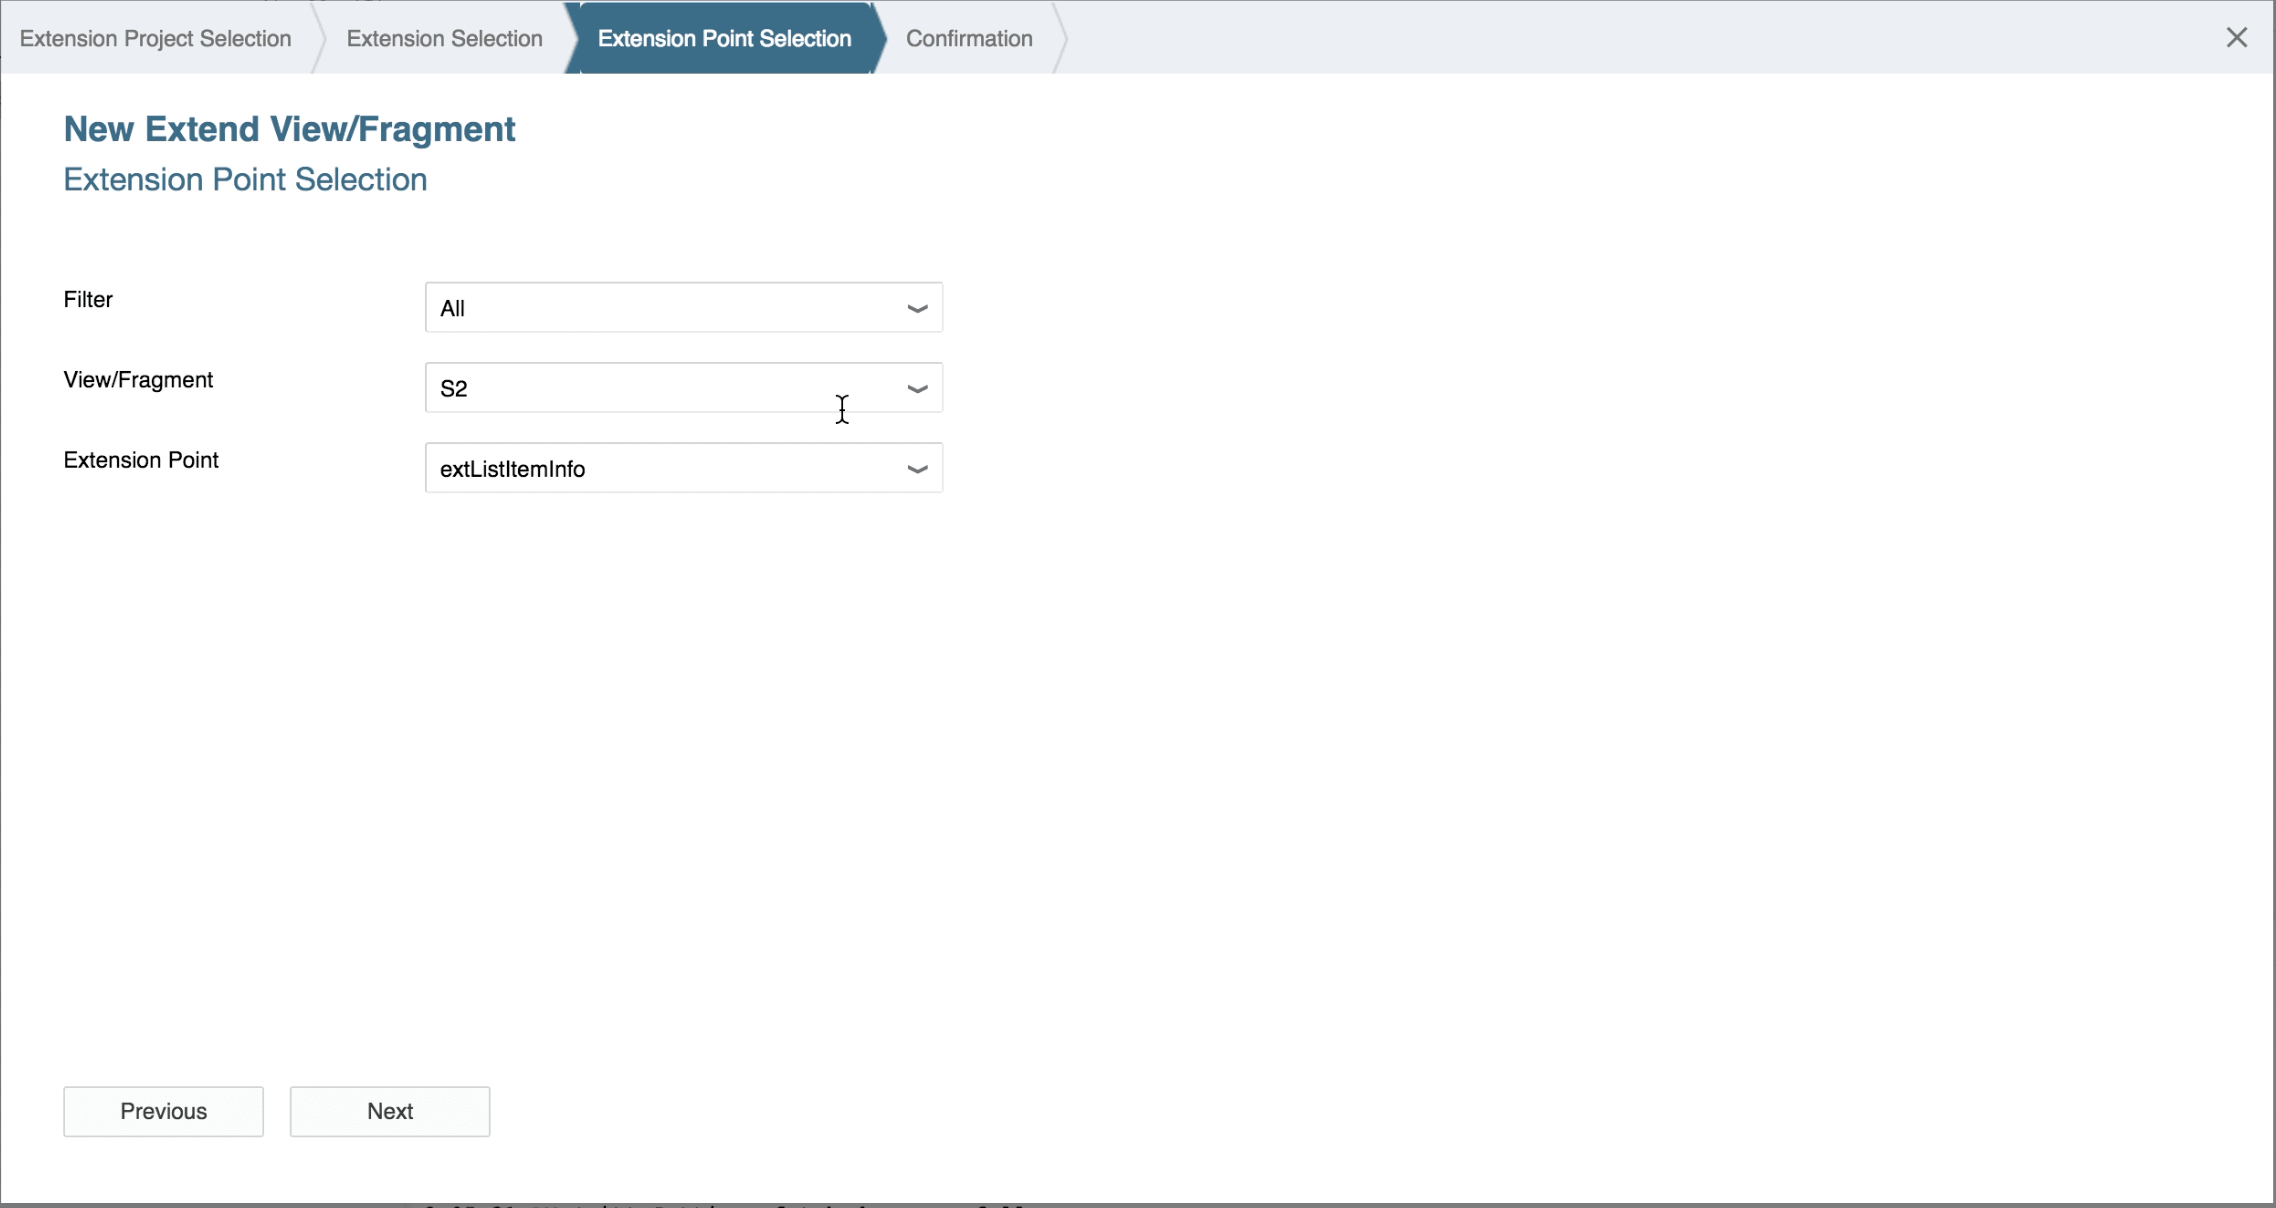

We’re going to actually exit out of the wizard and use the Extensibility Pane instead.
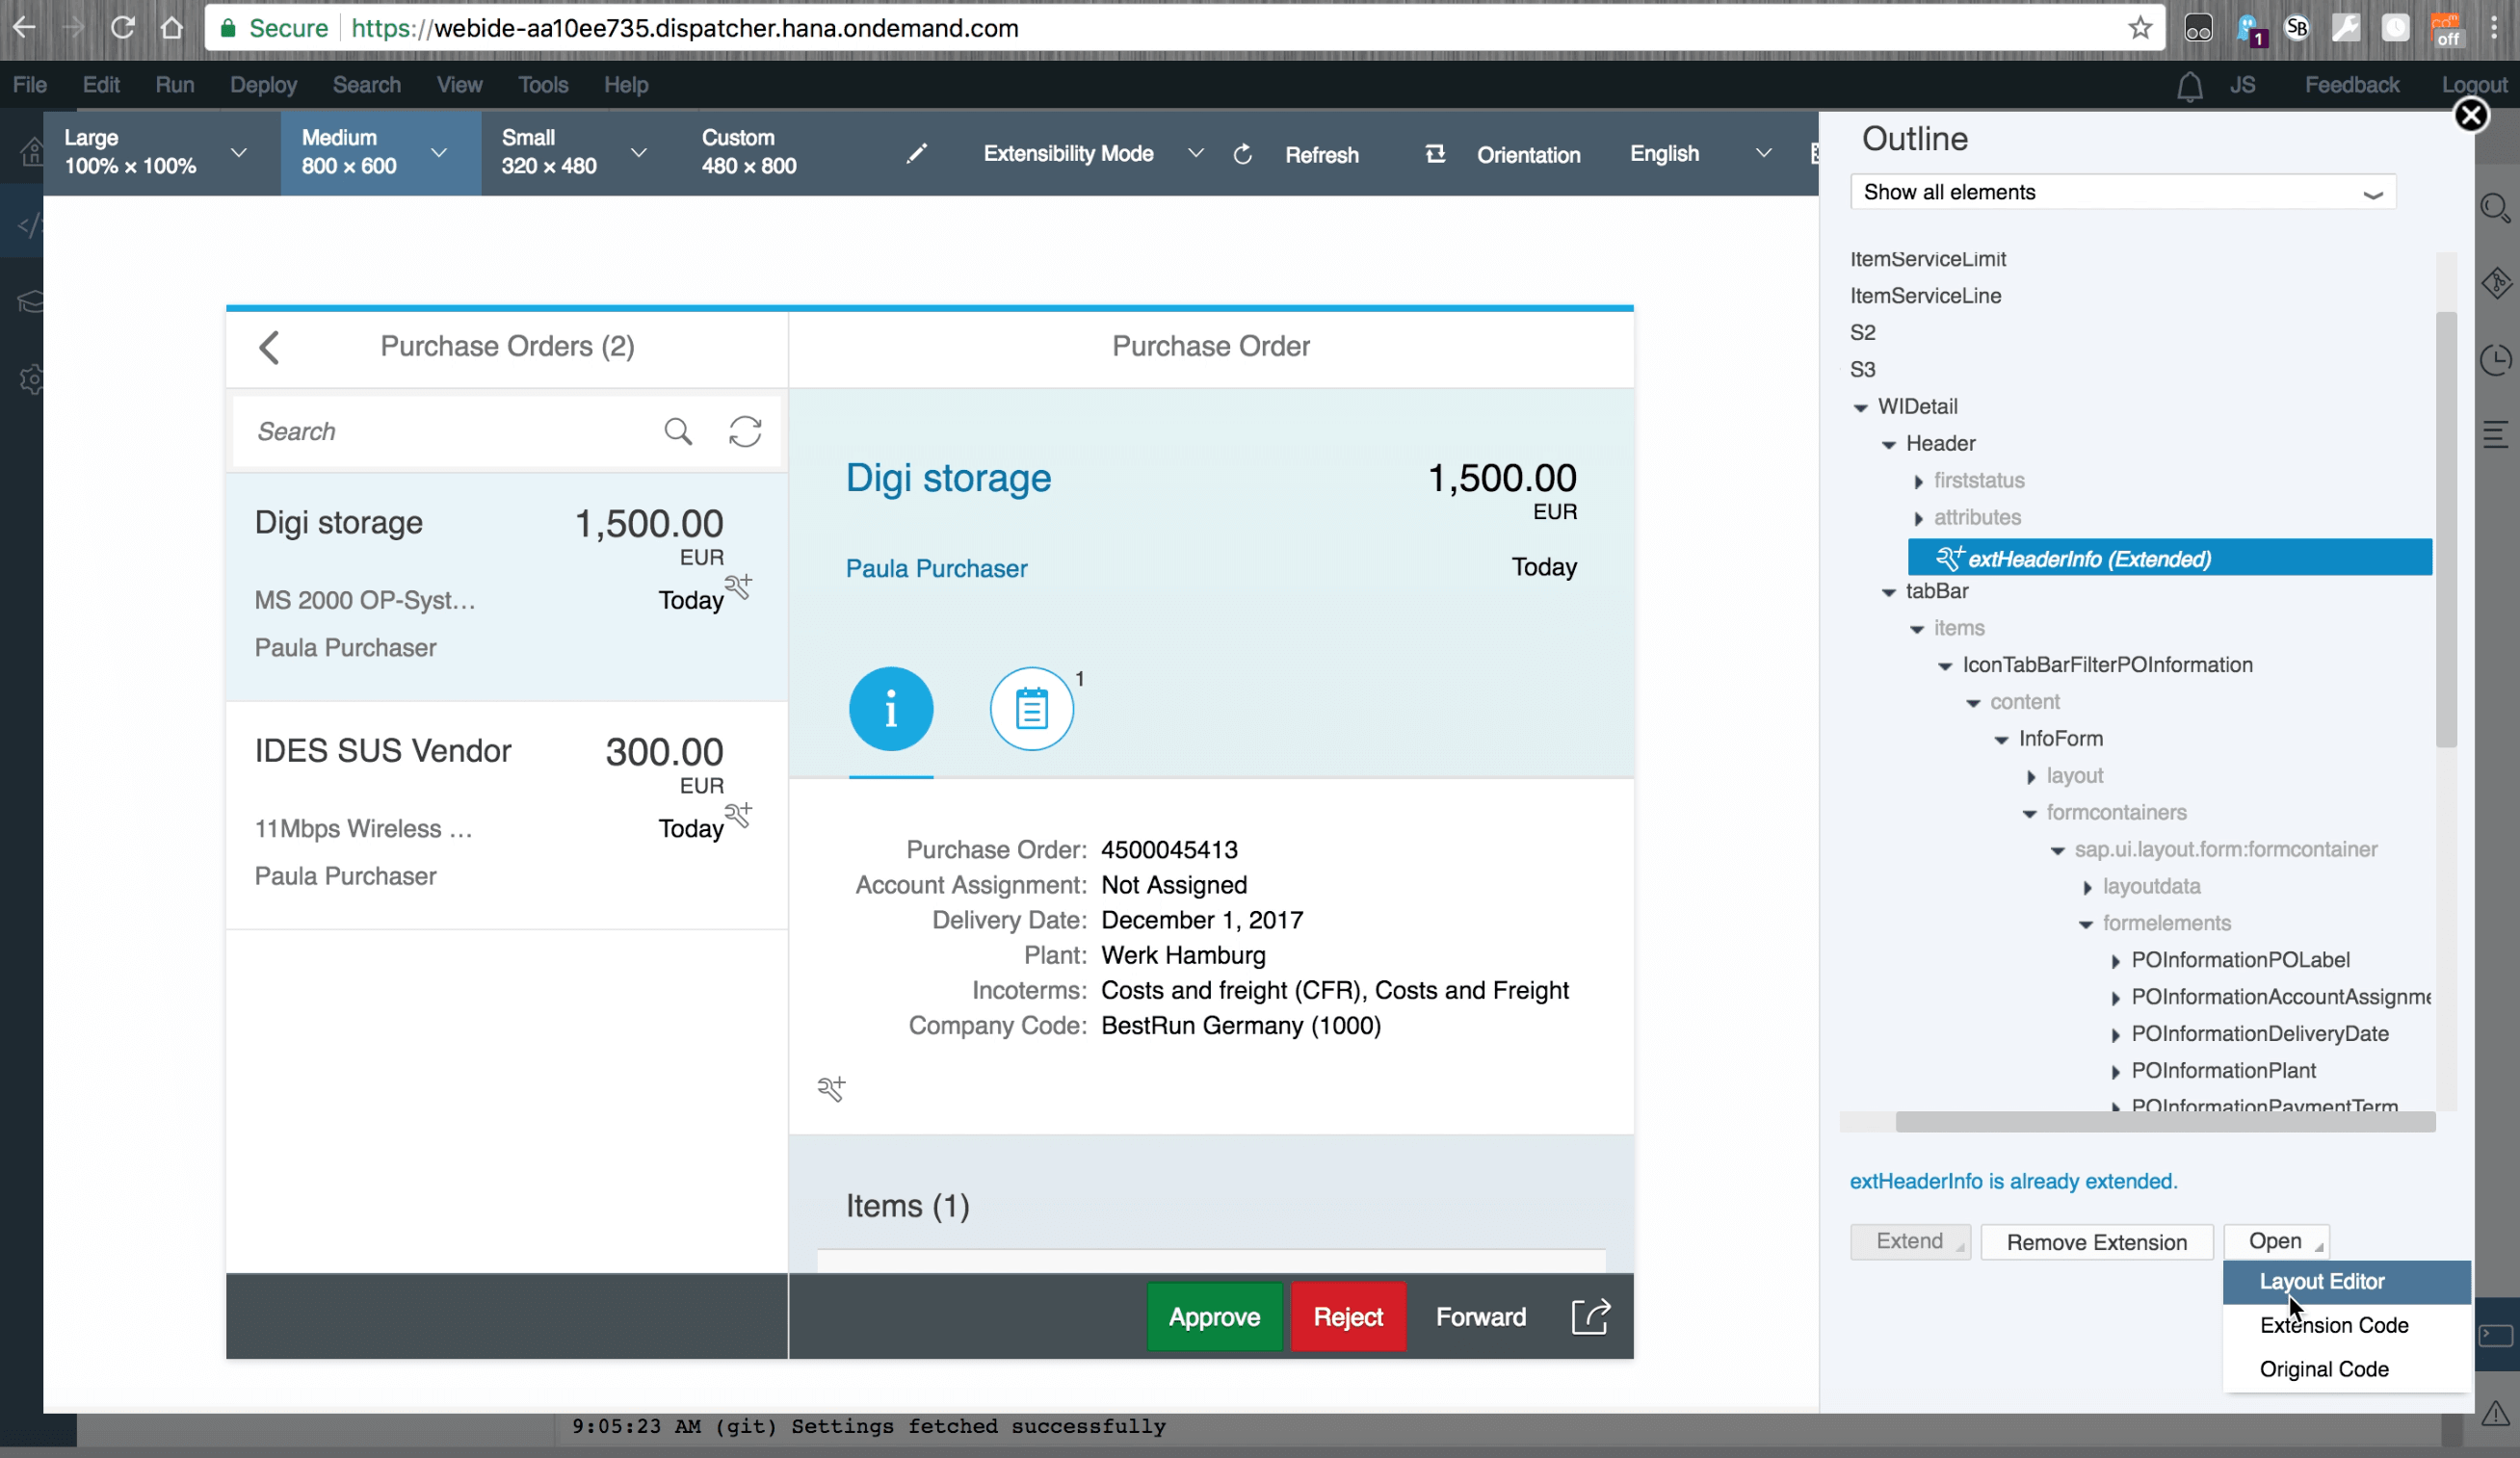
Now, once in the Extensibility pane, we can see that it pulls in the data for you and we are also able to view all of the extensibility points on the right hand-hand side.
Now, let’s switch to Extensibility Mode:

Now as we go through and look at the various areas, we can actually see the part of the application.
The next step in the sequence is to extend this information into the header.
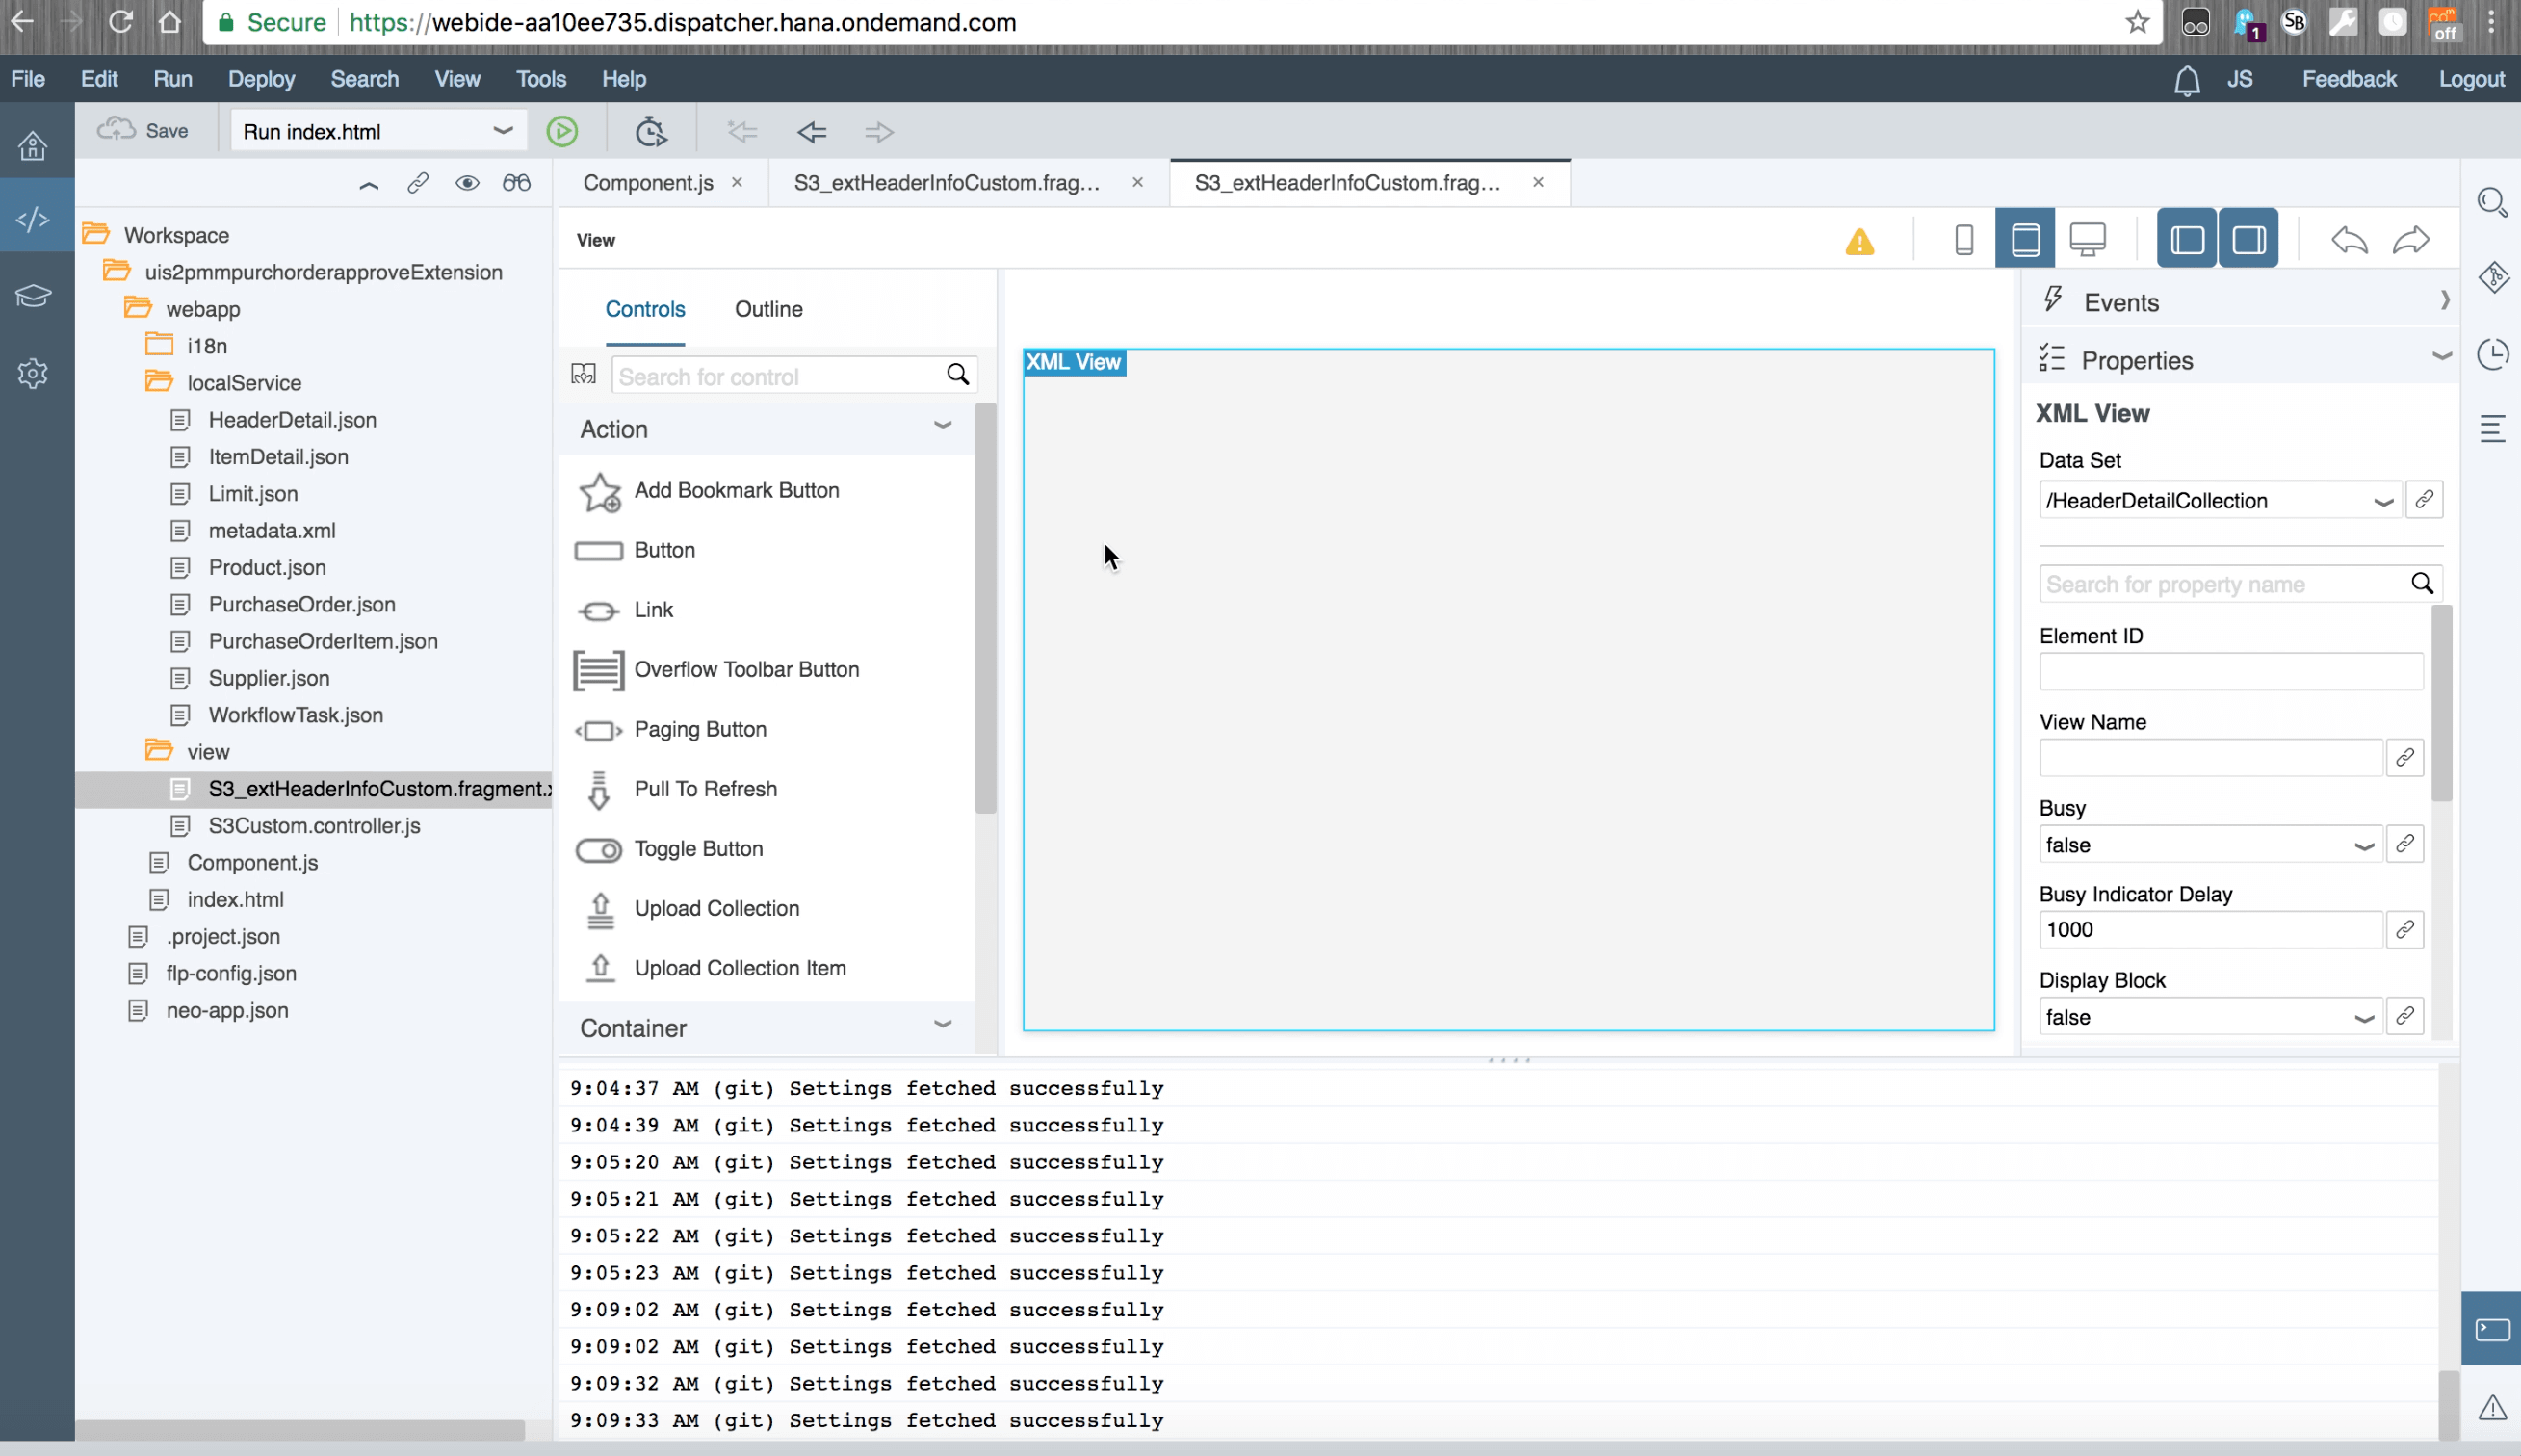
As you can see the extension is currently empty here, but what we’re looking at is what is called an XML view.
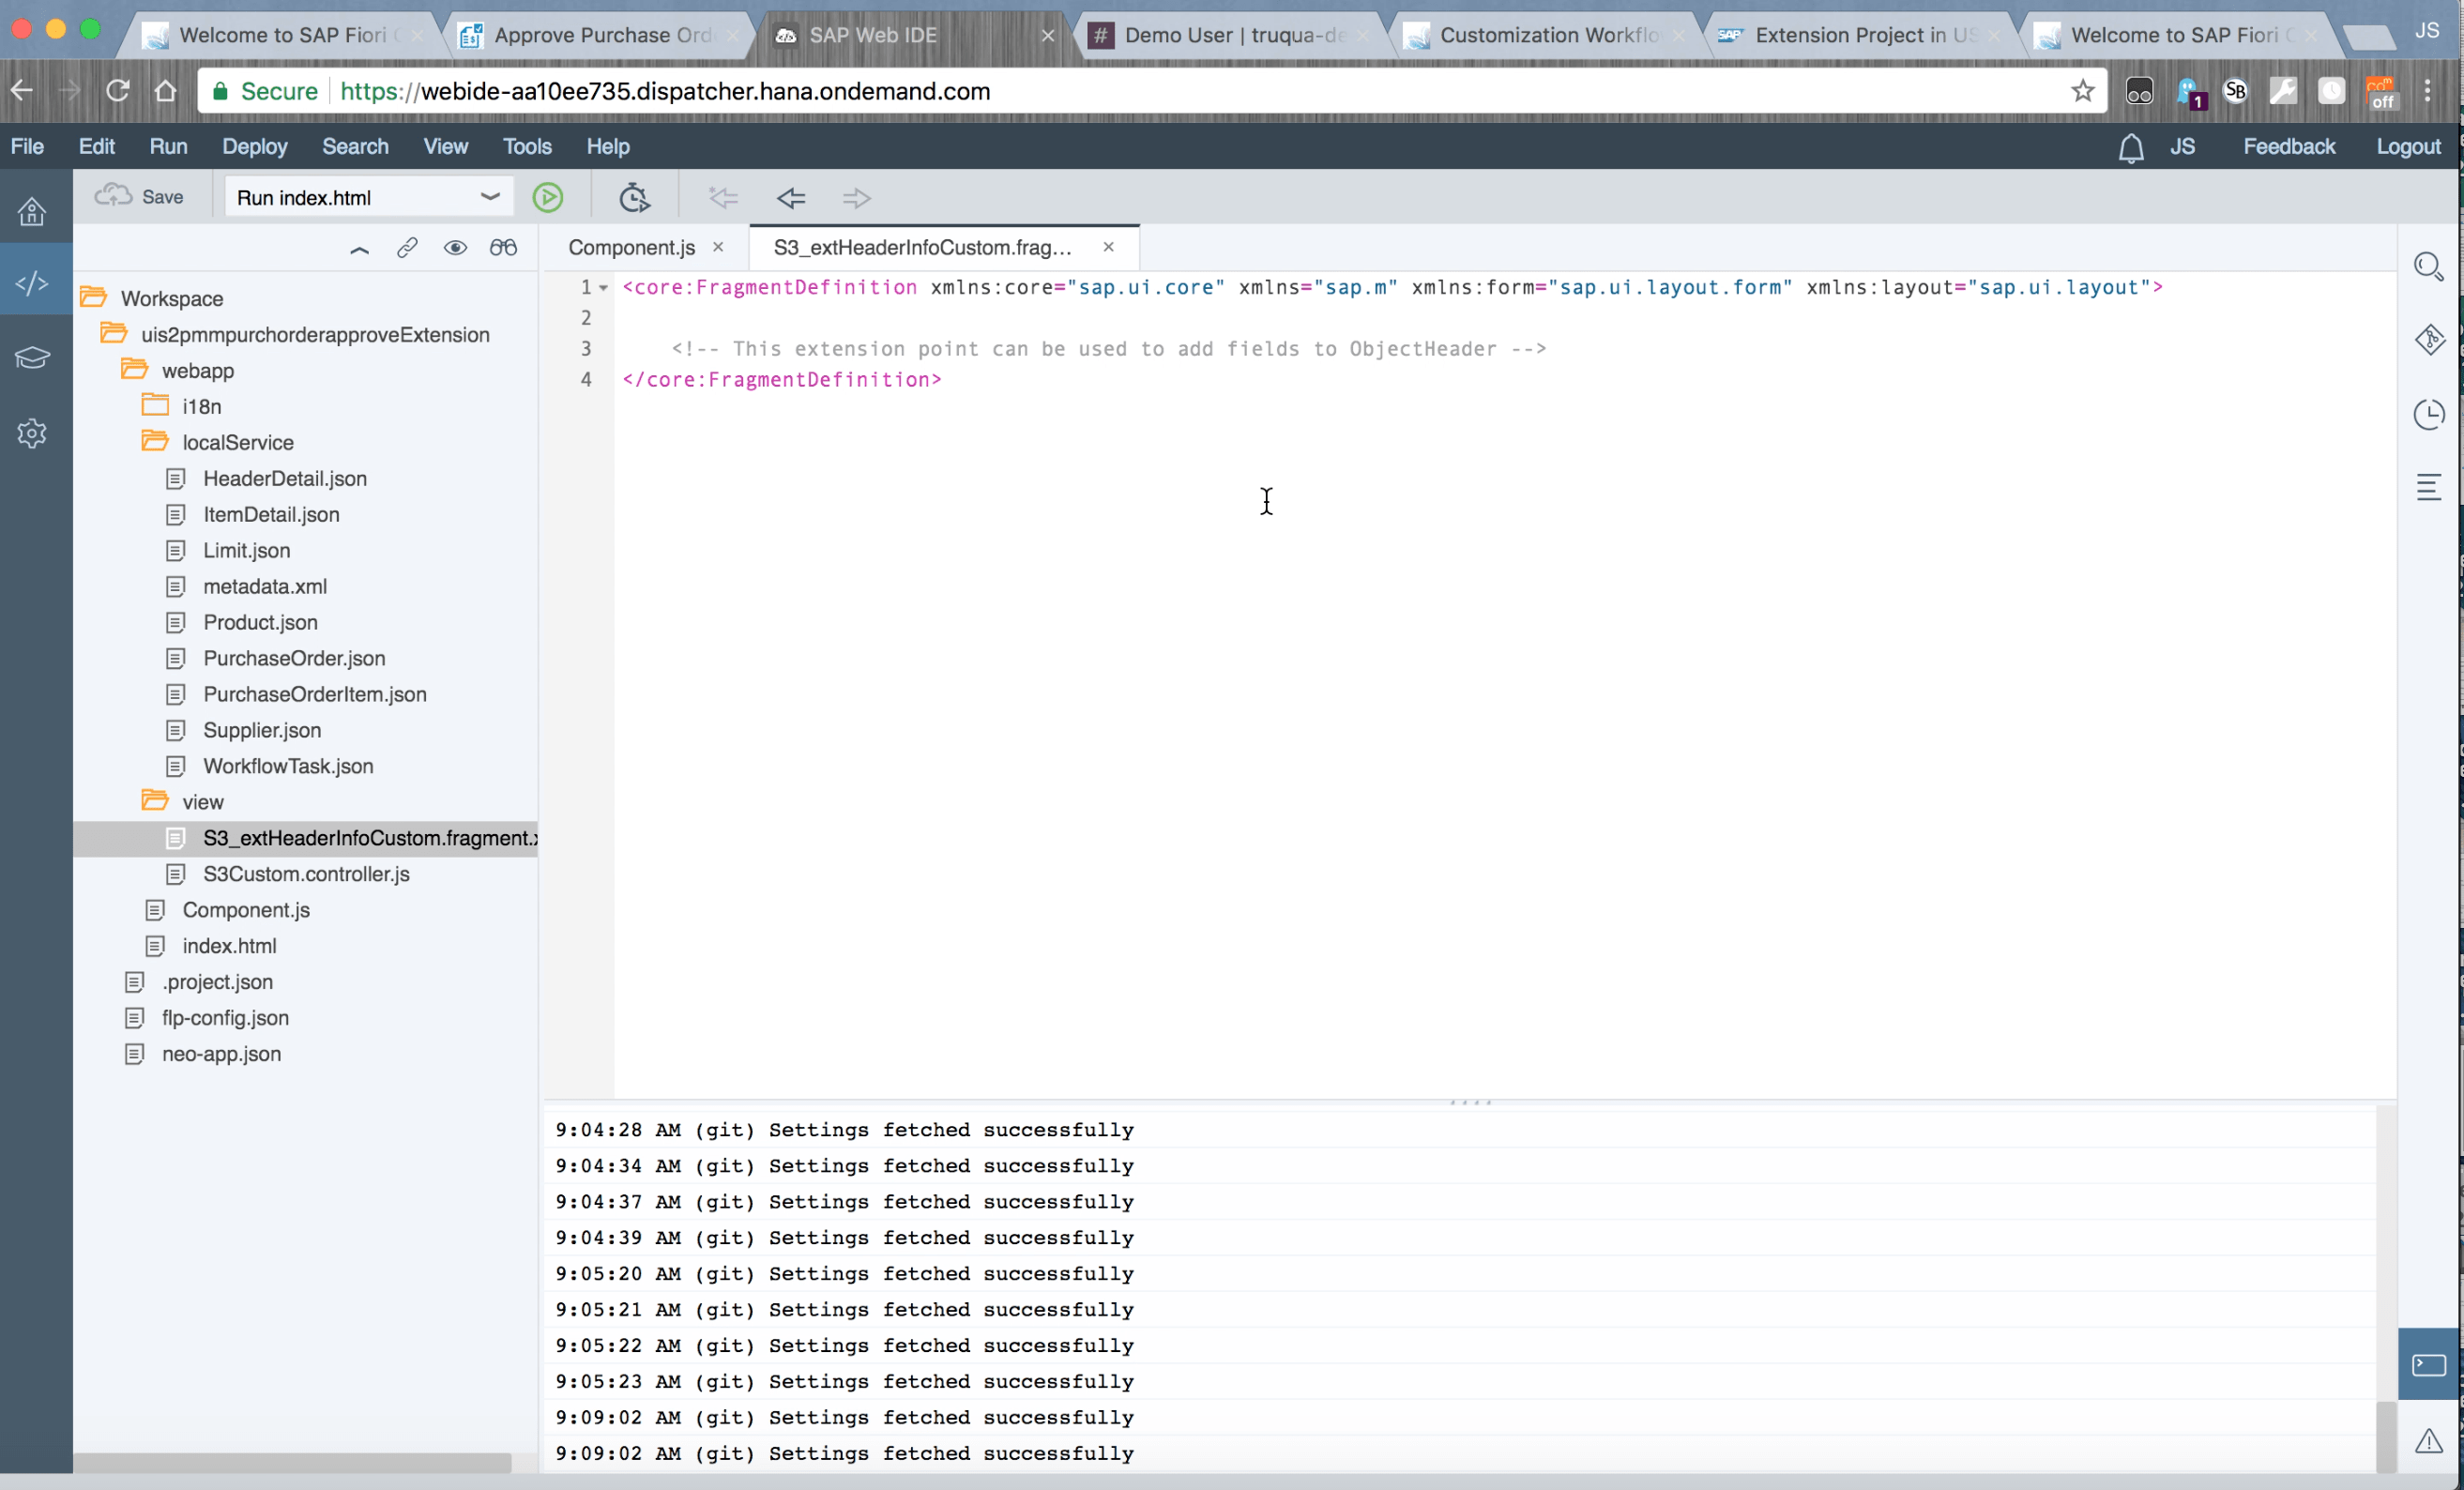
Now, there are a couple of ways to build views in UI5 and XML is one them. You can also build a view using JavaScript if more flexibility is needed. For the purposes of this exercise we’ll use XML.
A key requirement is that we do not want to custom code our application. We want to see the data that we’re pulling in, so to do that let’s go ahead and change this to the Layout view.
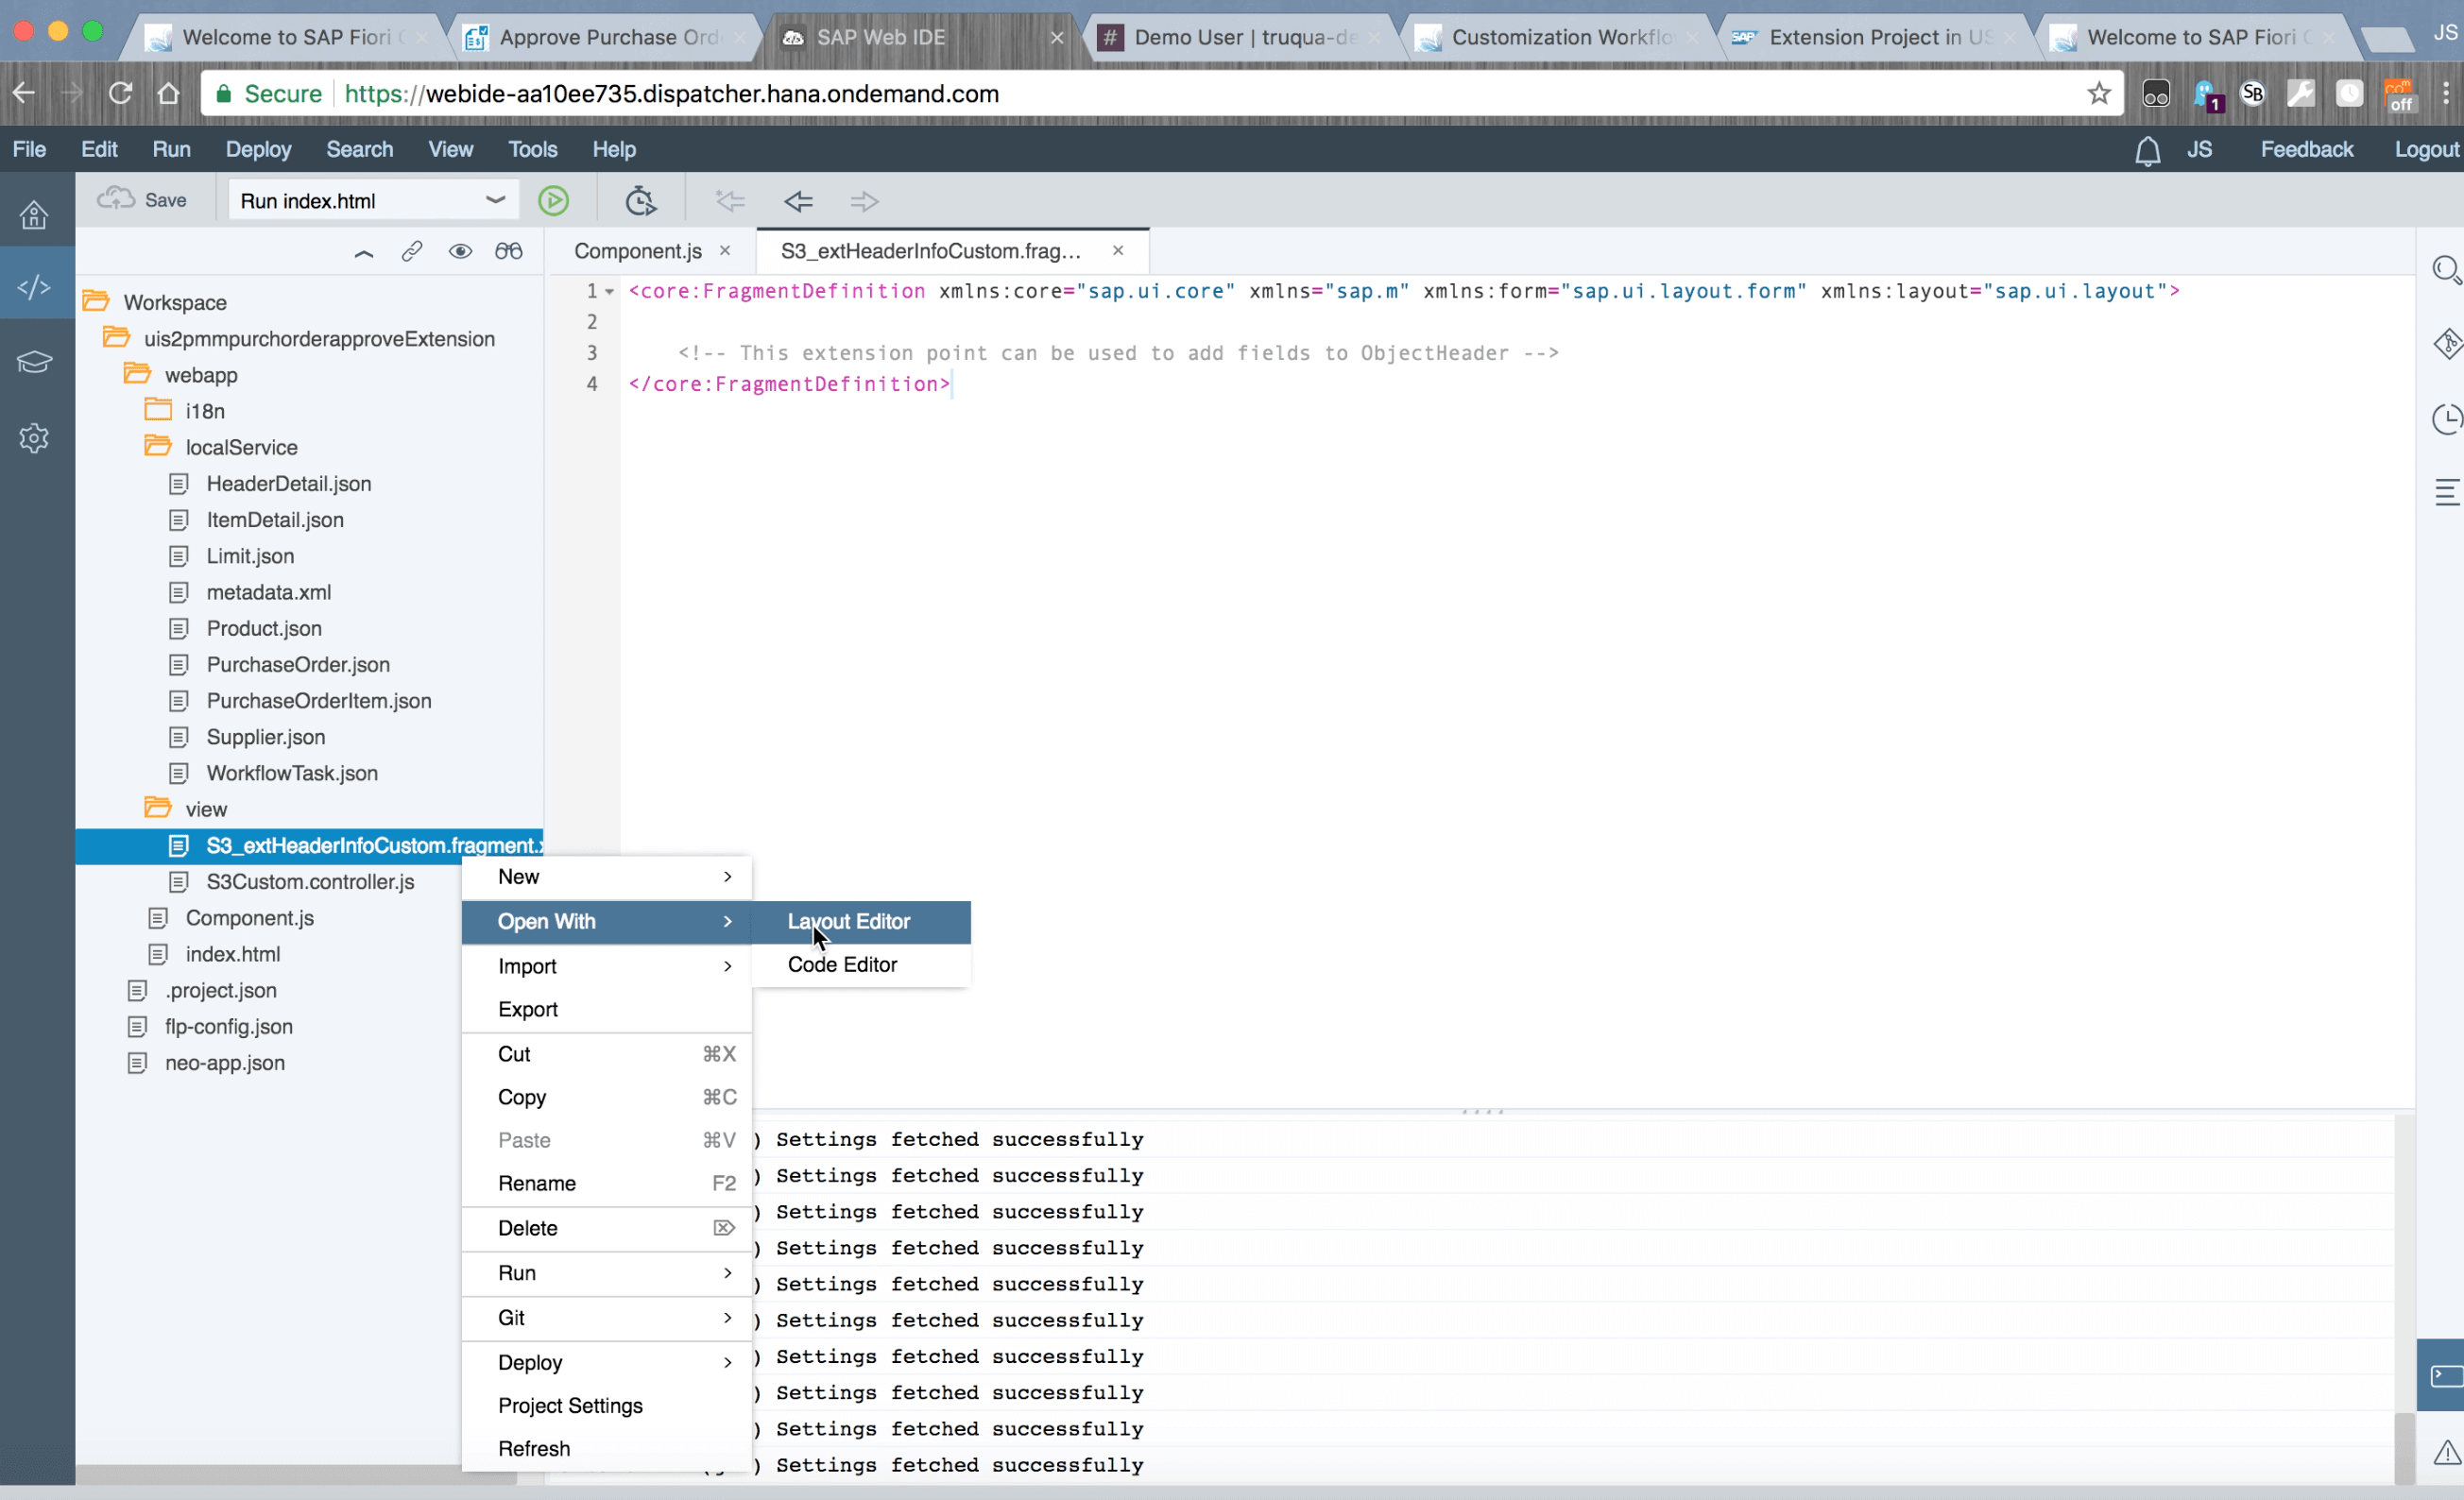
Once in the Layout Editor, we can see that the XML view is completely empty.
We are going to add an object attribute. We select our dataset (these are all the various datasets that are coming into this application). In this case, we want the headers added, so here we’ll just drop in an object attribute.
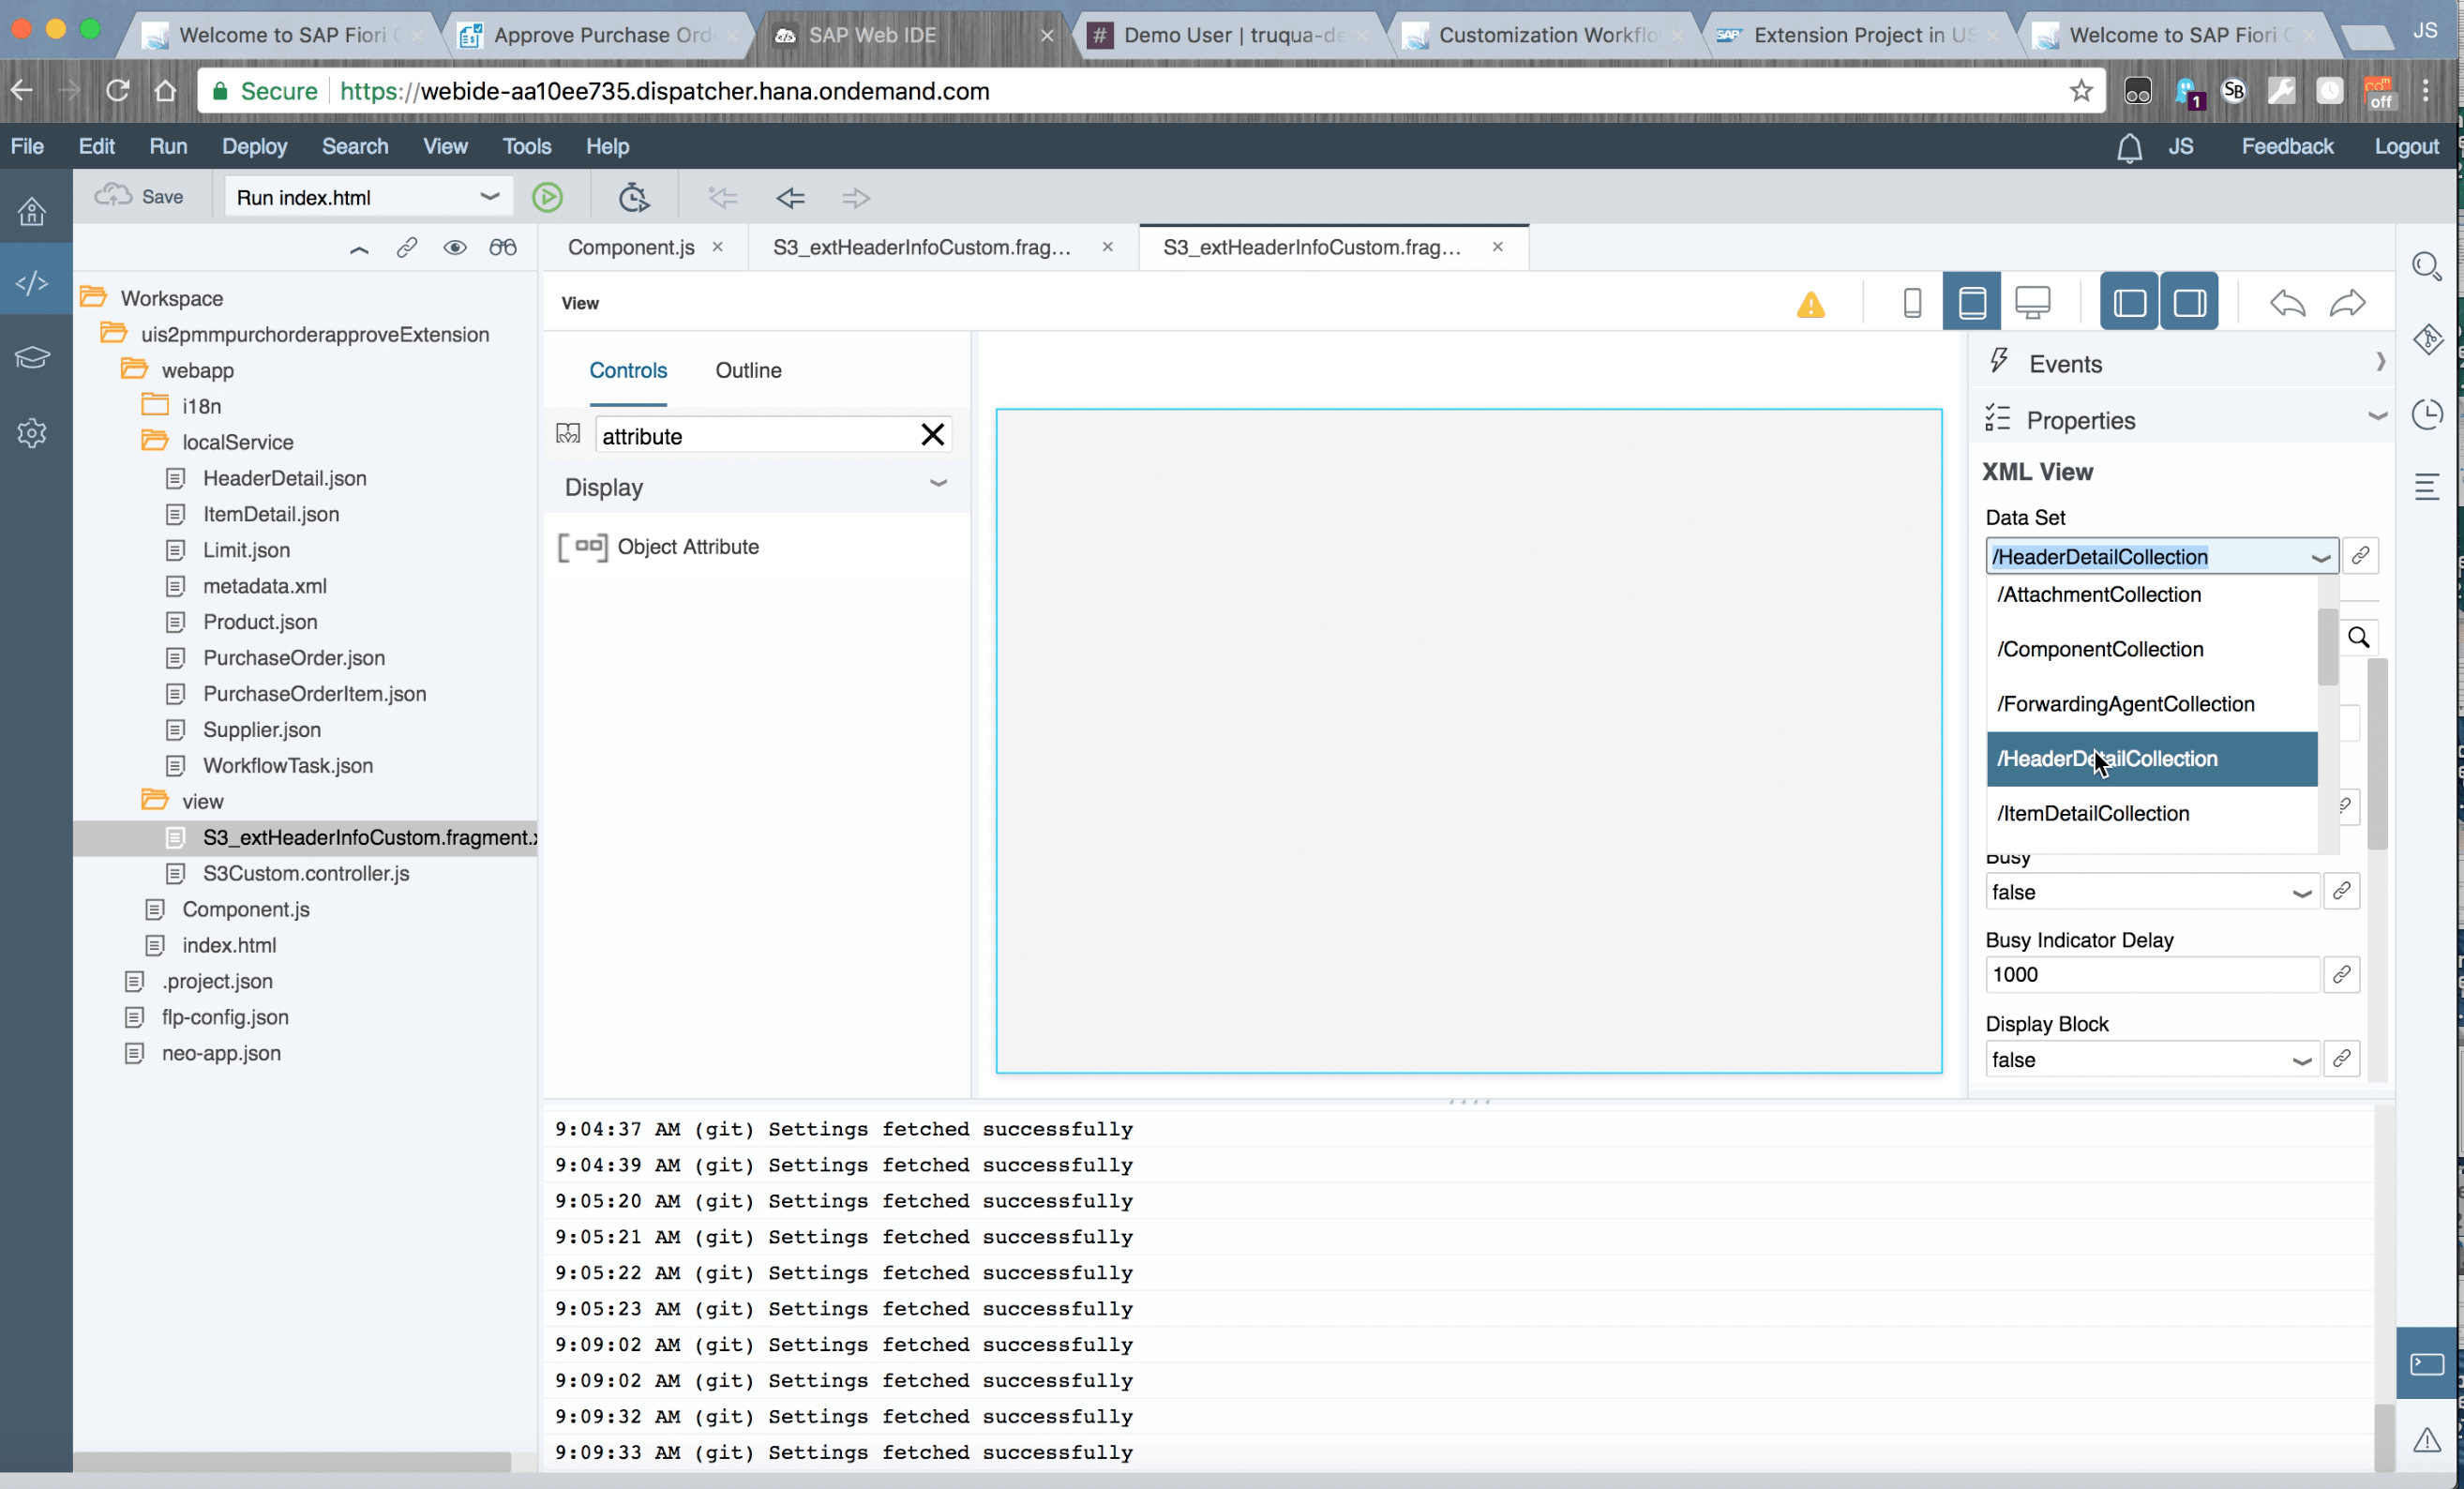
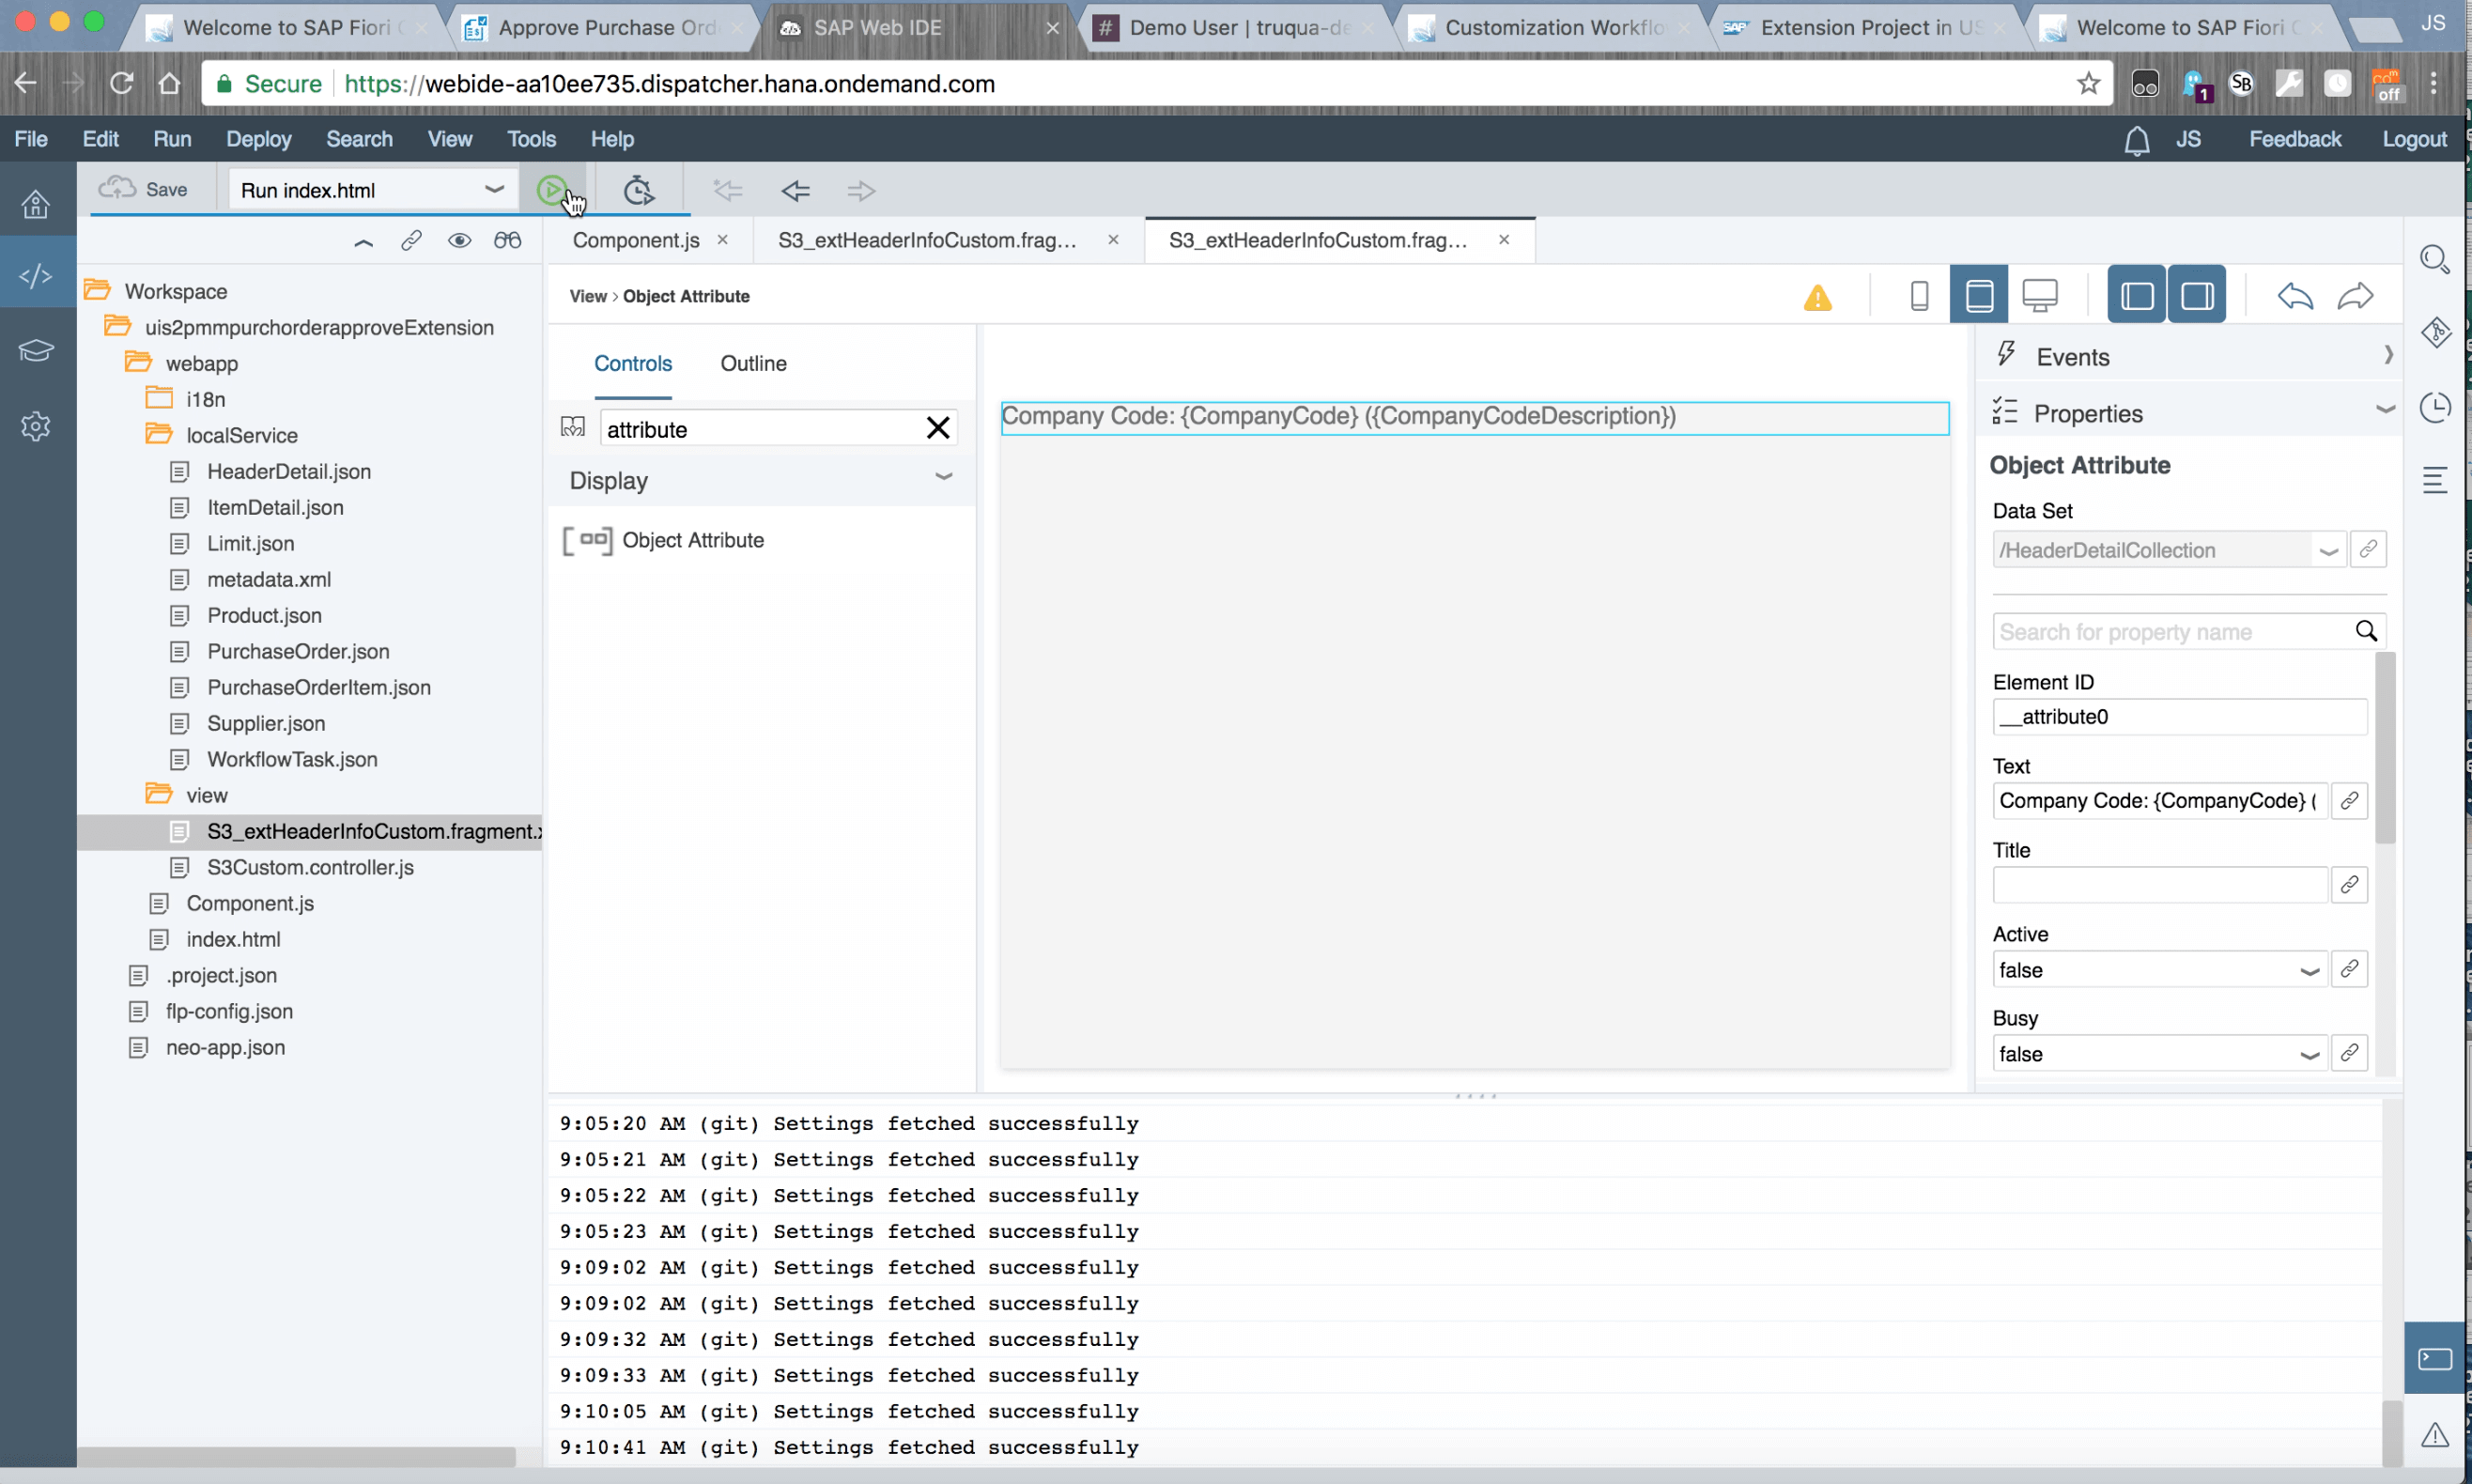
So now let’s say we want to show the company code. We can scroll down through our options and we can see the data type. Now we can just go ahead and double click “CompanyCode Description” to add it to the attribute.

Next, we will go ahead and run it.
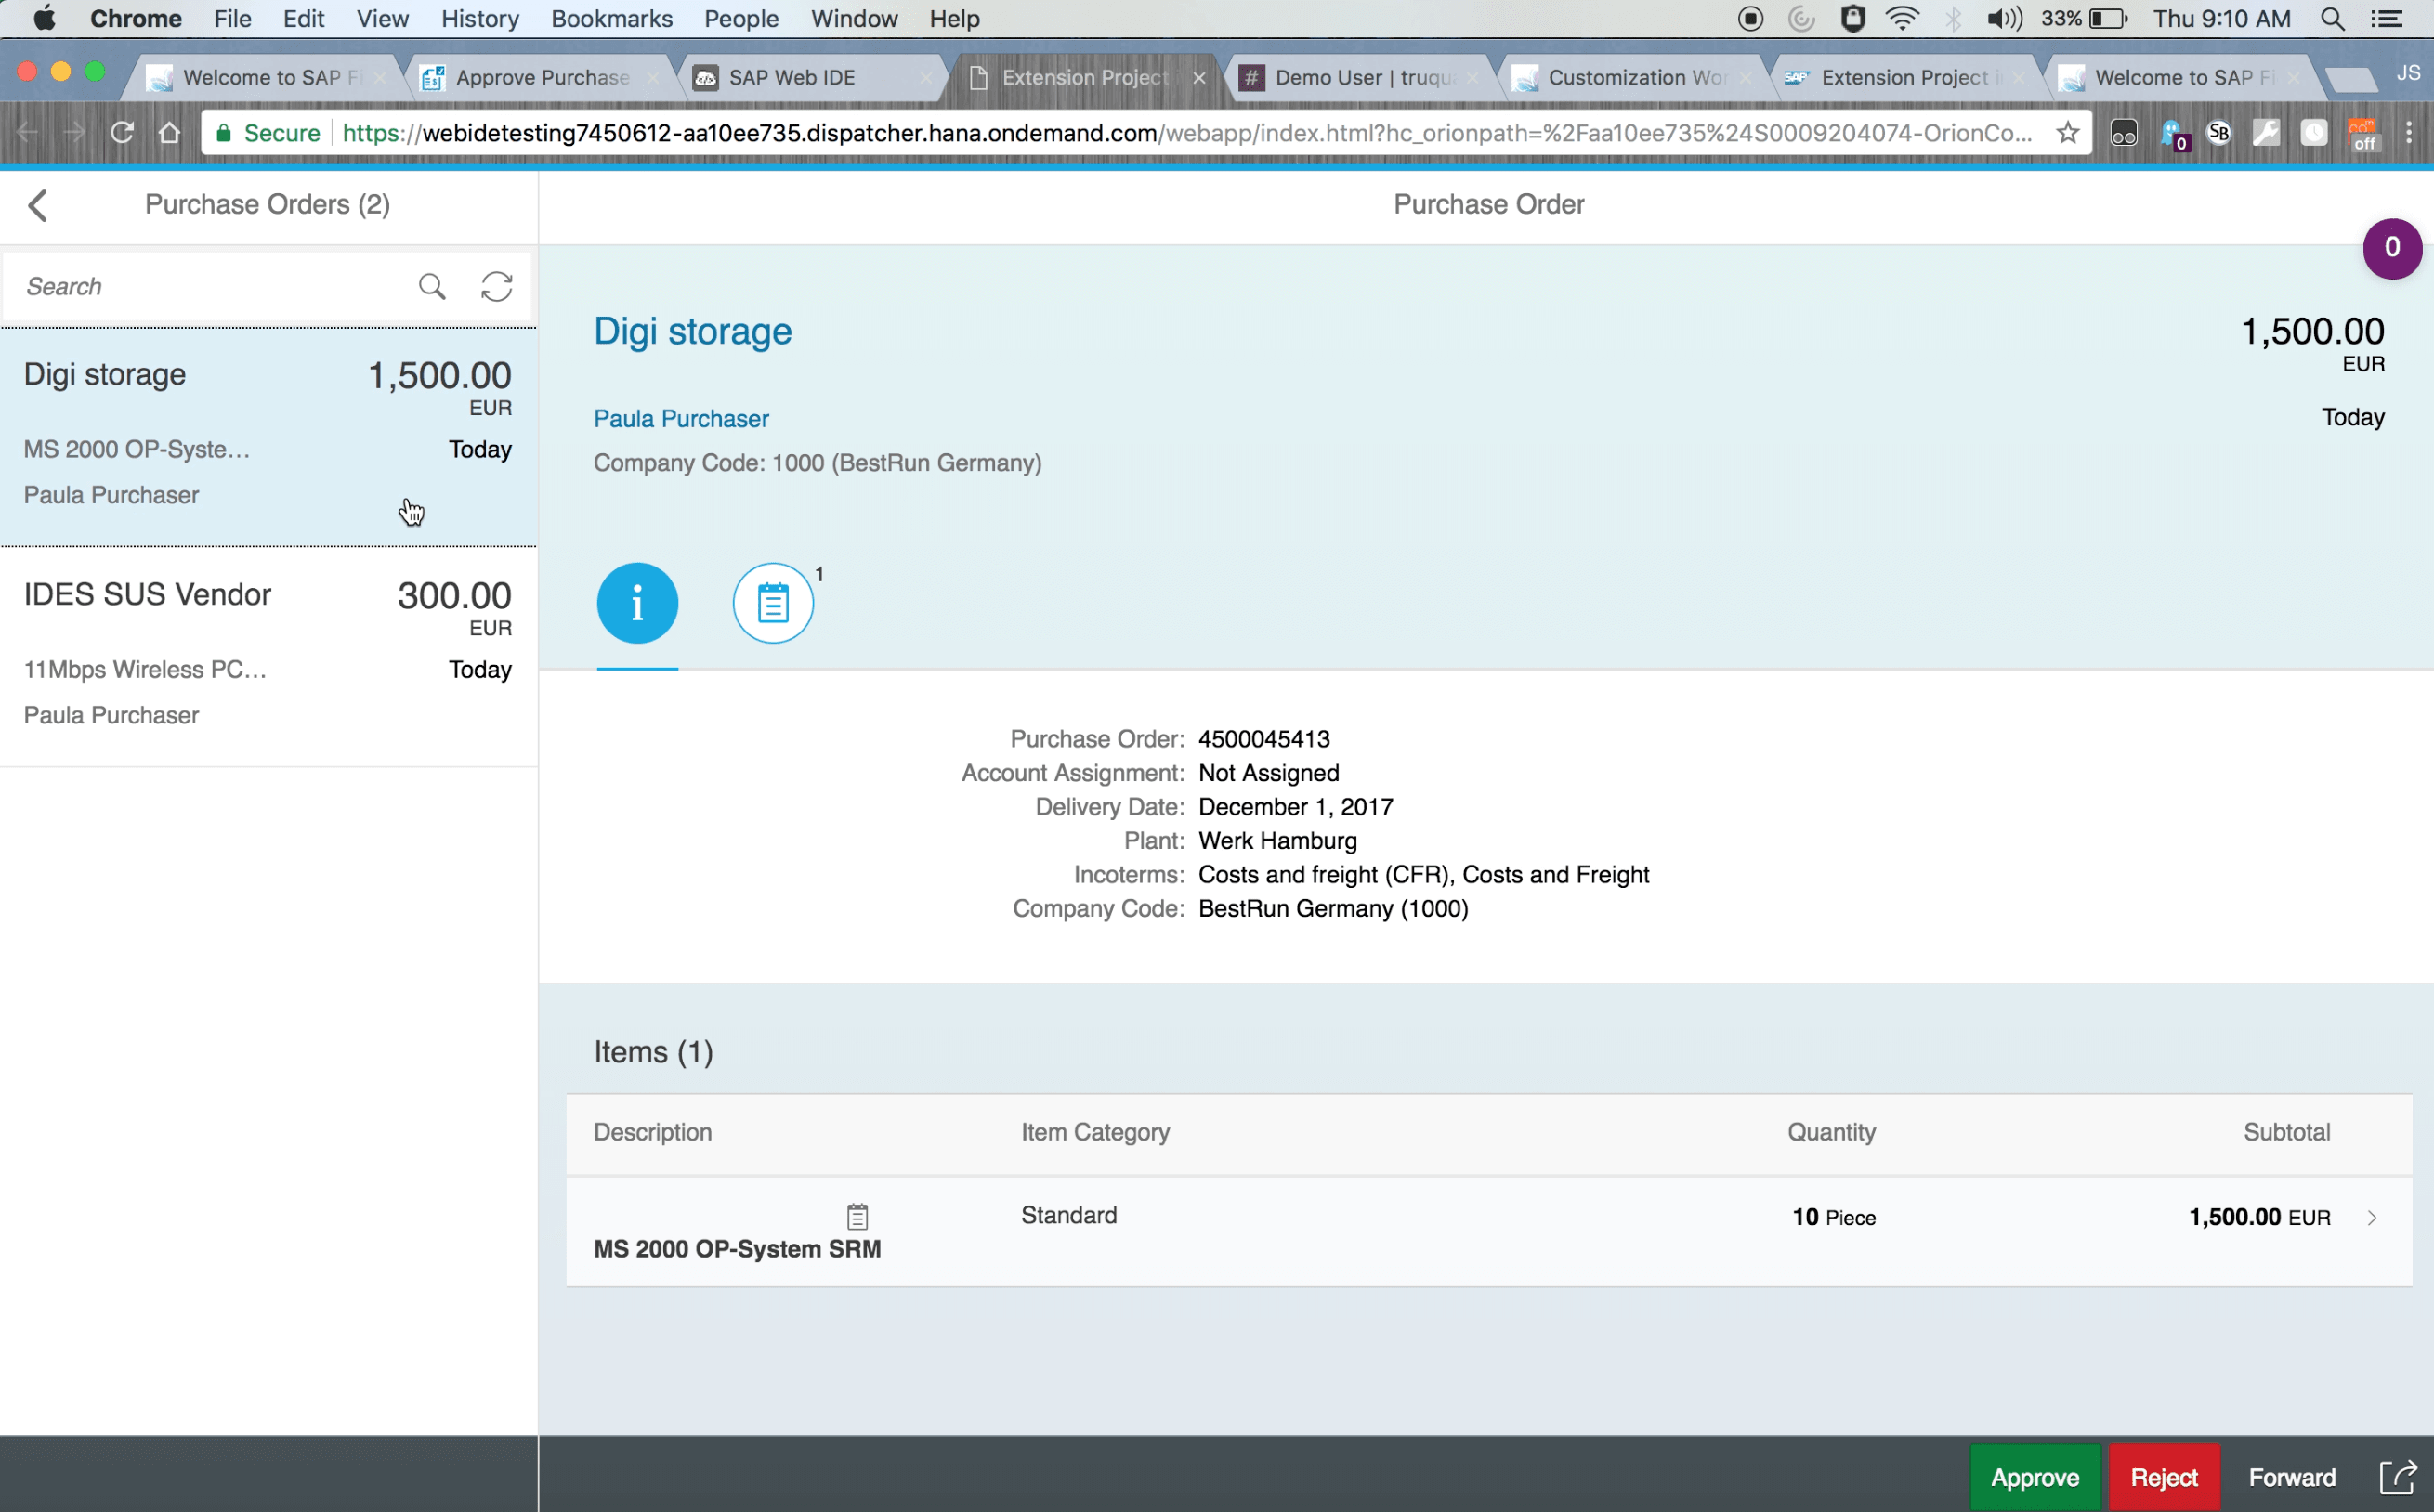
Once we’ve run our application, we can see our data and our company code information.
We can now deploy this application either to the cloud or on-premise.
What we’ve just illustrated is the easier part of extensions. As mentioned there are two different kinds of extensions we are going to look at, extending the views (which we just did) and extending the controller, which is the actual business logic, so the logic that powers your application.
Here we will walk through the process for extending the controller. What you’re seeing in the below is a screenshot of an overload of various functions that are being called.
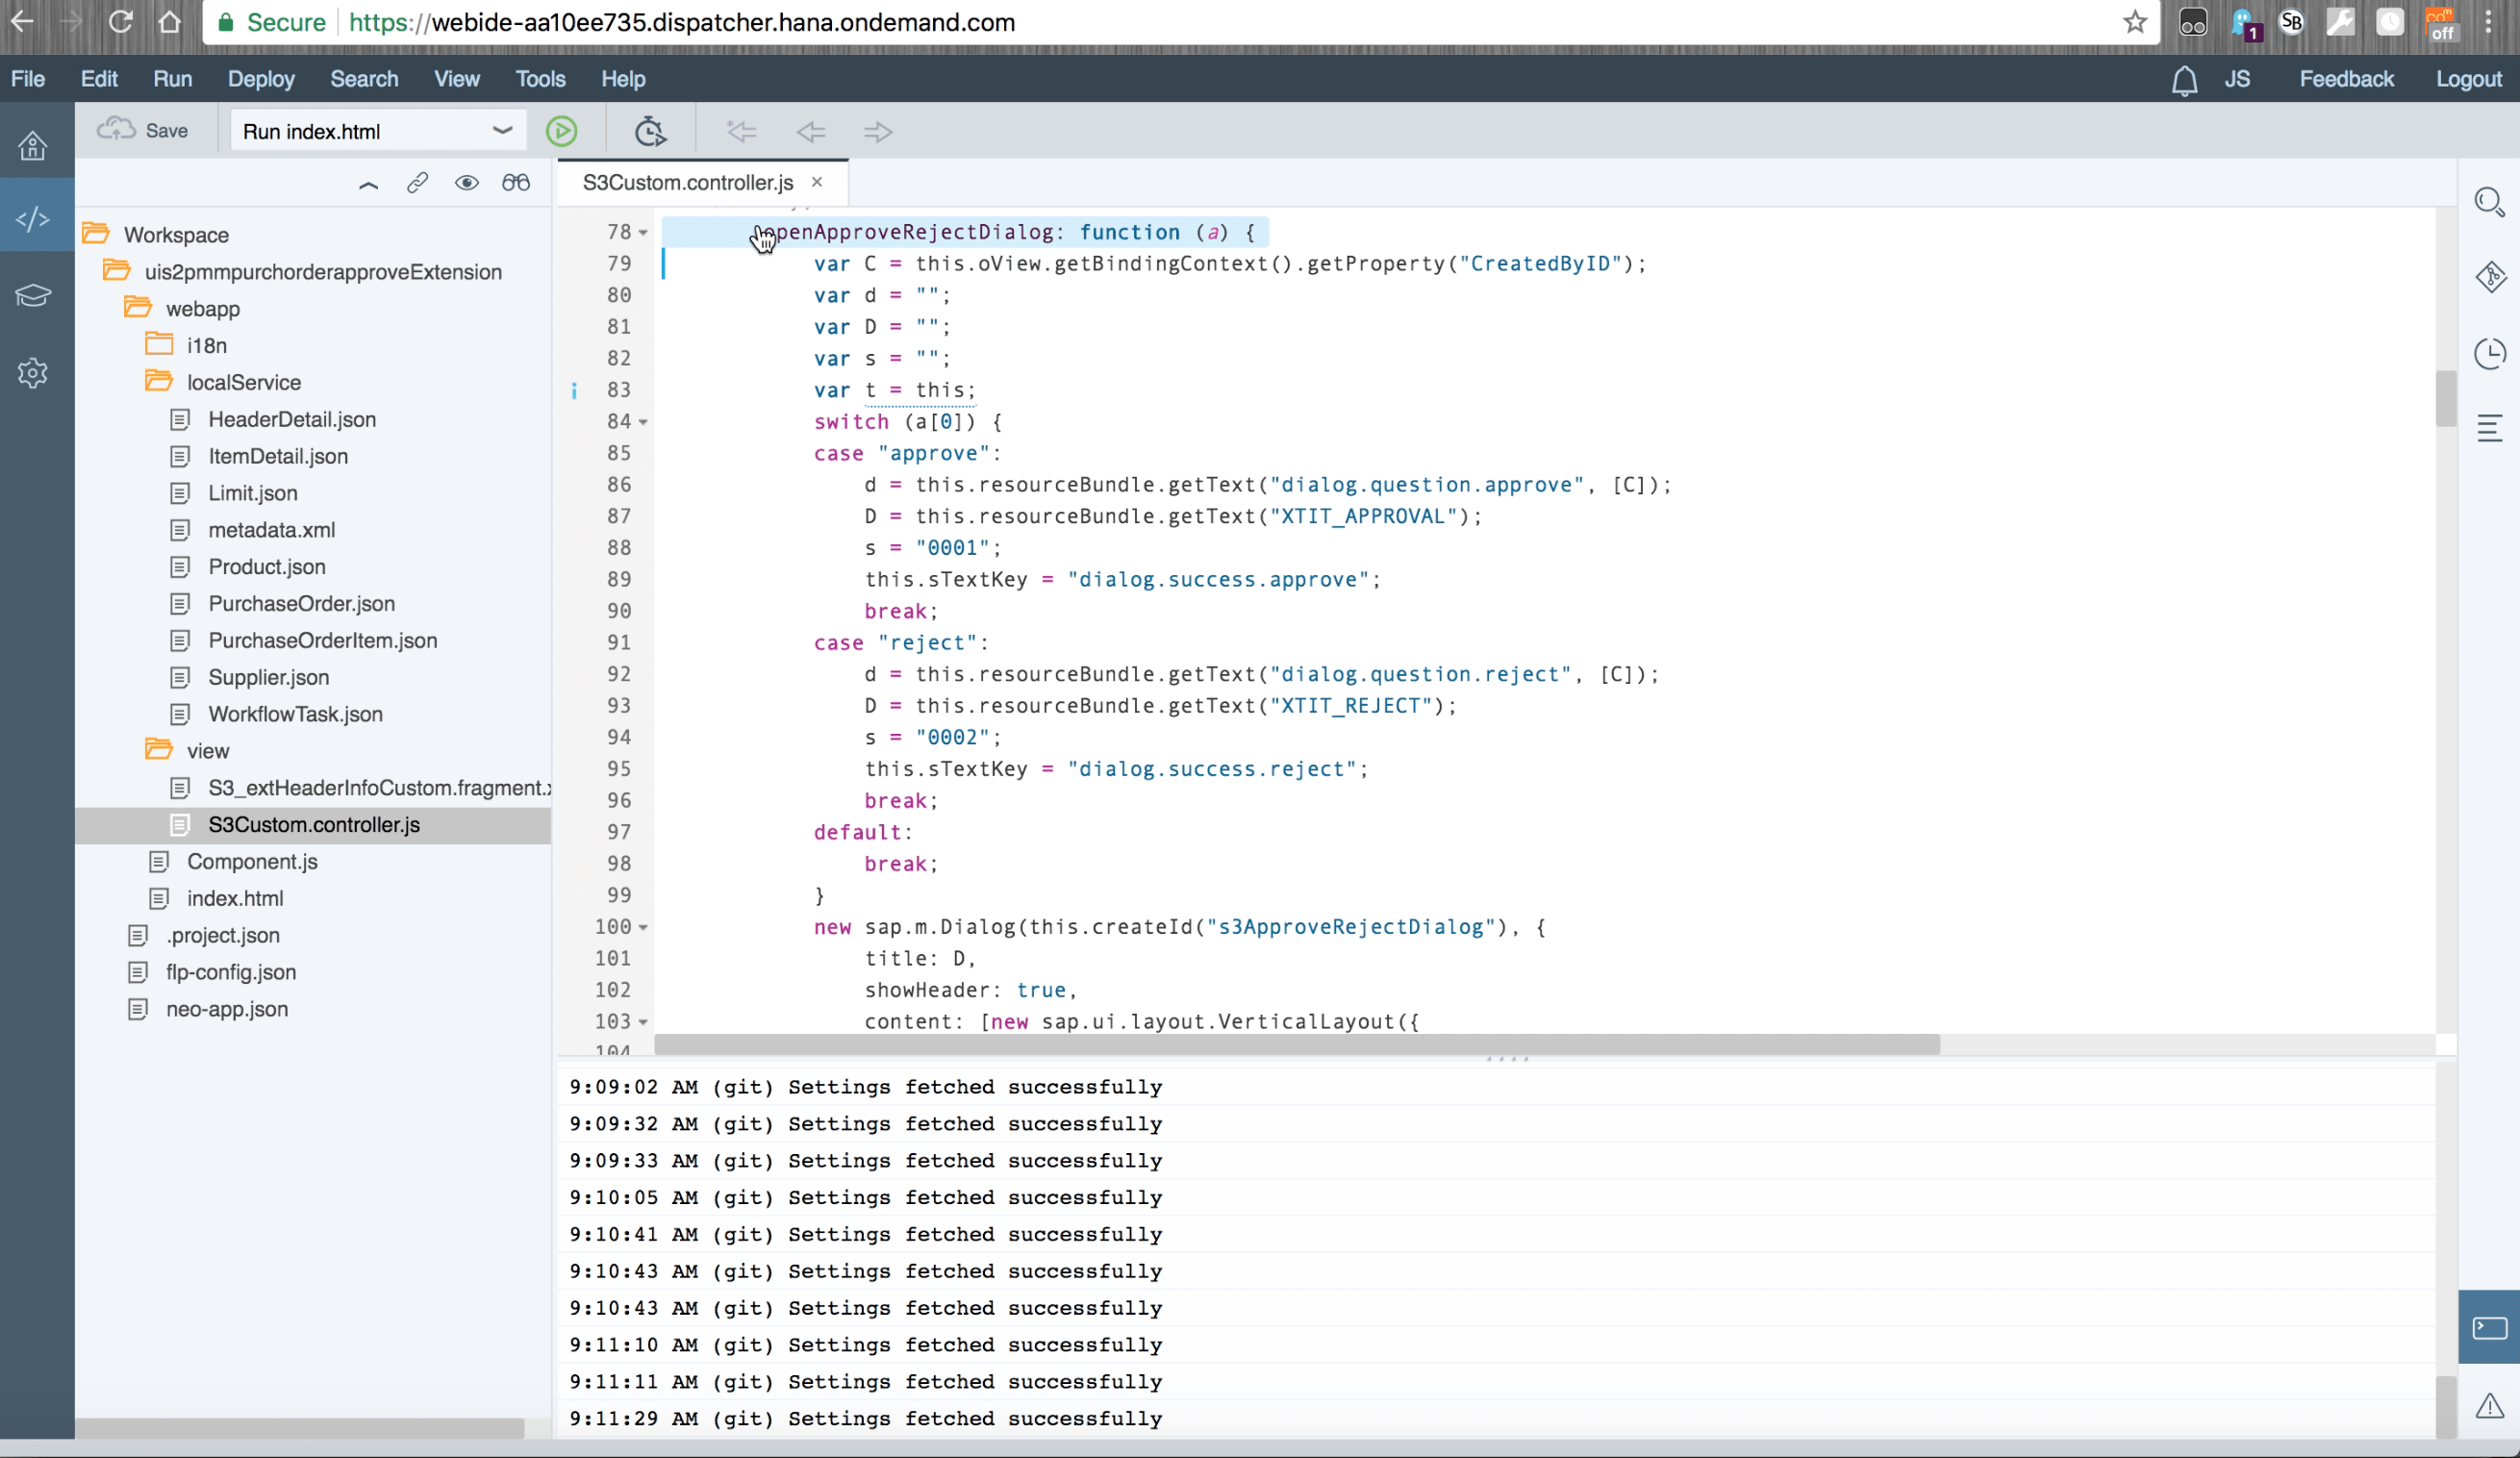
What I’m looking for are real-time notifications of my approvals and rejections. For example, if I’m the person waiting to hear about the status of purchase order, I want to know right away, without having to even check my email.
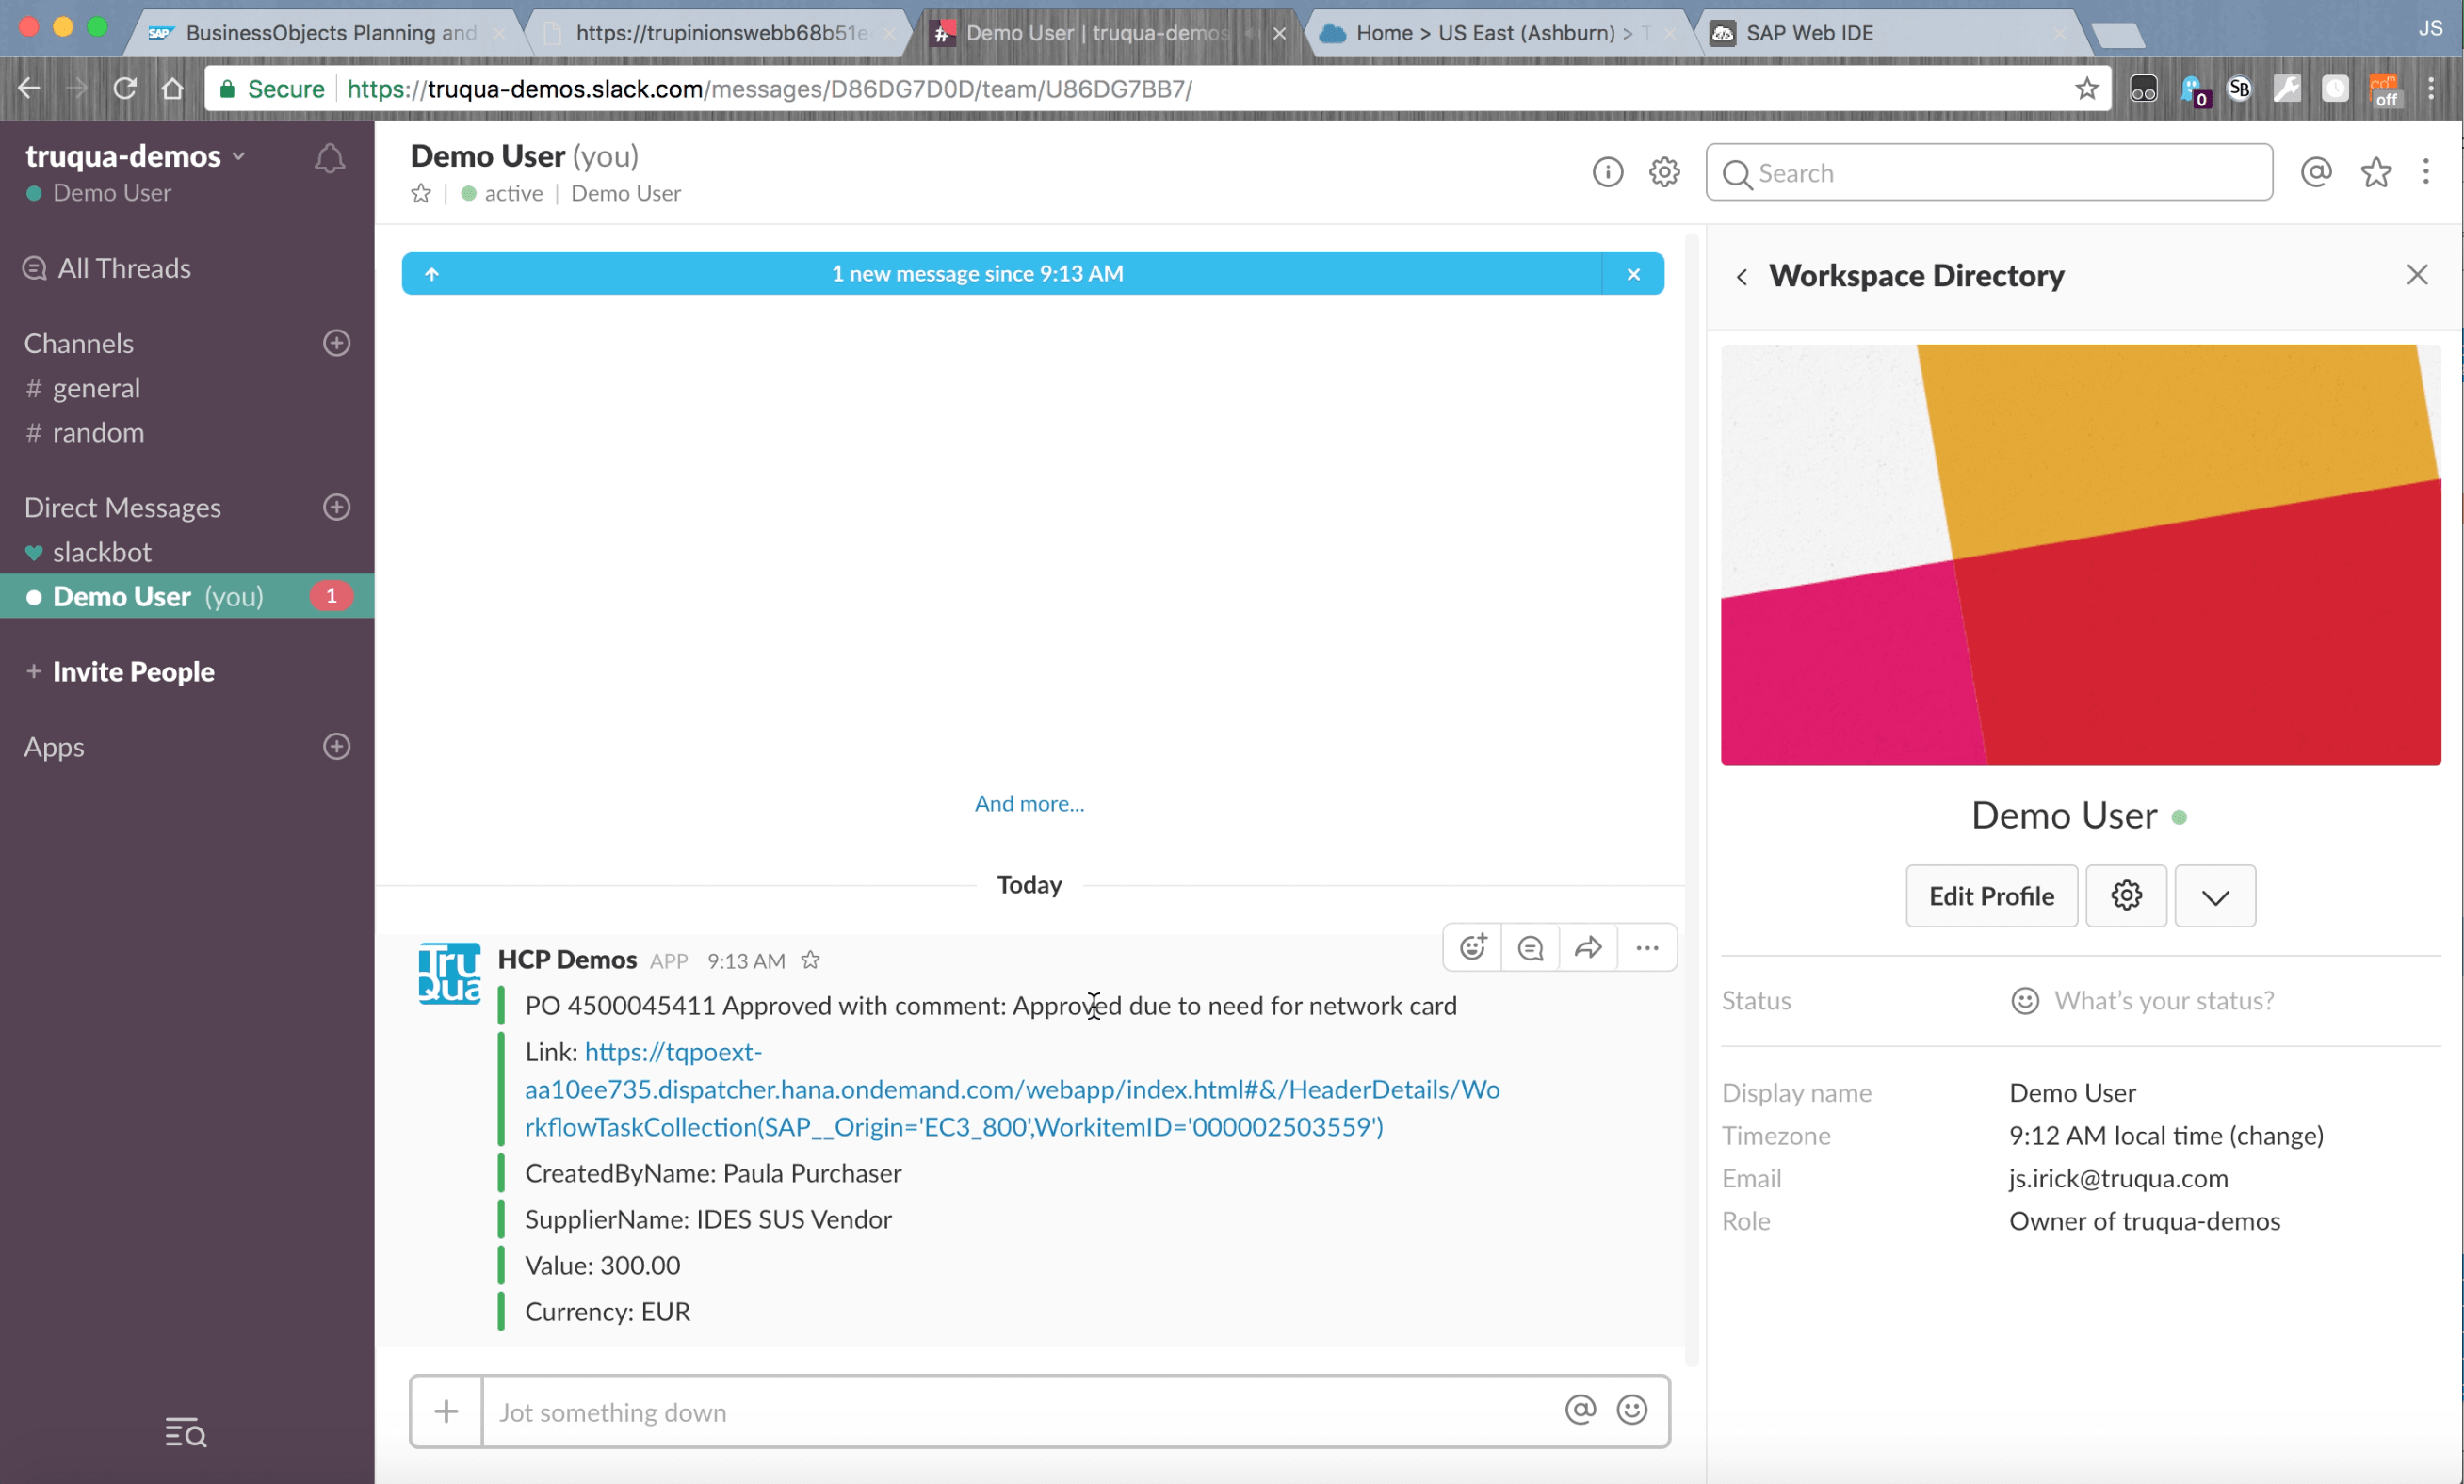
There are a number of ways that we can do this but many of our clients are now using the chat client Slack, so we’re going to set up our system so that the person waiting to hear about the status of the PO receives a Slack Message.
The key parts you’ll want to take note of, for example, is just how easy it is to pull out the important business properties of the data you’re working with, and you can make a very simple post with that data.
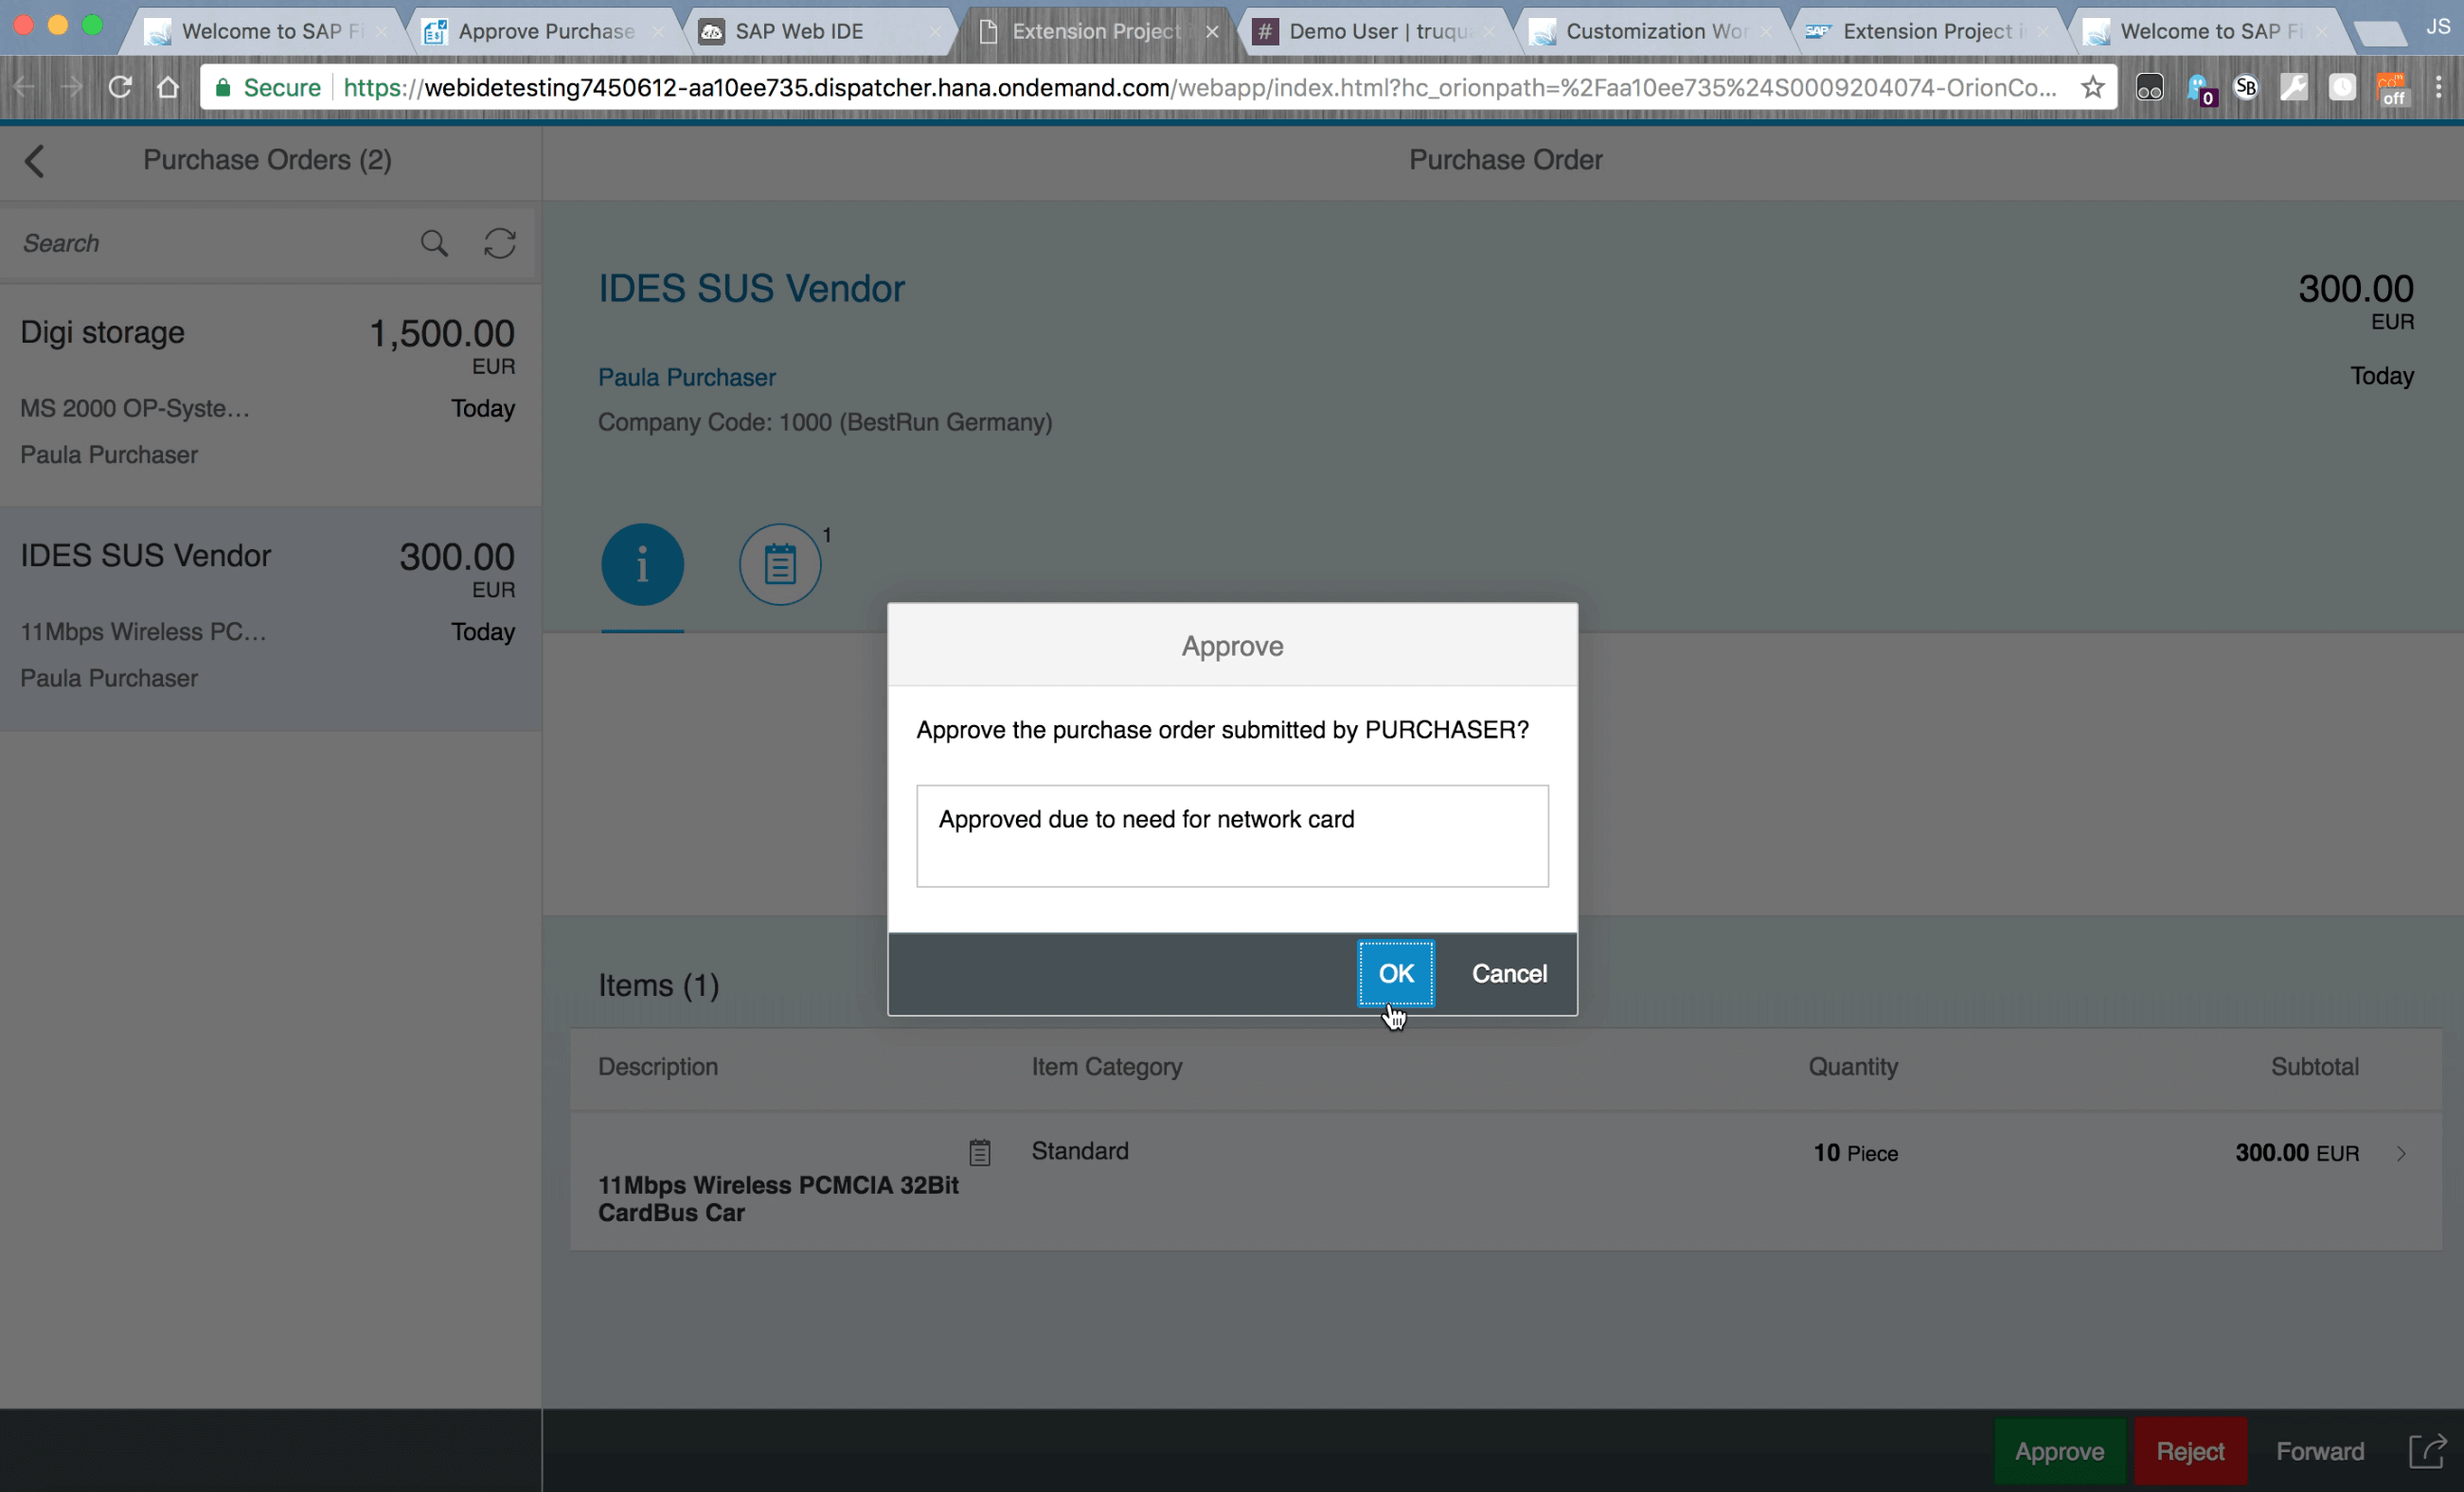
Here we are looking at approval or rejection of the purchase order. First, we’re going to make the following changes:
- Change our text
- Change our color
- Add a link so the original purchase order can be accessed
Then we’re going to go ahead and approve and this message will be sent to Slack.
And as we can see our notification in Slack has arrived, so we can go ahead and approve this purchase order.
For more information on TruQua Enterprises, visit us online or follow us on Twitter at @TruQuaE.